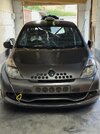
GW 200 CUP (clubsport->racecar->v2)

What a rollercoaster. Was looking for some project inspiration and started reading Tuesday. Absolutely fantastic work throughout and I take my hat off to you for just getting on with it after that shunt. Can’t wait to see this on track!!
Cheers, hopefully at the bottom right now, was close to setting fire to it tonight when I went to turn it over and found the starter solenoid has failed..

IMG_8761.jpeg
 
So after I had calmed down I purchased a new starter from RPD, no idea why or how the solenoid has failed as it was working before I removed it.

Starter fitted (bitch of a job) and coolant topped up, bled as well as I could without running. 20L of VPower added to the tank, flushed a litre through to make sure it was all clean, no issues.

Millers competition running in oil added, plugs removed and I was ready to finally see if I had oil pressure. It felt like a lifetime but it was probably about 15 seconds before I got around 2.5 bar at the filter.

Double checked fluid levels, torqued down plugs, fuel line and crank sensor on and ready for the start..

Started instantly! Ran for about 10 minutes between 2-2.5K to get the cams bedded in, I will probably do another 10 but I need a helper so I can double check for leaks etc. However I can’t see any issues and oil pressure looks good, it won’t idle (I didn’t really give it a chance) which is probably to be expected with the cams/manifold.

IMG_8776.jpg

IMG_8777.jpeg

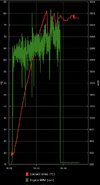
Time to get booked in for the dyno…

For anyone in the same position this video is very good.

 
Last edited:
So after I had calmed down I purchased a new starter from RPD, no idea why or how the solenoid has failed as it was working before I removed it.

Starter fitted (bitch of a job) and coolant topped up, bled as well as I could without running. 20L of VPower added to the tank, flushed a litre through to make sure it was all clean, no issues.

Millers competition running in oil added, plugs removed and I was ready to finally see if I had oil pressure. It felt like a lifetime but it was probably about 15 seconds before I got around 2.5 bar at the filter.

Double checked fluid levels, torqued down plugs, fuel line and crank sensor on and ready for the start..

Started instantly! Ran for about 10 minutes between 2-2.5K to get the cams bedded in, I will probably do another 10 but I need a helper so I can double check for leaks etc. However I can’t see any issues and oil pressure looks good, it won’t idle (I didn’t really give it a chance) which is probably to be expected with the cams/manifold.

View attachment 155274

View attachment 155275

Time to get booked in for the dyno…

For anyone in the same position this video is very good.
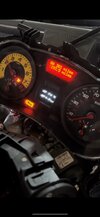
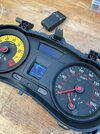
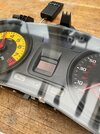
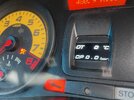
just out of interest how did you get the oil temp and pressure displayed in the middle of the clocks like that it looks really good mate
 
  • Like
Reactions: nlr94 and Sean197
just out of interest how did you get the oil temp and pressure displayed in the middle of the clocks like that it looks really good mate

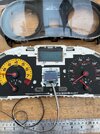
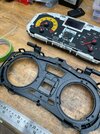
Cheers, this got lost as I was working on it the weekend before the crash.

IMG_6816.jpeg

IMG_6832.jpeg

IMG_6831.jpeg

IMG_6836.jpeg

IMG_6839.jpeg

Basically its a zadatech screen retrofitted in, took a bit of cutting and some thin sheets of CF to smarten it up but fits well.

IMG_6813.jpeg


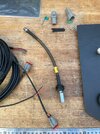
I then have the temp / pressure sensors on a sandwich plate with the pressure off a pig tale to prevent vibrations.

 
You would be loosing the tyre pressure warning light though no? I dont know if that small screen has any other warning lights other than the doors,
 
You would be loosing the tyre pressure warning light though no? I dont know if that small screen has any other warning lights other than the doors,
I don’t think the cup chassis has that option? Before I removed I did find a manual which listed all of the lights but I can’t find it now.
 
  • Like
Reactions: Dowling93
TBH I've never seen a 197/200 with TMPS. Actually that would be a nice usage for that middle screen if you could engineer a third-party on the fly TPMS to give live data
 
Cheers, this got lost as I was working on it the weekend before the crash.

View attachment 155276

View attachment 155277

View attachment 155278

View attachment 155279

View attachment 155280

Basically its a zadatech screen retrofitted in, took a bit of cutting and some thin sheets of CF to smarten it up but fits well.

View attachment 155281


I then have the temp / pressure sensors on a sandwich plate with the pressure off a pig tale to prevent vibrations.

Thank you for that i have just been looking at there website and found the oled screen that you can have 4 gauges on so might need to have a measure up and see if we could make one fit the the place of the original clock up on the dash

how did you mount yours the the bit of carbon ?
 
Thank you for that i have just been looking at there website and found the oled screen that you can have 4 gauges on so might need to have a measure up and see if we could make one fit the the place of the original clock up on the dash

how did you mount yours the the bit of carbon ?

Yeah not sure if 4 would fit, its literally strips of CF painted black and lots of araldite but tbh any thin bit of plastic just to hide the top and bottom would work.
 
  • Like
Reactions: Jakkehoop
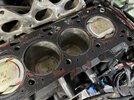
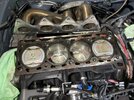
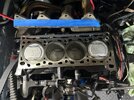
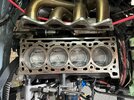
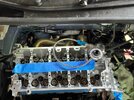
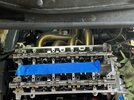
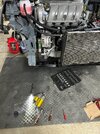
So after things going so well and dyno booked I found a leak, not massive but coolant drips from the head gasket. Exchanged a few messages with Alex and by all accounts a HG leak on an F4R is very rare which pointed to something being wrong. I went through what I had done and looked at the pictures I had taken when I remembered that I had used the new HG when checking the piston to valve, only torqued to 20Nm and I remember checking on the internet if this was ok. It looks like it wasn’t. I had also spent so long on working on the head I believe I had become a bit complacent on the surface finish.

IMG_8792.jpeg

Alex mentioned it might settle after some heat cycles, I slept on it and decided it wasn’t worth the risk. 3 hours later including a drive back to get my timing tools I had her stripped back to the block. I made the right decision as there was evidence of oil on the pistons and valves. Left her for a week as I needed a break.

IMG_8799.jpeg

IMG_8802.jpeg

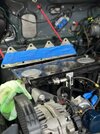
Last night spent a few hours cleaning things back up with brake cleaner, the block surface is now as clean as I can get it and the head is currently being double checked and cleaned again by AMS. Luckily I didn’t need to remove the valves…

IMG_8821.jpeg

IMG_8825.jpeg

In this picture you can see the oil temp and pressure setup, basically a copy of the R3. New HG purchased and time to try again, it seems no amount of time and patience can overcome experience, lesson learnt.

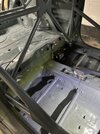
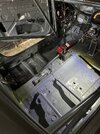
Painted the metal work GDF did, very happy with how it all turned out, seating position is as close to the tunnel as possible which is a bonus.

IMG_8834.jpeg

IMG_8836.jpeg

IMG_8837.jpeg

Running out of things to waste time on now..
 
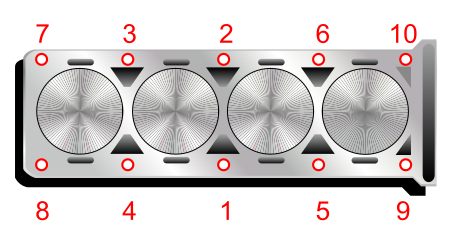
what do you mean headgasket tighten to 20nm? I dont think thats possible.these are the torque setting if that helps.

11446.png


Cylinder head
Renew the bolts
Renew the gasket
Stage 1
30 (Nm)​
Stage 2
155 - 205 (°)​
 
Yeah, 20Nm was what I used when measuring the piston to valve so that I could get an accurate measurement with the gasket compressed before she then came apart to remove the checking springs and torqued correctly.
 
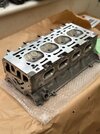
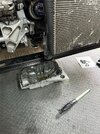
Picked up the head from AMS, they had taken less than 3 thou off to just clean it up, spent a while deburring and making sure it was as clean as possible.

IMG_8853.jpeg

New head gasket and bolts, used elring this time as the quality from Victor Reitz is questionable, the elring gasket is also slightly thicker at 0.7mm compressed to overcome the two skims. Put it all back together over about 5 hours, double checking everything and making sure the timing was bang on.

IMG_8868.jpeg

IMG_8873.jpeg

IMG_8882.jpeg


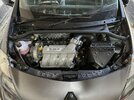
Started up and as far as I can see there are now no leaks, seems to want to now idle as well although I haven’t given it a chance whilst everything is still bedding in.

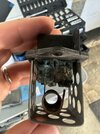
Of course the fan didn’t work as the resistor looked like this:

IMG_8893.jpeg

£15 for a replacement and it now fires up when I pull the coolant temp sensor.

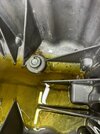
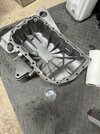
Dumped the oil and pulled the sump off and gave it a good clean, probably overkill but you can see a nice mixture of assembly lube, fastener lube and cam lube. New sump seal, filter and 5.4ltrs of fresh competition oil for the break in on the dyno.

IMG_8901.jpeg

IMG_8904.jpeg

IMG_8905.jpeg

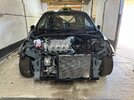
I then bolted on the frontend, dropped it on its wheels and torqued up everything to spec.

IMG_8911.jpeg

IMG_8932.jpeg

IMG_8940.jpeg

IMG_8950.jpeg

I then released that I hadn’t tested if it actually moves, it does.