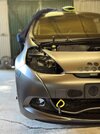
GW 200 CUP (clubsport->racecar->v2)

Ignoring the fuel tank day disaster I am still enjoying this, it’s certainly testing me and life is getting in the way but have plenty of ‘unfinished projects’
50BBB7E3-DBDB-41D1-B2AE-A55FE96AAC33.jpeg

F8C59AFA-DF65-4FF7-B5B4-7412C951FCDC.jpeg

1AB9DCB2-BE6D-4A28-9D0A-A3A5470A0B4B.jpeg

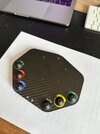
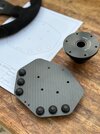
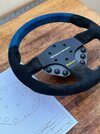
#1 steering wheel control panel, been wanting to do this for a while, designed on fusion 360 and going to do it properly with race spec components. TrackFormula for the matt CF and blink stop for the buttons / stickers. Still need to finish reverse engineering the stalk, about half way there.
BC83F094-DA0B-4C2D-AA19-38310E20DE84.jpeg

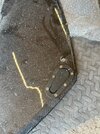
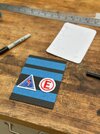
#2 centre panel, don’t trust the Renault dash anymore so moving everything closer and together near the gear stick.
A2D0B70E-672B-4C7A-8191-3D60A145DCDD.jpeg

F16E818A-7C77-4598-A4E8-DD475A59ED5F.jpeg

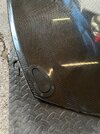
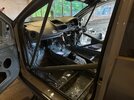
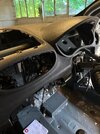
#3 dashboard, my old one fits but it’s heavy and awkward where the clocks sit, looking at potential different options for this.
85D6C98B-B803-47FC-8A6B-C89606265FDE.jpeg

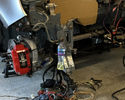
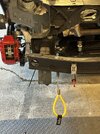
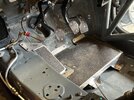
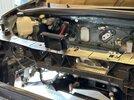
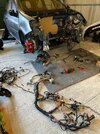
#4 loom, I have had more issues than expected with this as quite a few connectors had broken in the crash, ABS, brake, lights etc. Luckily I got a spare with the new shell but it is slightly different due to it being keyless, I am very close to just ripping it all out and building fresh..
EBC6753A-93B9-4EFE-B507-DEE12B7D8C37.jpeg

E4D62ABE-4E95-40AC-941C-952D1B3E6908.jpeg

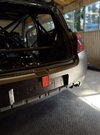
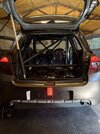
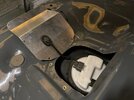
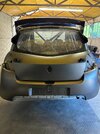
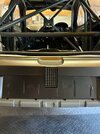
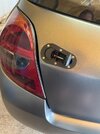
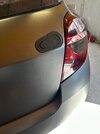
#5 rain light, isn’t wired in yet but happy with this position, I didn’t want it inside the car as I found it to be a real pain in the saxo for visibility especially when lit. Installing in the bumper also means it’s super easy to wire using the fog light.
6CA94BD0-8826-40BA-9732-5869E77E11C7.jpeg

1DC10155-BDFE-48D4-9196-DCF642847F84.jpeg

31AC3240-25F9-45A2-BFCE-C3E72B3814A1.jpeg

3B49D960-9A56-40A4-B5B1-8CBF0678E7CD.jpeg

#6 OCD, started replacing various bolts in the windows and aerocatches, black is 10x better. Also removed all the silver foil from he inside, purchased some circular stickers instead.
87CDFA37-CA30-4B36-AC44-0763439726E8.jpeg

0F22DB90-A99A-4257-A761-C21269030196.jpeg

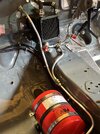
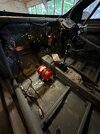
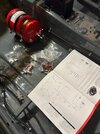
#7 fire extinguisher, this arrived the day after I crashed, finally picked it up and thought I would get it installed whilst nothing is in the way. FEV Ali system, impressed with the weight and fixtures, installed as centrally as possible but need to finish the nozzles.
1519E3A3-D971-4D35-A0F2-21A2CA40AAB7.jpeg

E4E9D1F7-8743-45D2-B756-51A18F80E853.jpeg

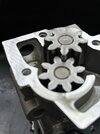
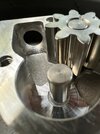
#8 pump, ported the oil pump to improve pressure at all revs, this will be interesting to see how it affects pressure / compares to those that shim the PRV.
845C3E1E-E810-4438-903B-D8E67256BF14.jpeg

628A76F2-7E31-4A4F-AFBE-107D8CB522EB.jpeg

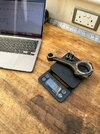
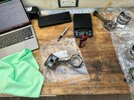
#9 Piston balancing, got each to within 1g (piston + rod) now all rebuilt and ready for rings once gapped. 5-7am seems to be the only quiet time I get for this, really enjoying the process.
B33B2F8A-0792-422B-918C-33007E378D7E.jpeg

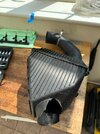
#10 Fixing and cleaning various parts which I keep finding broken.
708C615B-831C-4883-BCA0-F88AFE63BB92.jpeg

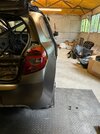
#11 Rear beam, after some moving around everything seems much straighter. I am starting to think that I may have bolted it up wrong earlier this year introducing some rear toe out on the right which likely resulted in the crash :facepalm:

#12 Engine build, started planning this out, parts should be ready from AMS next week.
C887BC94-84FE-41FC-BEC9-41F1C30DC46A.jpeg

DA3238B7-F28D-4440-9D8B-F2CB921A83D7.jpeg

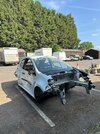
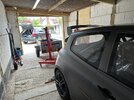
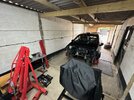
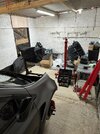
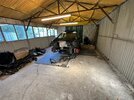
Old shell is getting collected on Tuesday and have done a big clear out in anticipation of getting chucked out at the end of next month. Found another unit which is 10mins away and no restriction on access which will be a massive help, also space for a trailer…
 
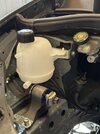
I like your washer bottle replacement.

Screenshot 2023-05-29 at 18.51.01.png

How heavy is your old shell? My old shell is still on four axle stands and has all of the parts removed from the shell, but some of the parts are just sat in the shell. It is easy to tip backwards holding the chassis legs but I cannot pick it up from the rear yet. I have seen your shell in photos moved around and was wondering how much effort it has been to move it about?
 
I like your washer bottle replacement.

View attachment 154496

How heavy is your old shell? My old shell is still on four axle stands and has all of the parts removed from the shell, but some of the parts are just sat in the shell. It is easy to tip backwards holding the chassis legs but I cannot pick it up from the rear yet. I have seen your shell in photos moved around and was wondering how much effort it has been to move it about?

Haha, that shows the green fuel rather well, after the third turn of the ignition that got installed.

No scales to weigh but it’s still pretty heavy and I can’t really lift from the front, interestingly it’s much heavier than the new shell even when the old is fully stripped. I have been using some cheap dollies to move things around which is easy with wheels but a pain when it’s resting on two pallets.
 
  • Like
Reactions: burrellbloke
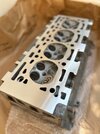
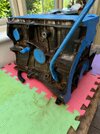
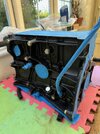
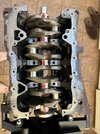
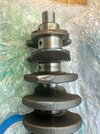
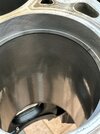
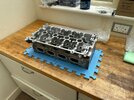
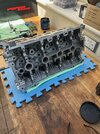
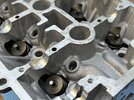
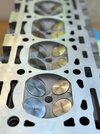
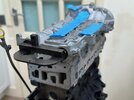
Got the block and head back from AMS last month, done a great job on the following:
  • Hone / new piston jets (galleries unblocked)
  • New guides
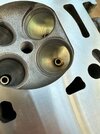
  • Seats cut
  • Valves lapped
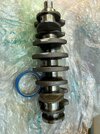
  • Crankshaft polish
  • Crankshaft balance (0.25g)
IMG_8237.jpeg
IMG_8240.jpeg

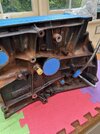
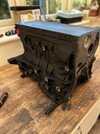
After 10 years of abuse the block was in a bad way so went through the process of removing surface rust, Hydrate80 and then a matt black paint on top, was very time consuming but looks a million times better.

IMG_8245.jpeg
IMG_8249.jpeg
IMG_8251.jpeg
IMG_8263.jpeg
IMG_8260.jpeg

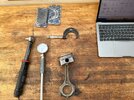
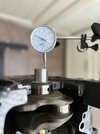
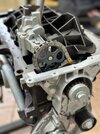
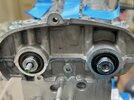
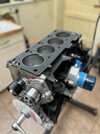
I have then spent what seems like weeks going through the process of measuring everything, bearing clearances, bores, pistons, weights and laterial clearances (crank + pistons) I have used a mixture of the R3, R3 EVO and the Renault Technical Note6027A, took me a while to find the last one but it contains a lot of information I haven’t been able to find elsewhere. The R3 manuals also have a lot of gotchas such as how to measure clearance and miss out a few seals, I assume this is a translation issue. For example measuring clearances at just 20Nm will give you wildly inaccurate measurements compared to torquing to spec (using old bolts)

IMG_8266.jpeg

IMG_8322.jpeg

IMG_8330.jpeg

The balancing looks very rudimentary but you can see how more has been taken off the further away from the flywheel which matches the mains bearing wear.

IMG_8270.jpeg

IMG_8271.jpeg

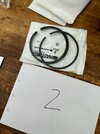
Rings gapped, all within 830 spec but closer to R3, with 0.3, 0.55 and 0.6, using a ring compressor to get pistons into the block is my least favourite thing so far, stripped almost all the skin from my fingers.

IMG_8293.jpeg

IMG_8296.jpeg

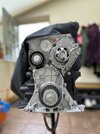
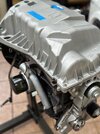
Few auxiliaries bolted back on, very happy with how it’s going.

IMG_8342.jpeg

IMG_8356.jpeg

IMG_8359.jpeg

IMG_8346.jpeg

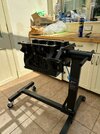
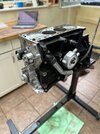
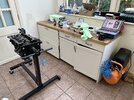
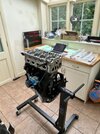
Yes I am building this in my kitchen / utility and no I don’t know how I am going to get it back to the unit yet.

IMG_8333.jpeg

Currently working on the top end, got some new parts to fit on this which I am excited about but just working on spring installed heights, seems to be a lot of incorrect information floating about.

IMG_8364.jpeg
 
Had some time off this month so lots of catching up to do on this thread.

IMG_8486.jpeg

IMG_8493.jpeg

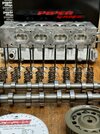
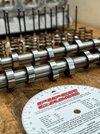
First up is the addition of Piper Cams supporting the rebuild! Really excited to get them on board, after approaching Lee earlier this year he mentioned that they were working on a 403 style billet cam and looking for further test subjects. I then got invited down to see how piper works which was awesome, worked in a machine shop in a previous life so was great to see the machines used. They also do everything in house from blanks to final cam. The plan is to eventually develop the cam based on testing to see what can be done to improve.

74F48805-8EDF-49C1-94DC-E853F751B940.jpeg

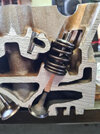
A few other parts in development such as lightweight conical springs, cross sectional photo here that is pretty cool.

IMG_8500.jpeg

IMG_8503.jpeg

IMG_8505.jpeg

IMG_8508.jpeg

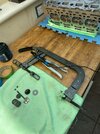
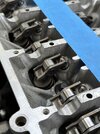
A then moved into rebuilding the head and finding out that collets are my new least favourite part of engine building. Upgraded the springs to CatCams and shimmed under the valve seals to get roughly 30kg seat pressure. I spent a long time doing this as it’s very tricky to measure and seems to be a lot of conflicting information regarding standard seat height. This is made trickier by the fact the aftermarket valves have the collets around 1.2mm higher than standard, love to know why as it’s a real pain.

IMG_8513.jpeg

IMG_8517.jpeg

IMG_8568.jpeg

IMG_8570.jpeg

Also went to the effort of confirming the piston to valve clearance using checking springs and my old dephaser modified to engage VVT on the intake once installed. I know I could do this by rotating the cam set degrees but this seemed like the most accurate way of doing it once timed using TDC method. This gave about 2.05mm of clearance on the intake which is as close as you want it. The exhaust side had a lot more clearance but it was very tricky to get anything accurate due to the hydraulic lifters acting against the checking springs.

IMG_8580.jpeg

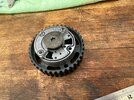
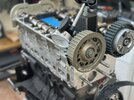
You can see I also upgraded the exhaust pulley to the pure motorsport version, this allows adjustment and isn’t damped resulting in being 800g lighter than standard!

IMG_8582.jpeg

IMG_8589.jpeg

IMG_8591.jpeg

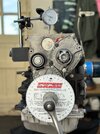
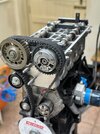
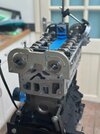
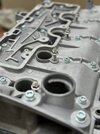
Timed using TDC to confirm the cam slots were accurate before double checking using the Renault timing tools, everything went together and turn over is silky smooth. Took a few attempts to get used to the way things move when torquing but with the engine out it was all very simple.

IMG_8598.jpeg

IMG_8608.jpeg

IMG_8604.jpeg

Bolted on a few auxiliaries before tackling the problem of getting it back to the car…
At the same time I was determined to complete a few things I had started on the chassis, first job was the fuel pump I purchased off Gav / Ethan’s Clio. Quick clean and test before installing, all working and ready to go.

IMG_8403.jpeg

Internal install of the fire extinguisher, still need to wire in and complete the engine bay install but it is very time consuming bending the Ali tubing without pinching it.

IMG_8461.jpeg

Rentune foot plate installed replacing the naff CF plate that was there before.

IMG_8464.jpeg

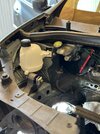
Header tank relocated (Dacia model) which means I have then opened up the front plastic mount to allow more air into the air box (R3 style) which I will likely mount upside down as the brackets snapped off in the crash anyway.

IMG_8467.jpeg

IMG_8468.jpeg

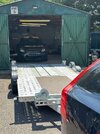
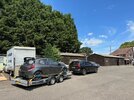
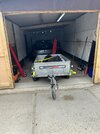
Got a message one morning that GDF had some time mid week so quickly picked up a trailer bolted the car back together and 3hrs later I was on the road hoping nothing fell off. Satisfying to get it moving again and allowed me to save a trip as I needed to move units anyway.

IMG_8553.jpeg

IMG_8554.jpeg

IMG_8559.jpeg

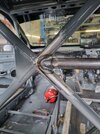
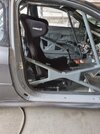
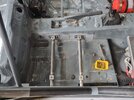
Chris has done a great job of getting a harness bar in, although legal before I wanted it to be as safe as possible. FIA seat mounts now installed as close to the tunnel and a good 30mm higher than standard so I can run the corbreau seat mounts and still see out the windscreen.

c348a35c-9006-42e7-af94-bd2b87c57cc9.jpeg

7b44eea8-071c-49f9-bd52-4ea3abb65b14.jpeg

5abf7399-e6f2-4b3a-9083-465ee072999f.jpeg

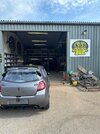
Just need to clean up and spray paint the new parts but can’t see that taking that much time. Car then transported back to the new unit, it’s smaller but no restriction on access and 10 minutes away means it’s a small price to pay.

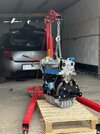
My initial plan with the engine was to slide it into the golf on the stand, this failed, with the sump on it was about an inch too tall and on its side it was even worse. After some sulking I was able to borrow father in laws trailer and with some carpet / mats / wood and some force was able to get it strapped down and on the road. The other side was easy as I could use the crane to lift it straight up, so 4 months later and I am back where I started and ready to put flywheel / box and engine back in!

IMG_8616.jpeg

IMG_8618.jpeg

IMG_8620.jpeg

IMG_8625.jpeg

IMG_8628.jpeg

Few weeks and I should be ready for the first start, it will then be a case of running in / mapping and geo before its first test day! Given up putting dates on this, just enjoying it right now.
 
Last edited:
Always a satisfying read these updates.
How did you mount the dacia coolant reservoir? I’ve seen a few people do it but haven’t found any good pictures for how it’s done
 
  • Like
Reactions: LiamP
A lot of that was over my head with the engine rebuild stuff but I'm so glad to see this coming together, I look forward to getting out on track with you at some point
 
  • Like
Reactions: Beany and LiamP