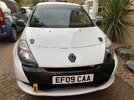
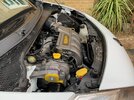
We decided to get the front Gaz Gold shocks serviced before Oulton. The Gaz service unit is only a short drive from my house. They charge £60 for each front shock and the cost of any parts that need to be replaced.

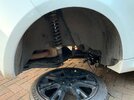
We decided last night to get them serviced and within a few hours of getting home tonight @EthanMenace had removed them from the car.
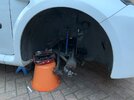
IMG_5507.jpeg

They are boxed and ready to drop off tomorrow.
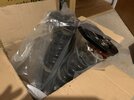
IMG_5515.jpeg

The drivers side shock has been making a knocking noise for a few months so it will be good to get that sorted - until the car is smashed over a few more kerbs and the noise comes back.
 
Yes. They were new in early 2022.

They have been smashed over kerbs at different tracks so I am not sure whether we have caused a problem or whether they were not right from the start.

I think the knocking is coming from the shock but I am not 100% sure. It has an odd problem with its rebound. But saying that they keep on doing a good job on track.

Lot’s of people have got Gaz Golds on their Clios and have not had a problem. I would still recommend them as they are good value for the performance you get.

When they are serviced I will find out if there was a problem.
 
A few parts arrived in the post today.

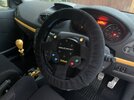
We now have a TRS steering wheel cover to protect the Sabelt Cup Racer steering wheel.

IMG_5524.jpeg

I still haven't had a customs tax bill for the steering wheel so I am starting to think that it was a bargain for £150.

Some Pro-line braided lines for the new rear beam also arrived. These are the long braided lines that go from the calliper and go to the union on the beam getting so there is no need for the OEM hardlines on the rear beam.
 
We have got less than two weeks to a track day at Oulton Park.

The car has no front shocks on it as they are still with Gazmatic being serviced

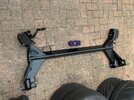
Also, the car has no rear beam on it.

IMG_5560.jpeg

Hopefully we will get the newer stiffened rear beam back soon so that it can be rebuilt and go back on the car this weekend.
 
I have just got off the phone to Gaz who told me that our front shocks are ready to be collected.

Apparently they were knackered as both shocks had bent rods, one needed a new bearing as it was rattling about, and a bit of the other shock was missing!

When I drove the car at Bands Hatch it felt pretty good, with any luck it will feel even better at Oulton Park with straight rods, good bearings, and no missing parts.
 
  • Like
Reactions: Jakkehoop
I don't think £200 is bad all told.

Will you bother with rears over winter?
Probably not.

We wanted to sort out the fronts as we knew one was noisy and either that one or the other one was missing a bit from the top where the rod comes out.

The winter plan is to save some money and probably put on a cup racer front end in Spring.
 
  • Like
Reactions: Tarticmonkey
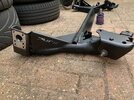
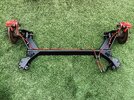
The stiffened rear beam is back.

IMG_5566.jpeg

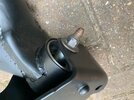
It has PMS spherical bearings in it rather than rubber bushes.

IMG_5567.jpeg

I find Alex at AW Motorsport a pleasure to deal with. Today he said he was driving in my direction and dropped off the beam which saved me a journey. He even returned the old Powerflex bushes in case I had any plans for them.

IMG_5568.jpeg
 
The rear beam has been built back up by @EthanMenace.

9E4553CF-7699-42EB-A3A8-94AAD93C6C00.jpeg

It is a thing of beauty. Ethan pointed out to me today that than handbrake brackets were cut off and have been welded back on.

772983F6-2DE2-4940-AE68-E287F1C7FB7C.jpeg

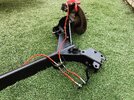
The beam has a set of Proline braided cables which run from the calipers to the union. We have used some P clips to keep the lines in place closer to the hubs. On the beam we have reused the OEM clips. As the Proline braided brake hose is thicker than the original hardlines a few cable ties have been used to keep everything tight and in place.

There are a few washers where the longer lines meet the shorter braided lines at the union to stop the brake hoses rattling about.

We put the beam on the Clio in the blazing sun - albeit @EthanMenace did most of the work (again). The rear Gaz Golds were twisted 180 degrees so that the adjuster at the bottom of the shock is in the open and not hidden away in the boxed in strengthened section.

I have no idea what the camber and toe is on the rear now. The car is booked in on Saturday next week to be shimmed and aligned.

I will collect the front Gaz Golds next week and get them back on the car before Saturday. Hopefully Alex at AW Motorworks will be able to sort out the front alignment as well as the rear. I am expecting the Gaz Golds to come back completely loosened off to effectively reset the camber settings that they were running before.

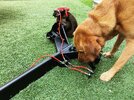
The dog approved of the beam.

6144ADD1-DCF9-4D7E-B52B-3FFA815FE164.jpeg
 
More progress today. We finally installed the front aero catches that we have had sat around in a box since we did the boot aero catches.

We thought long and hard about where to put the area catches and which way up they should go. After looking at lots of images of Clios with aero catches we decided to fit them so that the narrow part pointed down. We kind of followed a guide on Instagram.


We used this guide as it suggested that the aero catches could be installed without cutting an aero catch sized hole through the underside of the bonnet.

We decided where to put the pins on the plastic cross member in the engine bay, secured them in place and then drilled holes in the bonnet to line up with the pins.

IMG_5592.jpeg

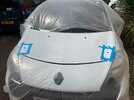
The next job was to use the templates to cut away the top section of the bonnet. After doing the boot area catches and getting lots of fallout on the paintwork I decided to cover up the car.

IMG_5593.jpeg

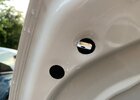
As usual all of the hard work was done by @EthanMenace and I was just the helper providing much needed moral support and cold drinks in the 31 degree heat. When the holes had been cut with a Dremel the fun really started. The aero catch would not sit flush in the hole as part of the bonnet skin was in the way. Out came the grinder and both are catches were fettled to perfection to fit in. The backing plate had the retaining screws siliconed in place to hold them in place temporarily whilst the backing plate was slid inside the larger hole. This is what the bonnet looks like from underneath with the aero catch installed.

IMG_5598 (1).jpeg

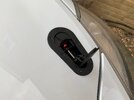
The messing about with the grinder was worth it as it makes the install look today.

IMG_5597.jpeg

Here is the new view from the front.

IMG_5596.jpeg

The bonnet hook on the underside of the bonnet has been removed. When we next take off the front bumper we will remove the bonnet latch and release wire.

The engine bay is looking okay. I even cleaned the washer filler bottle lid after someone pointed out it looked dirty next to the new oil filler cap.

IMG_5601.jpeg