R20 BTG - 200 Cup Track Car Blog

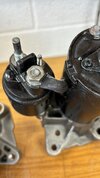
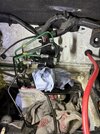
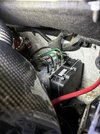
Time to fit my spare modified starter motor, which does away with the brazed connector and replaces it with a ring connector bolted to the power terminal. Let's hope this lasts.

20DB6BEF-1E7F-47CE-A802-14E68C98FFBB.jpg

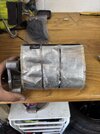
The install is the opposite, except it isn't. Wrap the starter motor back in the heat wrap, on the off chance that it stops something melting:

IMG_4862 Large.jpeg
  • Try and get the replacement in from above, struggle to get it in the right orientation without distubring the heat wrap.
  • Get back under the car and realise that removing the cross member (as per the service manual) might have been a good idea after all.
  • Crawl out from back under the car to get your impact gun. Zip out the 16mm bolts holding the cross member in. But you don't, because two of the bolts are 16mm and two are 15mm (?!) so crawl out again to get the right sized socket.
  • Have a brain fart when the last bolt gets whizzed out and remember this thing called gravity, as the cross member slams down on your head.
  • Get the starter back into position and try and line up the bottom 13mm bolt. Eventually get it in after 1000 attempts.
  • Get out from under the car and try and line up the top two bolts, eventually get them in after 746 attempts.
  • Bolt it all back up tightly. Get back under the car and try and connect the 10mm bolt to the power wiring terminal and 8mm bolt to the exciter wiring terminal.
  • Struggle because again, Renault haven't left enough slack on the wiring. Oh, and where has the 8mm bolt gone for the exciter terminal? Realise that you've trapped the wire when you bolted the starter back together.
  • Undo the bottom 13mm bolt and crawl out from under the car for the 37th time, and undo the top two 13mm bolts from above. Free up the trapped exciter terminal wire.
  • Crawl back under the car and spot a small nick in the wiring that you've just caused by nipping it. Consider bodging it with some electrical tape, but instead decide it's not worth the risk. Crawl back out from under the car for the 38th time, and go get your electrical tool kit. Cut off the damaged wire and rewire it with some new wire, giving yourself enough slack to get it on this time.
  • Bolt everything back up again, and pray that it's going to work.
  • Put the airbox back in, the battery tray back in, and the battery back in. Turn the ignition key. Nothing.
  • Consider your life choices.
  • Realise that you've known that your battery is on its last legs for a while, and rather than panic, try a different battery you have lying around.
  • Car fires right up, validating the last 5 hours of your life and all the cuts, bruises and fibreglass itchy shards you're now suffering from.
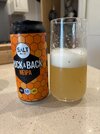
  • Have a beer, and vow never to do this job again.

IMG_4865 Large.jpeg

IMG_4864 Large.jpeg
 
Sorry, that was mean :oops:

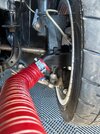
You'll either need to remove the front half of the arch liner, or cut a hole to be able to pass your ducting through. Neither was an issue for me as I didn't have the front half of the arch liners anyway.
 
Sorry, that was mean :oops:

You'll either need to remove the front half of the arch liner, or cut a hole to be able to pass your ducting through. Neither was an issue for me as I didn't have the front half of the arch liners anyway.

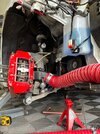
no drama :chair:

Just trying to get my head round how to route. Obviously theres no issues with the tyres rubbing on the pipe?

I've got a twingo water bottle - hopefully theres enough room to route it under there.

How much pipe do you need - 2 meters enough?
 
Last edited:
The beauty of the 41degrees duct is that it is static on the hub. As long as you run the ducting on a route that doesn’t foul the wheel then it will remain clear at all times. The duct is angled to promote this routing anyway:

IMG_4067.jpeg

IMG_4071.jpeg

You can obviously do a static test lock to lock to make sure you have clearance
 
Last edited:

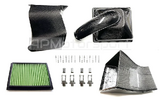
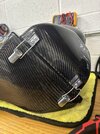
Comes with clips, but they are separate and you need to drill the carbon and rivet them in yourself. Does not come with the silicone hose (that's going to be the subject of a new blog post soon as it's been a pain). You have to buy the filter element separately as well.

Basically it comes like this in a box:

Screenshot 2024-07-01 at 14.15.23.png

I haven't fitted it yet, as I need to sort out the battery relocation to make room. I should have all the bits to make a start soon.
 
Battery relocation, R3 Airbox, ABS module replacement

After gathering bits for a few moths, time to make a start. I acquired a Deadweight Industries Touge 200 LiFePO4 back in April for a decent price, it's incredibly light at 2.0kg:

IMG_4106 Large.jpeg

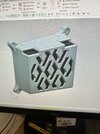
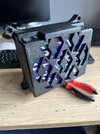
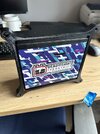
I gave this to @RSRowe at Cadwell and he went to work on his design and 3D printing skills, with an open brief. I was very please to see the design a few weeks later, he'd put some Renault logos into the print which looks cool.

IMG_1926 Large.jpeg

Came out looking really good and fits perfectly:

IMG_1929 Large.jpeg

IMG_1930 Large.jpeg

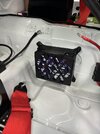
The battery has gone behind the passenger seat, so over the course of a few evenings I got it installed. I purchased the relocation kit from Duct3D which came with everything (and more).


IMG_4979 Large.jpeg

Using my new favourite tool, the rivnut gun:

IMG_4981 Large.jpeg

IMG_4989 Large.jpeg

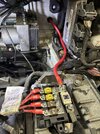
I just took my time, made everything look neaty and tidy, cutting cables to an appropriate length. Investing in some decent cable cutters and crimps definitely worth it. I fitted the isolator on the exhaust tunnel just behind the handbrake and earthed it into the existing chassis bolt hole behind the drivers seat:

 
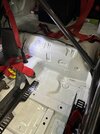
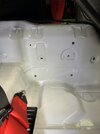
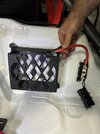
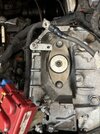
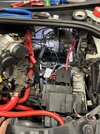
Out came all the existing stuff, lead battery, battery tray, OEM airbox. I made a little offset bracket on top of the gearbox mount area to mount the new distribution box:

IMG_4992 Large.jpeg

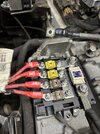
Cut off the old connectors and carefully labelled them prior to crimping and install:

IMG_4996 Large.jpeg

Drilled a 20mm hole through the bulkhead and installed a rubber grommet and passed through the power cable:

IMG_5002 Large.jpeg


IMG_5006 Large.jpeg

Battery relocation done, went back through and checked all bolts and connections.

IMG_5010 Large.jpeg

IMG_5007 Large.jpeg

Fired up first time which I was pleased about, no errors or electrical issues.
 
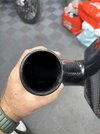
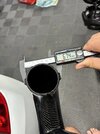
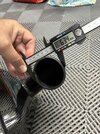
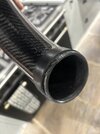
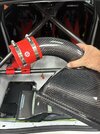
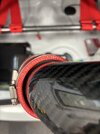
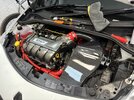
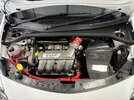
Battery and coolant reservoir location was done to install the carbon R3 airbox. Had a bit of a battle finding a silicone joiner to fit. Not sure if this is a manufacturing issue but the carbon inlet pipe is slightly oval, measuring 67mm at the widest point and 63mm at the narrowest:

IMG_4922 Large.jpeg

IMG_4926 Large.jpeg

IMG_4928 Large.jpeg

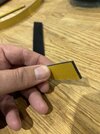
Bit disappointing for an item that cost so much. I ordered a 70mm > 63mm reducer to see if that would fit, but had a bit of a palaver with the online supplier who sent me the wrong thing twice (100mm > 80mm reducer, then a 80mm > 76mm reducer). Then they reckoned the 70mm > 63mm reducer wouldn't stretch over the ovalled inlet pipe, so instead decided to stick with a 70mm straight connector. To make sure it sealed properly, I used some 2mm self-adhesive rubber strip to shim out the pipe. Seems to have done the trick:

IMG_4968 Large.jpeg

IMG_4970 Large.jpeg

IMG_4971 Large.jpeg

IMG_4973 Large.jpeg

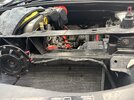
Cut out the front of the plastic engine bay cross member to allow the fresh air in:

IMG_5015 Large.jpeg

Drilling and riveting a new carbon airbox is a bit scary, but took my time and came out well:

IMG_5016 Large.jpeg

IMG_5024 Large.jpeg

IMG_5041 Large.jpeg
 
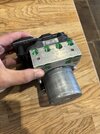
Last job was to replace the ABS module to try and solve the rear left locking under braking issue. I thought about getting a second hand unit from a breakers, but managed to find a new OEM module for a decent price:

IMG_4806 Large.jpeg

This is a pretty easy job with the airbox out, take off the 11mm brake pipe unions, unclip the electrical connector and loosen off 2 x 10mm mounting bolts. Same again in reverse:

IMG_5029 Large.jpeg

IMG_5040 Large.jpeg

The tricker bit is purging and bleeding the system using CLiP. Definitely needs a second pair of hands, as someone needs to sit in the car with the laptop and foot on the brake pedal pumping, while someone else goes around each of the four corners bleeding the brakes following the procedure on CLiP. The brake pedal feels much more solid now, I'm wondering whether I've been driving around an issue for a while.

After following the procedure and the pedal feeling great, I was still getting a brake fault when powering up the car and the ABS wasn't working (brakes were great, but locking all four corners):


As this was happening on the pre-ignition cycle, I knew it was either an electrical or calibration issue, and not a physical fault. Took me a while to figure out what it was, as CLiP isn't the most intuitive software.

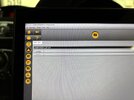
I was getting two error codes, DF055 (Programming of Vehicle Parameters) and DF020 (Speedo Index Programming).

IMG_5034 Large.jpeg

IMG_5035 Large.jpeg

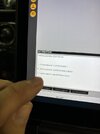
DF055 was reporting a 2.DEF status, which means it has an invalid program. Poring over the parameters I noticed that PR063 was set to a value of '99':


This meant the module had not been coded to the type of car. This should either be 1, 2 or 3 depending on your make/model.

IMG_5039 Large.jpeg

Once I'd figured out how to edit this value, I changed '99' to '3' (mine is a Phase 2 CUP in this context) and wrote the data to the module. This cleared DF055 error code. I also found out that you need to code the module to your wheel/tyre size. Once I'd done that, it cleared DF020. After another code reset, neither came back.

I make that sound easier than it was, in reality that took me 2hrs+ to figure out, going in and out of various CLiP menus as it's not intuitive at all. Hopefully that sorts out the rear wheel locking issue, haven't been able to go out and test it in anger yet. Fingers crossed.
 
second the looks mega comment. Attention to detail is somewhat an understatement! Does it need mapping again now with the new filter?
 
How do you find the new airbox driving wise? Mind it's going to be a bigger jump coming from the stock one rather than the V6.
 
I didn’t realise you was that hands on Iain when it comes to cars. Must add another layer of satisfaction I’d imagine doing bits yourself?

Be nice to bump into you again some time soon. See how the cars progressing
 
Last edited:
I didn’t realise you was that hands on Iain when it comes to cars. Must add another layer of satisfaction I’d imagine doing bits yourself?

Be nice to bump into you again some time soon. See how the cars progressing

I do enjoy it, it’s just having the confidence and time to see a job though that holds me back. Very satisfying to DIY though, especially when it goes to plan!
 

Similar Thread Suggestions