R20 BTG - 200 Cup Track Car Blog

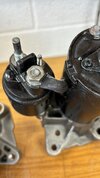
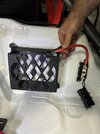
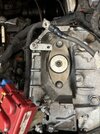
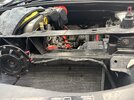
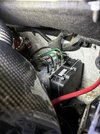
Time to fit my spare modified starter motor, which does away with the brazed connector and replaces it with a ring connector bolted to the power terminal. Let's hope this lasts.

20DB6BEF-1E7F-47CE-A802-14E68C98FFBB.jpg

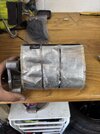
The install is the opposite, except it isn't. Wrap the starter motor back in the heat wrap, on the off chance that it stops something melting:

IMG_4862 Large.jpeg
  • Try and get the replacement in from above, struggle to get it in the right orientation without distubring the heat wrap.
  • Get back under the car and realise that removing the cross member (as per the service manual) might have been a good idea after all.
  • Crawl out from back under the car to get your impact gun. Zip out the 16mm bolts holding the cross member in. But you don't, because two of the bolts are 16mm and two are 15mm (?!) so crawl out again to get the right sized socket.
  • Have a brain fart when the last bolt gets whizzed out and remember this thing called gravity, as the cross member slams down on your head.
  • Get the starter back into position and try and line up the bottom 13mm bolt. Eventually get it in after 1000 attempts.
  • Get out from under the car and try and line up the top two bolts, eventually get them in after 746 attempts.
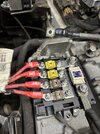
  • Bolt it all back up tightly. Get back under the car and try and connect the 10mm bolt to the power wiring terminal and 8mm bolt to the exciter wiring terminal.
  • Struggle because again, Renault haven't left enough slack on the wiring. Oh, and where has the 8mm bolt gone for the exciter terminal? Realise that you've trapped the wire when you bolted the starter back together.
  • Undo the bottom 13mm bolt and crawl out from under the car for the 37th time, and undo the top two 13mm bolts from above. Free up the trapped exciter terminal wire.
  • Crawl back under the car and spot a small nick in the wiring that you've just caused by nipping it. Consider bodging it with some electrical tape, but instead decide it's not worth the risk. Crawl back out from under the car for the 38th time, and go get your electrical tool kit. Cut off the damaged wire and rewire it with some new wire, giving yourself enough slack to get it on this time.
  • Bolt everything back up again, and pray that it's going to work.
  • Put the airbox back in, the battery tray back in, and the battery back in. Turn the ignition key. Nothing.
  • Consider your life choices.
  • Realise that you've known that your battery is on its last legs for a while, and rather than panic, try a different battery you have lying around.
  • Car fires right up, validating the last 5 hours of your life and all the cuts, bruises and fibreglass itchy shards you're now suffering from.
  • Have a beer, and vow never to do this job again.

IMG_4865 Large.jpeg

IMG_4864 Large.jpeg
 
Sorry, that was mean :oops:

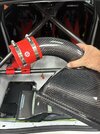
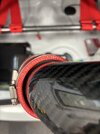
You'll either need to remove the front half of the arch liner, or cut a hole to be able to pass your ducting through. Neither was an issue for me as I didn't have the front half of the arch liners anyway.
 
Sorry, that was mean :oops:

You'll either need to remove the front half of the arch liner, or cut a hole to be able to pass your ducting through. Neither was an issue for me as I didn't have the front half of the arch liners anyway.

no drama :chair:

Just trying to get my head round how to route. Obviously theres no issues with the tyres rubbing on the pipe?

I've got a twingo water bottle - hopefully theres enough room to route it under there.

How much pipe do you need - 2 meters enough?
 
Last edited:
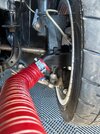
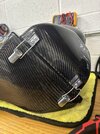
The beauty of the 41degrees duct is that it is static on the hub. As long as you run the ducting on a route that doesn’t foul the wheel then it will remain clear at all times. The duct is angled to promote this routing anyway:

IMG_4067.jpegIMG_4071.jpeg

You can obviously do a static test lock to lock to make sure you have clearance
 

Similar Thread Suggestions