R20 BTG - 200 Cup Track Car Blog

I had a bit more time with the car this weekend and managed to have a good look round in the daylight. I'm so impressed with it, it's so well done. Kudos to Supreme Motorsport, it's come out better than I ever imagined.

5DE79741-E392-4F9F-9A97-699CB16D3D08_1_105_c.jpeg

I took it for a 20 minute drive to get everything warmed up and to start forming some opinions of the car.

Positives:
  • With the dampers on fully soft, the car actually isn't too bad on the road. I've certainly had worse.
  • Front end turn in is superb, feels like there is no slack whatsoever and the nose darts to wherever you put it.
  • Gripper diff isn't as intrusive as I thought it might be. You can feel it binding a bit when manoeuvring at slow speed but once rolling it's fine.
  • ZPO shifter is lovely once the gearbox is warm (more on the gearbox below)
Negatives/Tweaks Required:
  • During the test drive I experienced reluctance to go into 5th and 6th. I later lost these two gears entirely. Suspected diagnostic is a cable that has popped off. Need to find time to investigate this another day.
  • Gearbox is a little notchy when cold, seems to loosen up a bit when warm. Actually feels better at high revs and high temperature. Matt said they use slightly thicker gearbox oil which might be the reason.
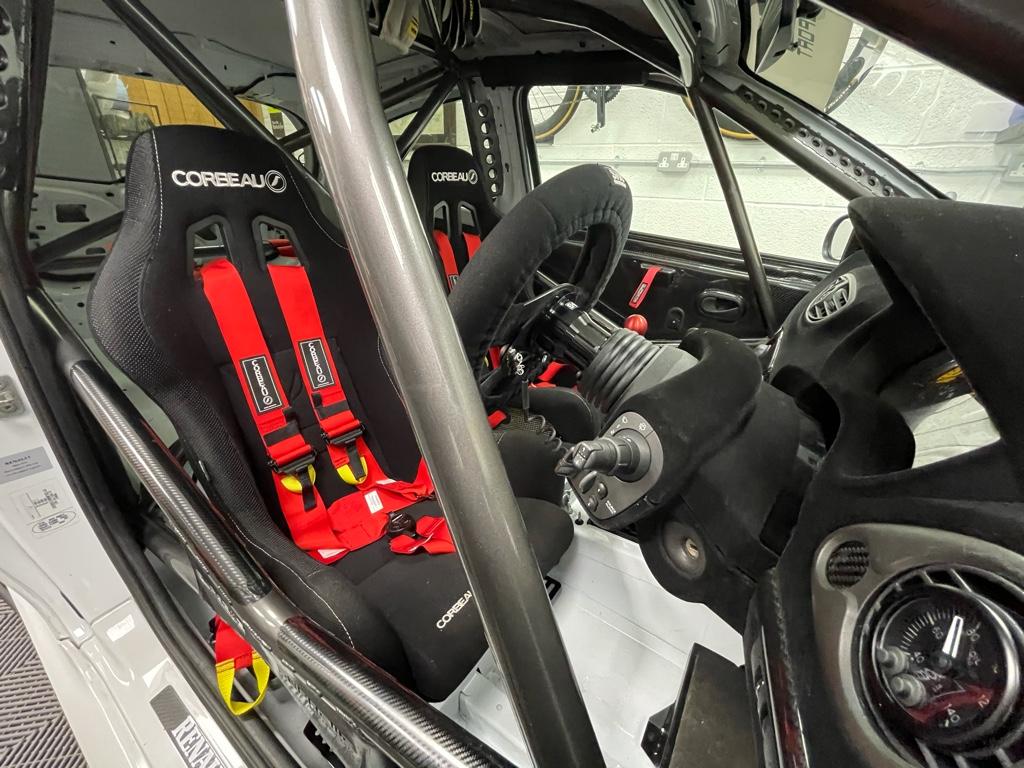
  • I came back and adjusted the seat height, my preference is to sit very low. As a consequence the steering wheel is too high (even when lowered with the Josh Wheeler steering column spacers). I'm in dialogue with Josh as to how we might lower it another 20mm or so. Watch this space.
  • The steering wheel is also a little too far away from me because the Sabelt wheel effectively has no dish, it needs to be 30-40mm closer to my chest when I'm strapped into the harnesses. Pretty easy fix in the form of a steering wheel hub spacer (LINK)
  • I lost power a couple of times on the test drive, looks like my negative battery terminal had popped off. The terminal itself has seen better days and the terminal on the battery looks like it's been chewed up a bit. Does anyone know if you can buy new terminals easily enough? Might also get a new battery just so that there is a good connection.
Gave the car a wash as it was a bit grubby from its journey on the trailer.

D5ADB969-4406-4232-8666-B85C08C7D1DD_1_105_c.jpeg

After sorting the drivers seat and harnesses, I installed the fire extinguisher onto the Supreme Motorsport mount. I'd found some nice quick release stainless steel bands which fit perfectly:

790D75FC-4718-4D52-9505-23C79B89994B_1_105_c.jpeg
449FB79B-C97B-4CA3-A530-DB54239D2DA9_1_105_c.jpeg832676DB-C529-4B96-A943-616E9772CB00_1_105_c.jpegC6365534-50E4-46F9-8D5C-6E1ACEE7EAF7_1_105_c.jpeg

I then gave the interior a bit of a hoover, there's a lot of residual flock dust at the moment that is causing a light dusting everywhere in the cabin. I'm sure this will settle down in time.

C6916455-05CE-4994-979A-00B560470490_1_105_c.jpeg

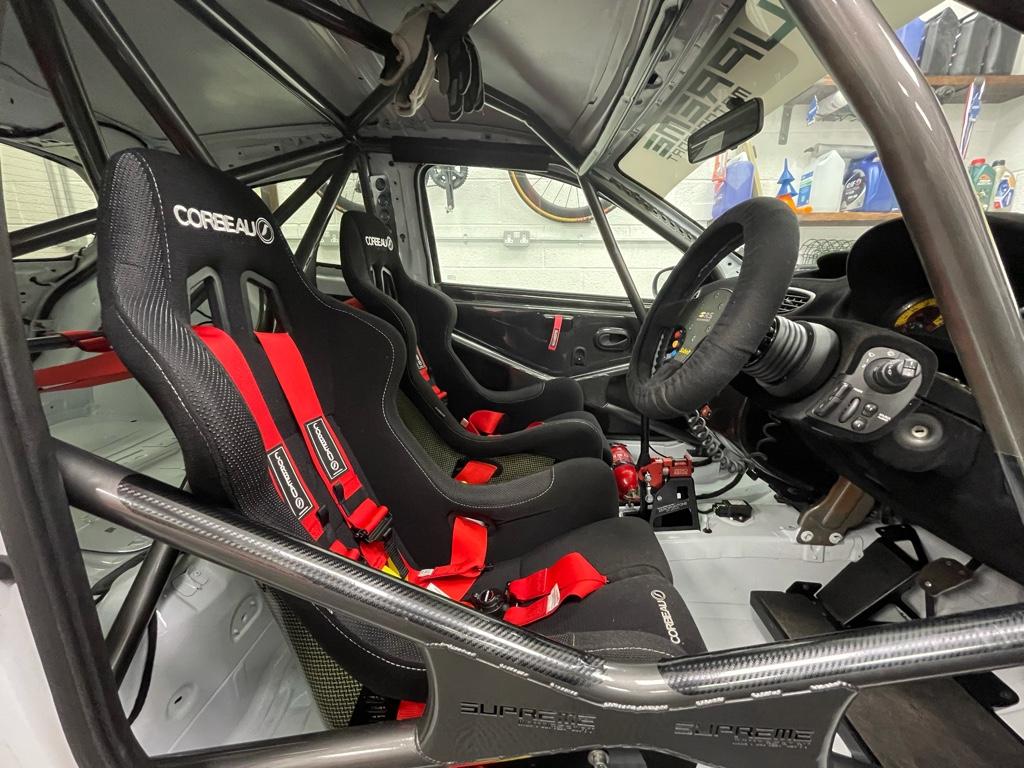
Some interior shots:
1EB4777C-B85F-490A-806C-2746A61AD399_1_105_c.jpeg
0B2DDC40-91EE-42FF-BF83-73676FCDB53E_1_105_c.jpeg

68B6084E-CF3E-4569-B49C-94F7B4BED252_1_105_c.jpeg
 
Earlier in the thread I mentioned that I was getting the Autec Wizard track wheels I bought from @Big Ben colour changed from gold to anthracite. I collected them today. I obviously need to clean the tyre soap off the edges but they look a lot better now. I might also get some ceramic coat ordered to make cleaning easier in the long run:

IMG_7204.jpegIMG_7205.jpegIMG_7206.jpeg
 
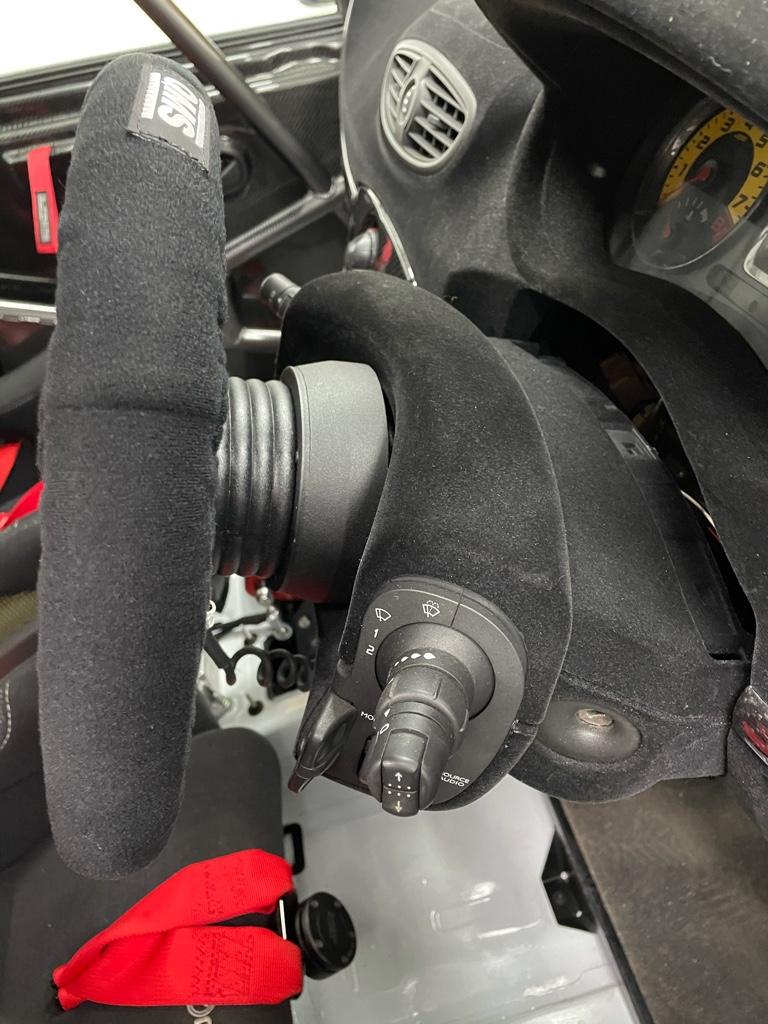
Because my car is the base model cup I don’t have forward/back adjustment on the steering wheel, only up/down. Now I’m happy with the seating position in terms of pedal position, the wheel is a bit too far away when strapped into the 6 point harness.

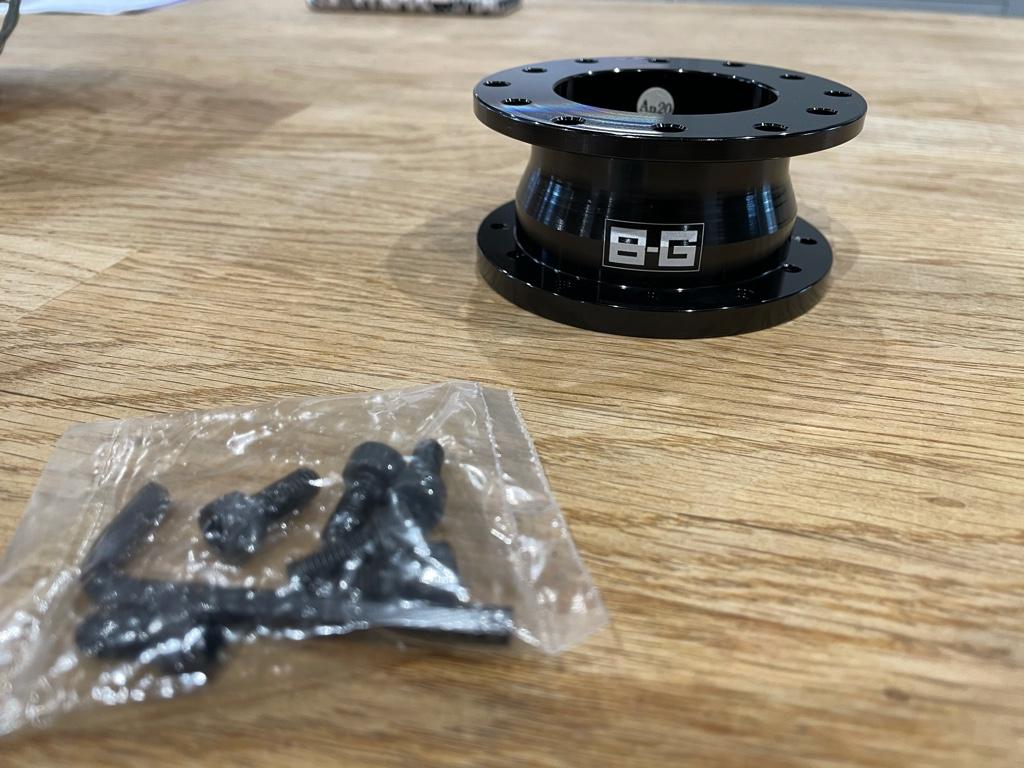
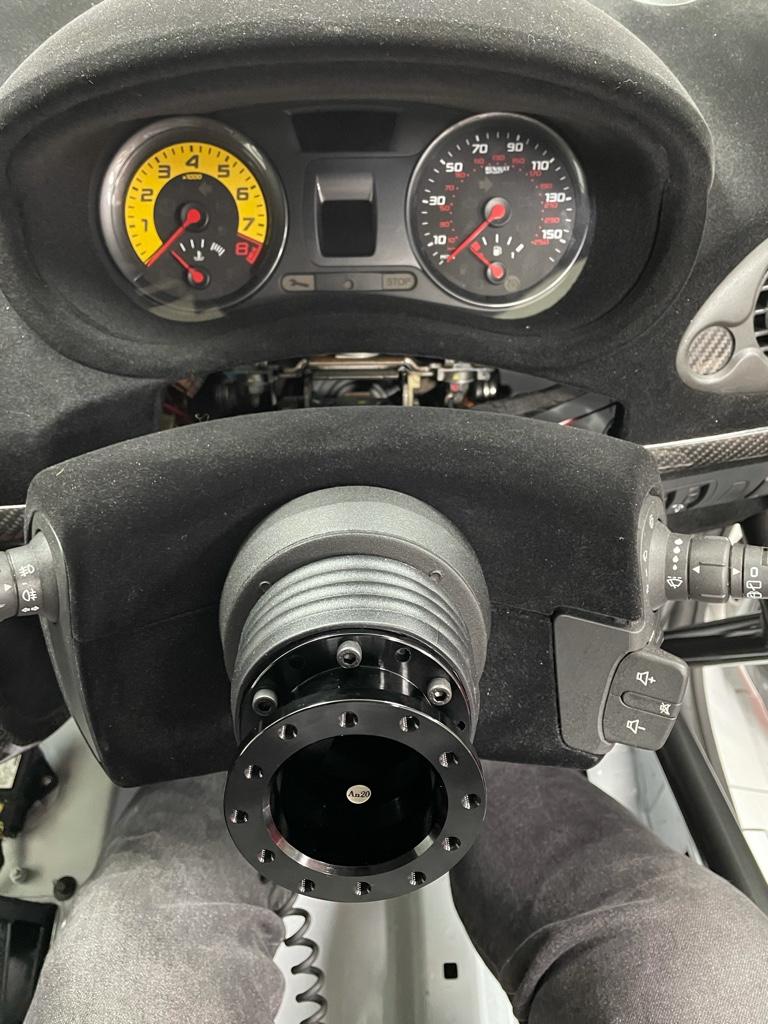
My steering wheel spacer arrived today, I went for 40mm. It’s a nice bit of kit and anodised black, comes with the required Allen bolts.

This is the spacer:

19ac04fb579c5ef9d369f0a2c735c5c2.jpg


This was the original wheel position:

e41aa6731c83d025e03697b7c257458b.jpg


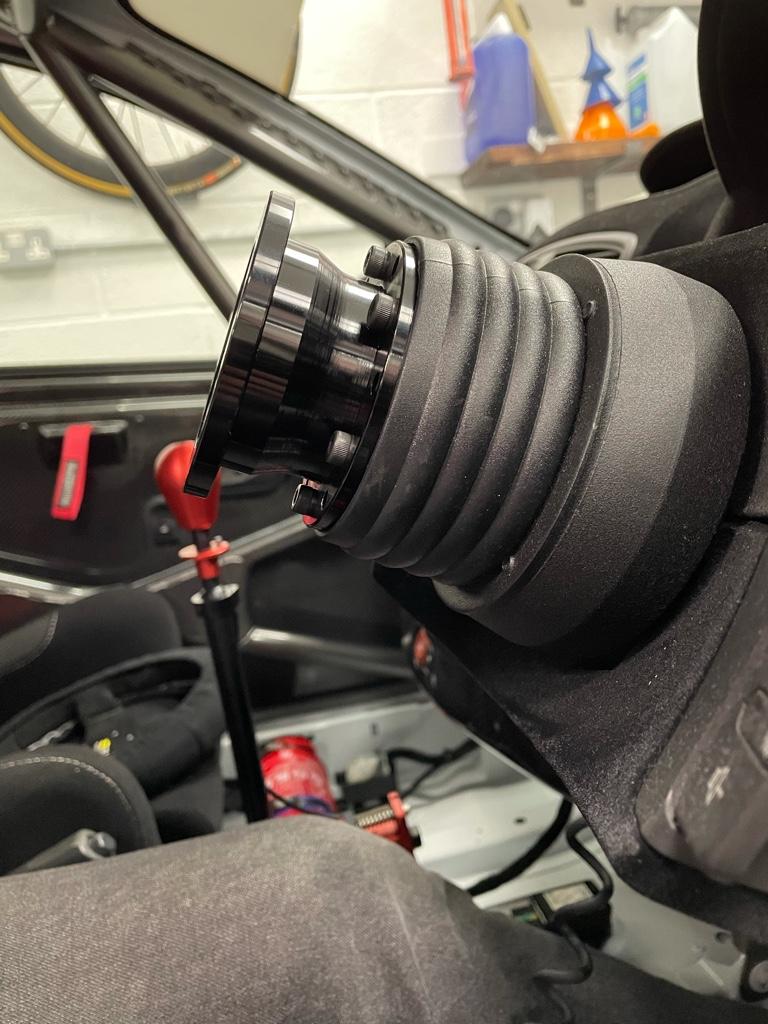
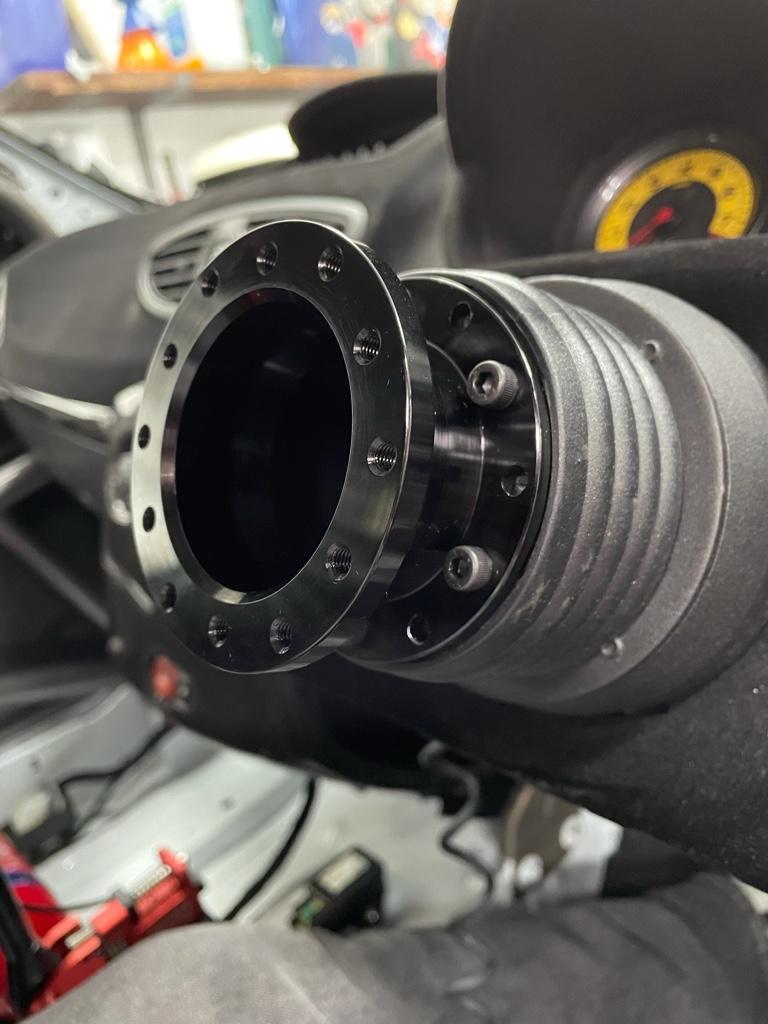
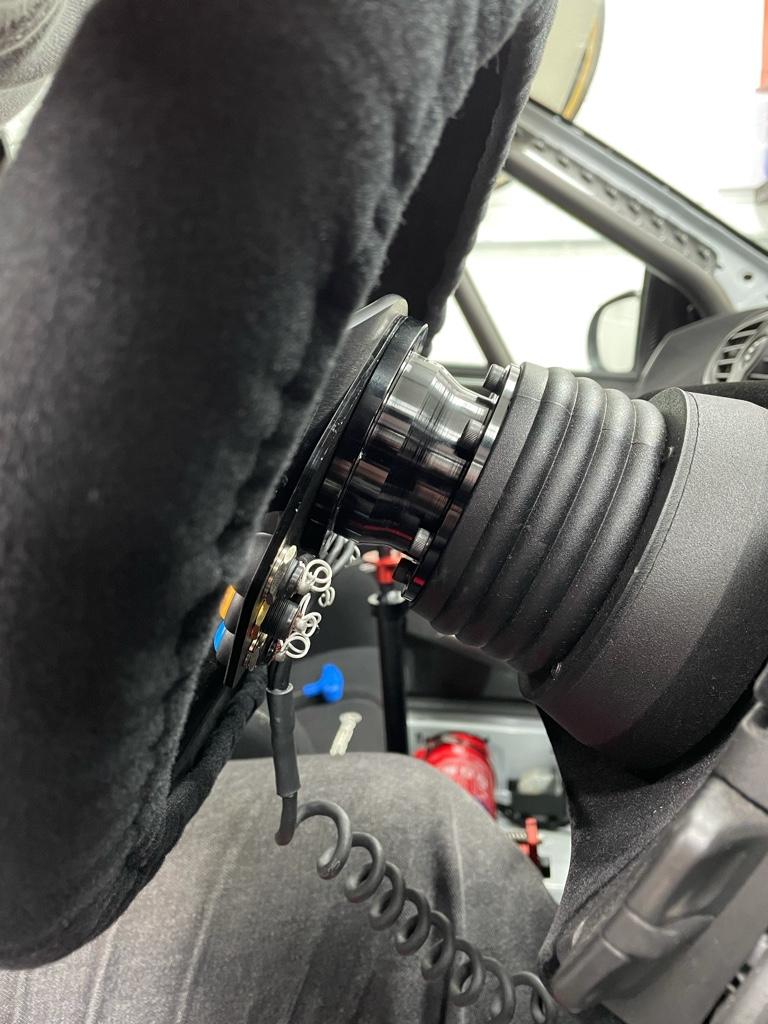
Wheel and button panel off, spacer fitted:

b7ec2d0d86793dfca799f9472e3ae54c.jpg

62d0ce7c579f0e4108c5a3ec61932c3e.jpg

d01f66d3d94c8e5a7d0c2a382849d5fe.jpg


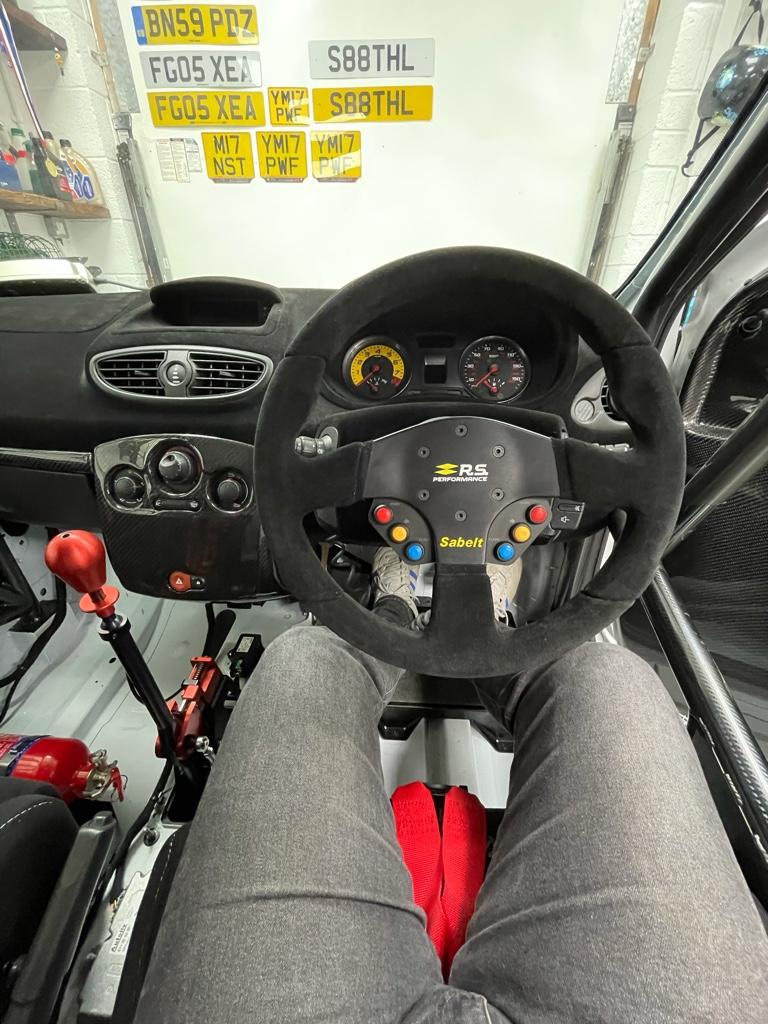
Wheel back on:

404bb6fe6e79fa02e0f1e53f3ce731ce.jpg


4ffafc9e4c4a207719acd93fc3cdffd7.jpg


Much better. Just need to get if 10-20mm lower which is the next task.


Sent from my iPhone using Tapatalk
 
"Everything is important"

Having removed the aerial from the roof, it left a small hole. I wondered what to do about it and eventually had an idea. I sourced this thing, which is actually a plumber's tap blank. It has a slight dome to it, a flat bottom, and a screw thread to tighten it from below. It was £2.49 from eBay :tearsofjoy:

9A2F2500-3162-4DAC-AB54-C2D33F059B3A_1_105_c.jpeg

FFC44918-3F2B-4AB3-92CA-D835EAB9A8C2_1_105_c.jpeg

The white was a poor match for the car, and it looked crap so I tried wrapping it with some carbon effect vinyl I had lying around. It looked better but

a) I'm shit at wrapping
b) Wrapping something circular is actually quite hard and
c) I'm shit at wrapping

Still, it was proof of concept and did the job for a short while.

FE4903D4-DE9E-4CAA-83E7-01F179C53870_1_105_c.jpeg1E6B3EBE-071D-4743-8219-05E996AFAEE9_1_105_c.jpeg

The carbon dash and carbon dash strips done by Project Carbon actually took a lot longer than first thought, and as a thank you for my patience Project Carbon offered to skin another roof plug for me in genuine carbon as a freebie.

I took them up on the offer and they did it as a bit of a fun side project and it turned out really nice:

F52862EB-6751-4330-8263-FD54EC162A73.jpegBA0654EB-F9C4-4CFE-A3AD-5449DF1A0BA3_1_105_c.jpeg

I haven't fitted it to the roof yet, I'm going to put a little bit of Sikaflex or Tiger Seal around the hole just to make it watertight.
 
That sits so well doesn't it you must be chuffed to bits! Same here with the steering wheel position, what make is that spacer? and who makes the carbon centre console?
 
That sits so well doesn't it you must be chuffed to bits! Same here with the steering wheel position, what make is that spacer? and who makes the carbon centre console?

The steering wheel spacer is made by BG Racing, and they have a few depths to choose from between 10mm and 100mm+

The carbon centre console is made by Project Carbon https://www.instagram.com/projectcarbon.uk/ and https://www.projectcarbonuk.com/

Would it be possible to get another one of those aerial blanks made? I need one for my Clio.

You'd have to contact Project Carbon and ask if they'd be willing to make another one for you. I wouldn't like to speak on their behalf. Contact details in the links above.

Cheers
 
  • Like
Reactions: Onrus
I popped the carbon roof plug in position today, I mixed up a bit of Araldite 2 part epoxy and ran a little around the underside of the plug. I cleaned the surrounding area with brake and clutch cleaner and dropped it into position. It looks spot on.

4A5EE135-46FD-435F-8254-5F0642F12CB8_1_105_c.jpeg
78CA3AC6-0D99-461F-B3A8-F8849177A1B8_1_105_c.jpeg

ABF61B66-AF9D-4388-8142-4EF7C786F893_1_105_c.jpeg

If anyone wants one, drop Project Carbon a note as he's happy to run off another batch.
 
Did a bit more prep work to the car today, last weekend I lowered the steering column using another 5mm spacer washer(s) to get it as low as I can safely.

I also replaced the 40mm steering wheel spacer with an 80mm spacer and now the driving position is probably as good as I’m going to get it:

df3f02ee27e1b1509621c5c5b90d47fb.jpg


2049f1707cf27971e030604648d02701.jpg


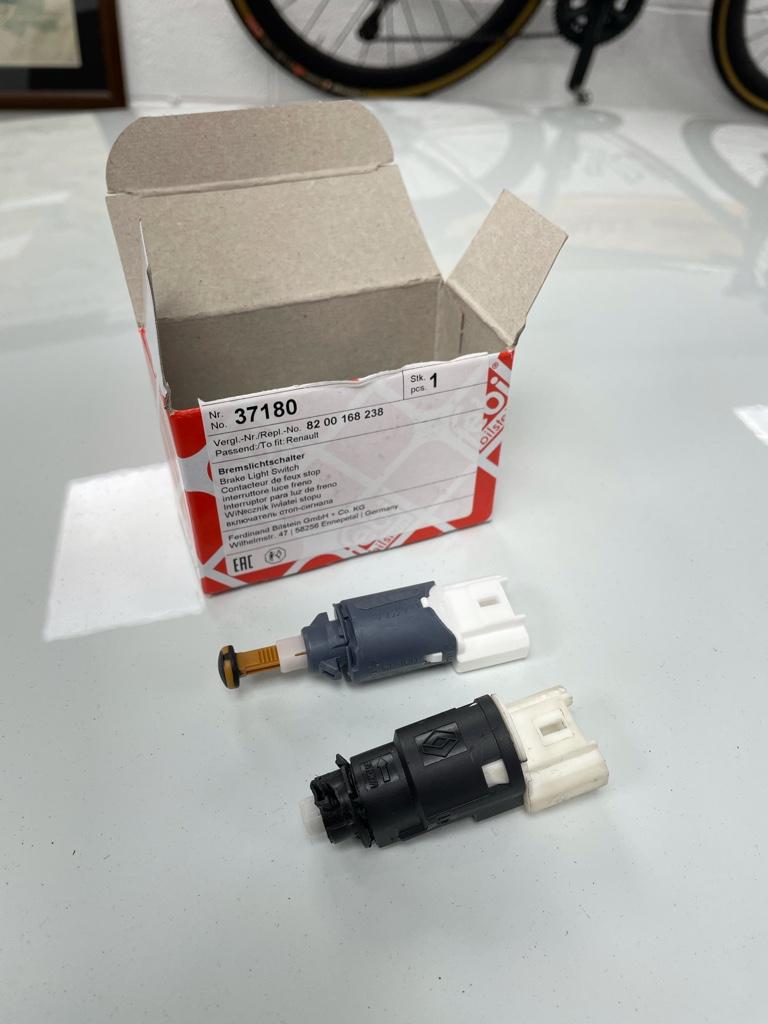
In the process of removing and replacing the lower dash under the steering column I must have dislodged the brake light switch as I noticed that my brake lights were staying on permanently. I managed to retrieve the switch but I must have snapped off the plunger somehow. Looked for ages including in the hoover bag but I just couldn’t find it!

I ended up having to buy a new one, part number 82 00 168 238 in case anyone needs one in future. You can see the missing plunger in the old switch. It’s a bit tough to get to it with a car with a full cage and bucket seats, I ended up upside down in the driver footwell but all sorted now.
f8f8cabd4e569aa8a9eab68c996d5b14.jpg


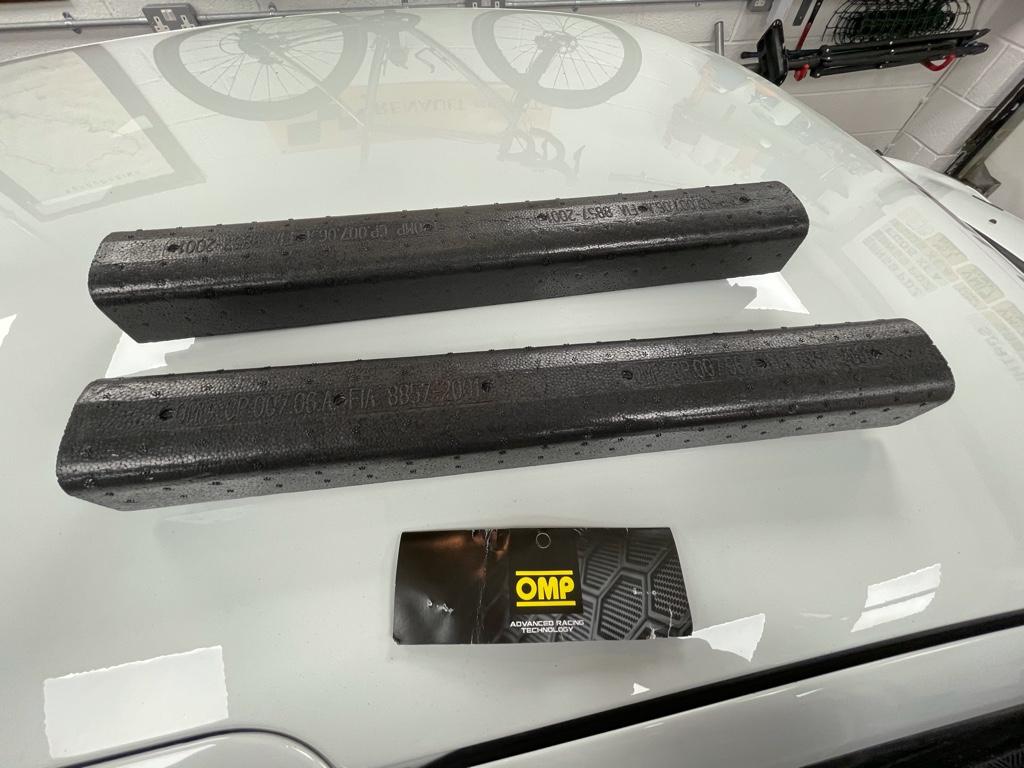
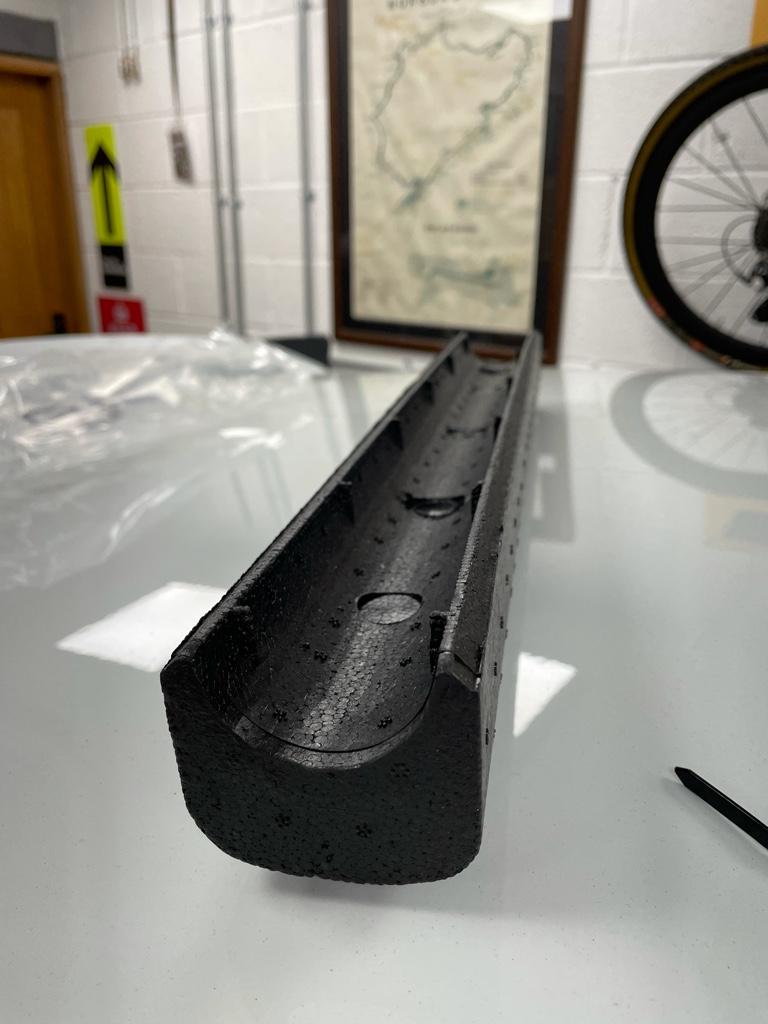
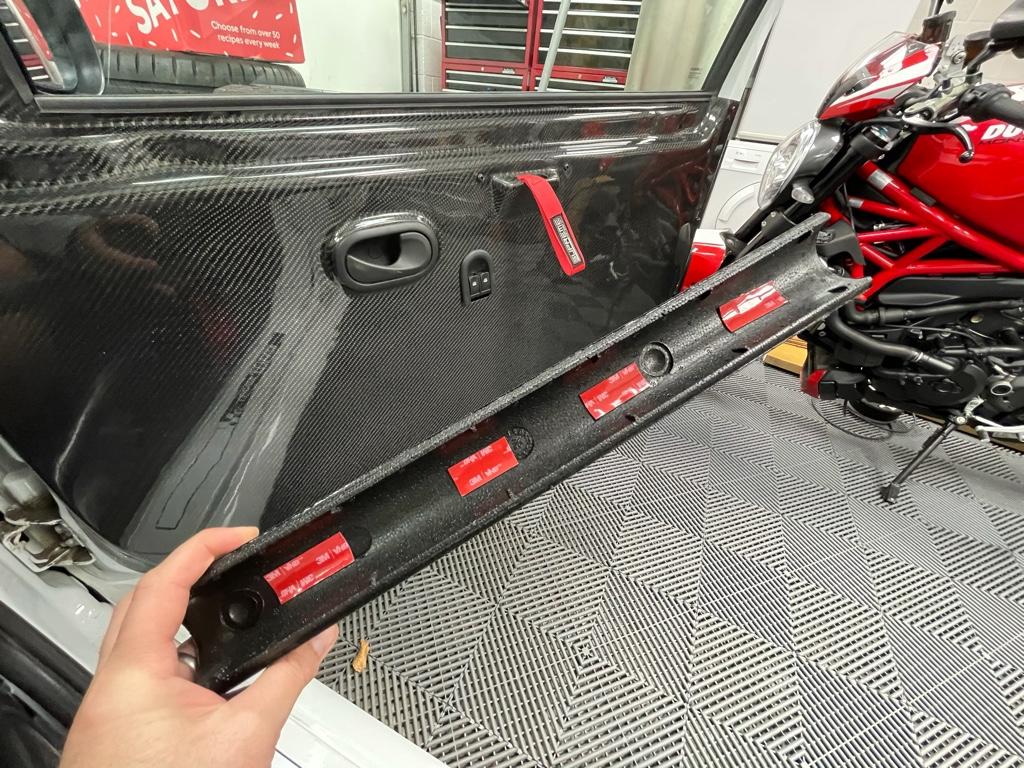
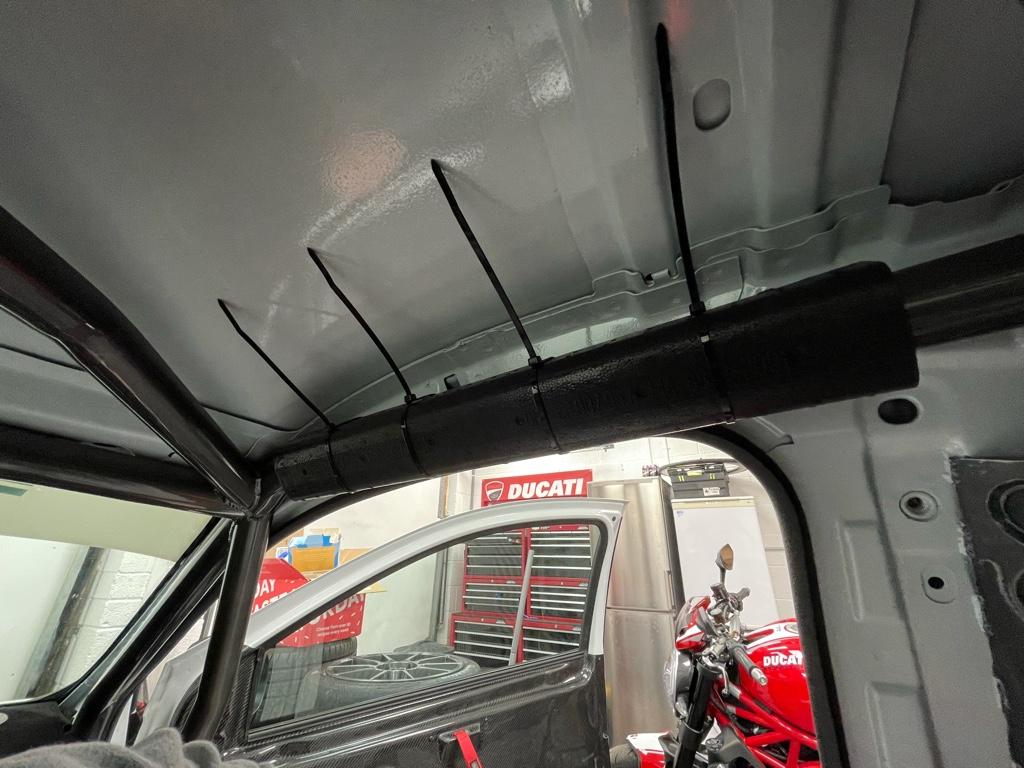
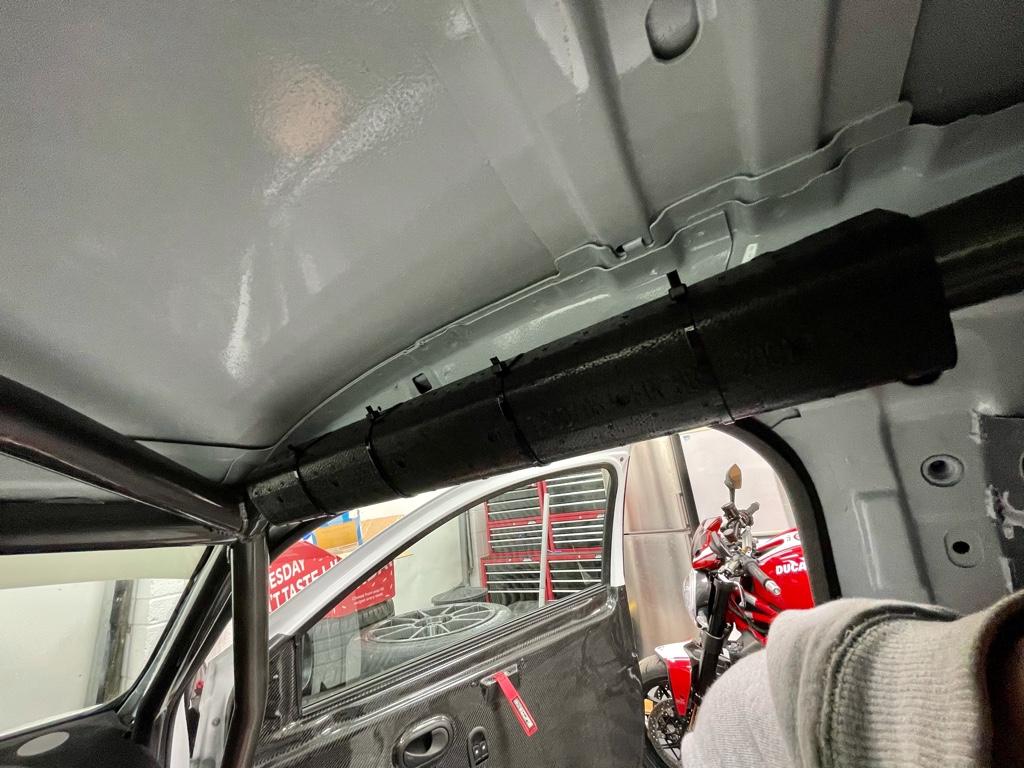
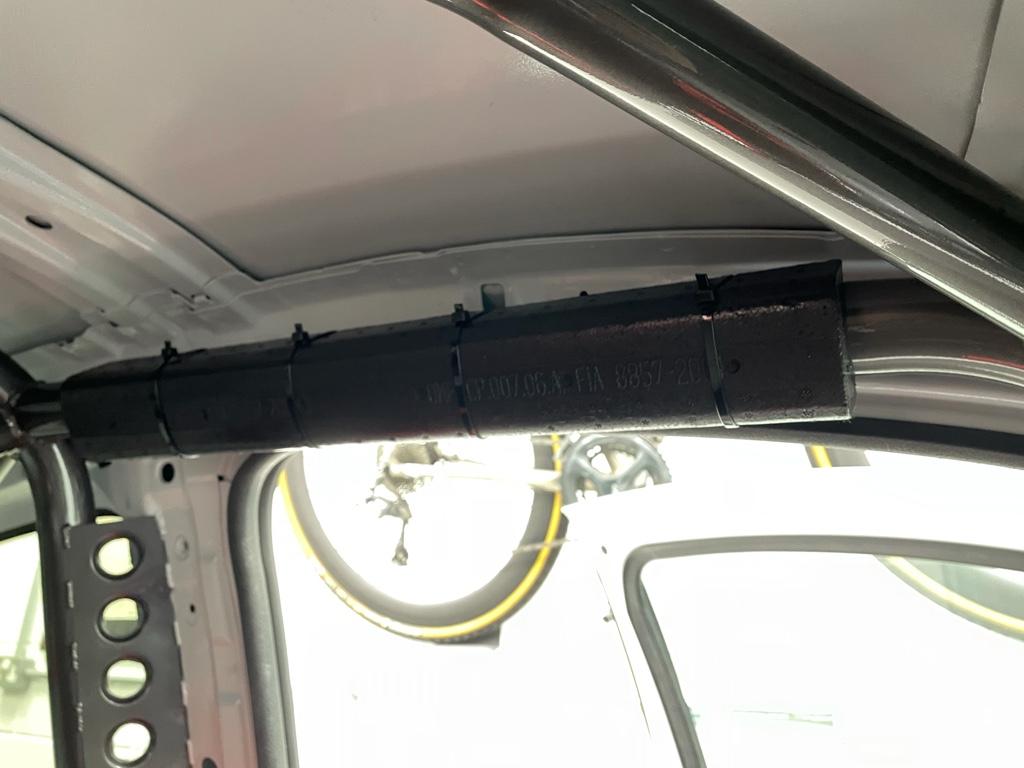
One of the things Nurburgring marshalls look out for in caged cars is padding around the head area. Most people seem to use pipe lagging, instead I bought a couple of these FIA approved OMP pads. They’re a bit expensive for what is effectively just shaped polystyrene (£26 each) but they do fit perfectly and look better than foam lagging in my opinion.

ae6b9c6b2c7b52d83bbb5a6c122a881a.jpg


d4f24227b1974b9df735f70826baad6f.jpg


A bit of double sided tape and they click into place onto the roll bar tubing. Probably didn’t need the additional zip ties but put some on anyway.

72f15ba2e666ab51a71acd1111a6af3b.jpg


8b916e724889e74192c090e812e40aeb.jpg


37b698a2e5606ee3287b8db13aa0b514.jpg


e59e6532a7a8b3b0e7d1bd6685c04b1e.jpg


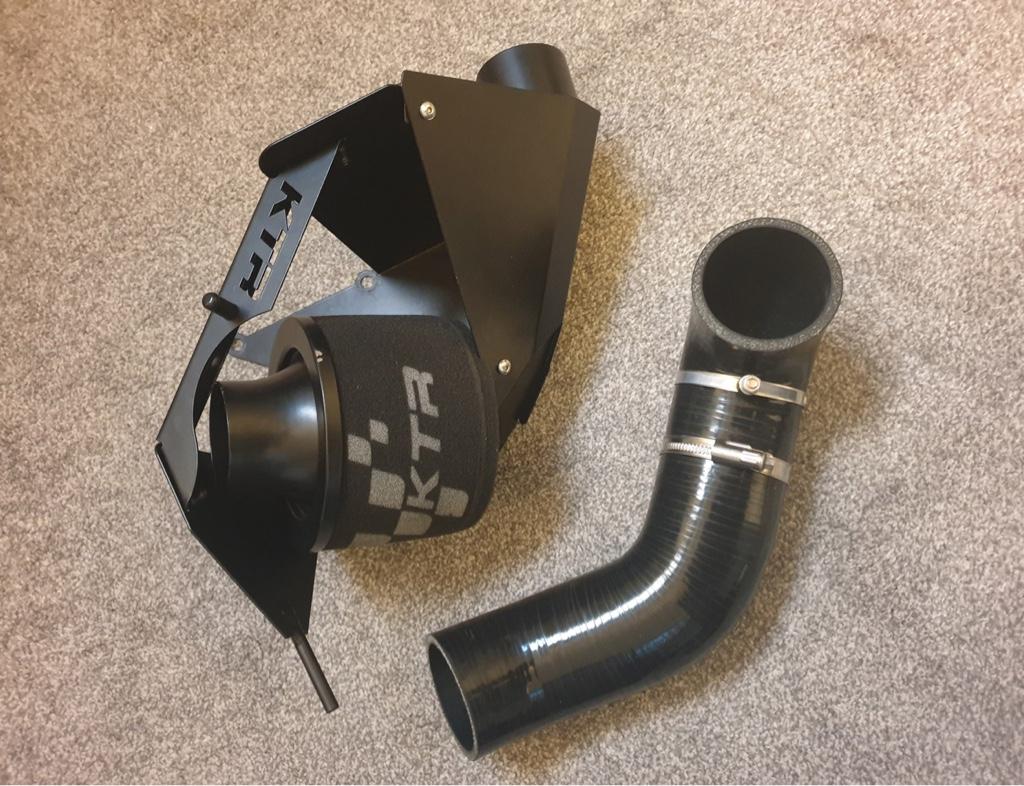
I also bought the KTR induction kit from the classifieds and fitted that this afternoon instead of the OEM airbox.

8bd91f426b960a3faf61787f674697e1.jpg


It’s pretty loud inside the cabin now with the exhaust, induction and stripped interior!

Going to give it a wash and a once over tomorrow ready for the MOT on Tuesday.


Sent from my iPhone using Tapatalk
 
Such a big oversight the padding is for most people.
It used to be a pain in my old car as my helmet rubbed on it. Certainly don’t have that issue in the Clio!
 
MOT passed today:

9FBCCBCF-66D7-4855-97E5-B3A99C99C5B5_1_105_c.jpeg

Gave it a wash to celebrate:

317E140A-C5EB-4F50-A603-AB8F04416B62_1_105_c.jpeg

I spent some time getting the bulbs into the projector headlights I've got lined up ready to go on. Got Philips LED sidelights, Philips Silvervision indicators, and 2 x 6000K HID (1 x H1 and 1 x H7). Put some old LED H7 bulbs that I had lying around in the holes for the cornering lights just as a blank. Given that the front bumper needs to come off, it might be a job for Easter weekend.
 

Similar Thread Suggestions