Albi R27 452/500 (UPDATE - 19.02.2017 - The end)

Good idea John, and yet another example of that attention to detail (or should I say OCD :wink: )

One of the best cars on here :smile:

Thanks very much [MENTION=51111]jimmyd81[/MENTION], the cars been getting quite a lot of bits done to it lately, but today finally got a bit of love and care with a wash, polish and wax. Writeup coning soon :wink:

Really like what you're doing with this! Just checked my MAP sensor and it has a lot of movement so I will definitely be adding some cable ties to that! @Jmax

Thanks again [MENTION=51033]matthewson[/MENTION], I have gone a bit over board with some of the things I've done to it, but I just can't get enough of the car lol. As for the MAP sensor, a few guys have said that the problem of the kangarooing will slowly reappear, but not as bad as it was at first.
 
Update 24.05.2015

With my attention turning to the finer details of the car I decided it was a great time to tidy up the brake calipers and touch in some of the chipped paint.

1159.jpg


1160.jpg


1161.jpg


1162.jpg


1163.jpg


1164.jpg


Time for a quick scrub getting into ever nook and cranny with a stiff toothbrush.

1165.jpg


1166.jpg


1167.jpg


1168.jpg


1169.jpg


1170.jpg


1171.jpg


The rear calipers definitely need a lot of attention.

1178.jpg


1179.jpg


1180.jpg


1181.jpg


Having cleaned the brake calipers and identified all the bit that needed retouched, it was time to pull out my trusty touchup paint.

1158.jpg


And set to work...

1173.jpg


1174.jpg


1175.jpg


1176.jpg


1196.jpg


1197.jpg


1198.jpg


1199.jpg


1200.jpg


Their all looking a lot better now, I just need to tidy up the Brembo logos on the front calipers when I get some suitable black paint and I'll be a lot happier.

Over the past week or so I've noticed the passenger side door sticking a lot. When I unlock the car everything seems to unlock apart from the passenger door.

I'm a bit worried it might be a problem with the lock, but the confusing part is if I get into the car and then open the passenger door from the inside its not an issue.

I have a feeling it might just be that the lock is sticking, so its on with a bit of grease to see if it helps things.

1177.jpg


I'll keep my fingers crossed for now.

As always, comments or tips are welcome.

John
 
Last edited:
Update 26.05.2015

A few days ago I purchased the after market Renault Sport front splitter and seeing as it was such a nice day today I thought why not get out into the sun and fit it.

1147.jpg


1148.jpg


The tools ready for the job (yes, there is a drill in there).

1149.jpg


This was by far the hardest part of removing the stock splitter, it took a lot of effort to get it removed.

1153.jpg


1154.jpg


I was so hesitant about doing this, because I knew when the holes were drilled that I would have passed the point of no return...

1155.jpg


Ahhhhhh, what have I done?

1156.jpg


A lot happier now :smile:

1157.jpg


1172.jpg


Even happier now, as I think it really completes the front end of the car.

1184.jpg


1185.jpg


1186.jpg


As always, comments are welcome.

John
 
Last edited:
Looks great!

Heart in mouth whilst drilling them holes id day :tongueout:

Thanks very much [MENTION=29138]Chris91[/MENTION]. Heart in mouth is an understatement, it was something I never thought I'd do to any car lol, but its been worth it.
 
Amazing what a massive difference just one item can make...

Yea, I wasn't always sure about the splitter when I saw it on other cars [MENTION=4553]shubz197[/MENTION], but love it now I have one lol.

nice job there..looking much better..:thumbup1: whats next to tackle??

Thanks very much @Pav. Theres loads I still want to do, although the splitter is making me think seriously about adding the side skirts too.
 
I bought my 197 with a splitter already fitted... So seeing one without a splitter used to look a bit naked at first... But then again there's always simo!
 
haha..thats right..would look good with the side skirts on..keep it going..nice work there..
 
I bought my 197 with a splitter already fitted... So seeing one without a splitter used to look a bit naked at first... But then again there's always simo!

simo?? [MENTION=4553]shubz197[/MENTION]??

haha..thats right..would look good with the side skirts on..keep it going..nice work there..

We'll see what happens [MENTION=41063]Pav[/MENTION], I know their stupid money to buy and I'm not 100% sure I like the look of them.....yet :wink:
 
Update 30.05.2015

After the nightmare dealings with the Autoglass call center and three weeks of waiting the day has arrived...

With the right screen now available for the car work started as soon as Devon the fitter arrived.

1213.jpg


What a beautiful day for fitting a new screen.

1214.jpg


It was at this point the typical Northern Irish weather struck and decided to unleash a massive hailstorm on us. So work was delayed as we maneuvered the car under the awning.

1215.jpg


Back to work.

1216.jpg


Old screen out.

1217.jpg


1218.jpg


On with the sealant.

1219.jpg


New screen prepped and ready to be fitted.

1220.jpg


1221.jpg


Hard at work...

1223.jpg


1224.jpg


Back as good as new, just needs a few hours to dry.

1225.jpg


Devon was kind enough to put the new mirror in place for me. I'd rather he used the hammer to coax it into place than me and risk another £75.

1226.jpg


Finally the screen is fitted and in the end I couldn't fault Devon and how he fitted the screen, my problem lies fair and square at the feet of Autoglass and how they really didn't seem to care about me as a customer.

As always, comments are welcome.

John
 
Last edited:
Update 31.05.2015

With Devon having fitted the new mirror for me while he was replacing the windscreen, all that was left to do was to connect up the wiring.

1226.jpg


Just need to tape if off now, so I don't get any shorts.

1227.jpg


All back in place and good to go.

1228.jpg


As always, comments are welcome.

John
 
Last edited:
Update 02.05.2015

After fitting the front splitter to the Clio I decided something just didn't look right with how the car was sitting.

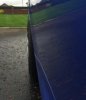
I started into the research looking at pictures of other 197s and at the start I saw an image on Instagram of a 197 sitting what I felt was perfectly, it had 15mm spacers on the front and 20mm on the rear. I did a bit of research via Clio197.net to see what everyone thought of this idea, only to be told that I really shouldn't stagger the spacers. I was told be a fellow forum member that the old cup race cars used to fit 5mm spacers up front to give extra track over the rear, so that really put me off the idea of staggering the rears more than the front anyway. The most common option seemed to be to run 20mm spacers all around with a select few option for the slightly wider 25mm. Again after some research I found that the downside of running 25mm is that your splatter your rear quarter with stones.

I was pricing spacers everywhere I could find them, from Gumtree to Renault tuners in France. In the end I stumbled across a set of second had 20mm spacers for sale on Clio197.net. The person selling the spacers had bought them, painted the edges black and then fitted them to the car, however before he even took the car out on the road, he decided he didn't like the look of the stance. I felt these were just what I was after as they were pretty much brand new.

A couple of days after the purchase they arrived, accompanied by some extended bolts...

1243.jpg


1244.jpg


Before

1237.jpg


1238.jpg


1239.jpg


1240.jpg


1241.jpg


1242.jpg


After

1339.jpg


1340.jpg


1341.jpg


1342.jpg


1343.jpg


1344.jpg


1337.jpg


1338.jpg


Fitting of the spacers probably took me the guts of an hour as it was a bit fiddly at times getting the holes lined up, but I got there in the end.

1345.jpg


I'm sure you'll agree the car is sitting a lot better now. The only thing that now tempts me is, should I lower it?

You might remember a few weeks ago I treated myself, well the car to these...

1121.jpg


Well I felt now I'd fitted the spacers and the cars really starting to take shape, that now was as good a time as any to fit them.

Before

1211.jpg


After

1212.jpg


As always, comments are welcome.

John
SaveSave
 
Last edited:
I love the stance of 20mm spacers but the potential for the side of the car being stone chipped really puts me off actually getting any! A couple of your pics show perfectly how the front wheels now stick out slightly and are perfectly lined up to throw stones and muck down the sides of the car.

attachment.php


It might actually be worth seeing if you can get some of that clear plastic protective stuff on the side skirts?
 

Attachments

  • 1.jpg
    1.jpg
    8.4 KB · Views: 290
looking better and better...dont forget that after you have fitted the spacers you will get the side of your car dirty more..maybe getting some mud flaps would be a good idea...
nice work as always mate :clap: