AG200 Rescue

Hi everyone.

Going to start a Thread on my recent pick up of an AG200 that needed some TLC.

Car was a CAT S but repairable in Sept 2019. Written off with a damaged boot lid, light & bumper. Very, very small crease next to the petrol cap which is why it was probs a CAT S. No other structural damage at all. Everything underneath and inside are perfect. 71K miles and a low 2 owner car.

MOT passed with no advisories. Quite a good MOT history to be fair.

Full service including all belts and gear box rebuild completed last week at Rensport.

I have managed to track down almost all of the history for the car which is a great result.

Pic of the damage which is very superficial.

SDOM4627.JPG

Car went to a local body shop in Sunderland for the repair.


DDZR7091.JPG


Pic of the car looked before the brake upgrade. Had quite a bit of work done by me prior to picking up on Tuesday 18th Feb. 2020.


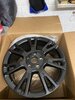
Wheels refurbished in gloss black.

H&R springs fitted.

TRC splitter fitted.

Full service inc all belts etc.

Gear box rebuild.


IMG_8256.JPG
 

Attachments

  • Avatar.JPG
    Avatar.JPG
    77.7 KB · Views: 13
  • IMG_8225.JPG
    IMG_8225.JPG
    3.2 MB · Views: 13
  • IMG_8214.JPG
    IMG_8214.JPG
    2 MB · Views: 13
  • IMG_8215.JPG
    IMG_8215.JPG
    1.9 MB · Views: 12
Made the most of a rainy Saturday and changed the door weather strips and change the air filter.

Current ones where in bad shape.

Seals removed and all glue removed etc from both sides.

IMG_8310.JPG
IMG_8315.JPG
IMG_8313.JPG
IMG_8318.JPG
IMG_8314.JPG
IMG_8319.JPG

OEM part number for reference.

IMG_8311.JPG

Took me about 45 mins to do both. They are behind the window but slot in.

Step 1 - remove the old strips by pulling out slowly from the bottom to top.

Step 2 - clean off all excess glue using glue/tar remover. I use Solvo 7063 as I had some in my garage. Use a sharp blade if required to get the glue off the window edge.

Step 3 - trial fit by pushing the seals in place behind the window. Do not remove the sticker backing. Once happy with the fit move to Step 4.

Step 4 - remove sticker backing and push fit seal behind the window. Push the seal in tight to get a good fit.

Step 5 - press down on the glass edge into the seal. Also use a thin scraper to press the seal onto the metal by placing into the slot between the window and seal.

Step 6 - ensure seals are stuck in place by pull testing.

Step 7 - close the door and check the fit is OK.

Step 8 - water test for leaks.

Hope the above helps.
 
New delivery yesterday.

TRC side skirt extensions. Will be interesting to see how these look when fitted.

IMG_E8379.JPG
IMG_E8380.JPG

The all important extra 10 BHP calliper decals to fit once I’ve repainted them.

bef57273d53e7cc65c1cd02e44da13fc.jpg
 
  • Like
Reactions: peter
Get those Speedlines on properly :grin:

I've got a couple of weather strips in the garage awaiting fitting on my AG.
 
  • Like
Reactions: Phil555
Get those Speedlines on properly :grin:

I've got a couple of weather strips in the garage awaiting fitting on my AG.

Speedline wheels will go on once the weather picks up mate. To shitty at the minute.

Hope the guide I did helps you out for fitting.
 
Good work saving the AG, looks great, splitter suits it (as most of the ones I see on 200s I hate).

Also thanks for the write up on the strips, I have also got 2 to do soon.
 
  • Like
Reactions: Phil555
Tidy. Interested to see the side skirts fitted as you don’t see many that aren’t genuine Renault
 
  • Like
Reactions: Phil555
Bit more done today.

Had an issue whereby the service light would not reset. Bit of research lead me to a dodgy indicator/light stalk wire. The red wires that connect the stalk to the wiper stalk can get worn away over time which stops the trip buttons from working.

Managed to pick up a second hand one for £25.

E3CCF562-C074-4BAA-8BC9-1BF83DEEE7BE.jpeg


Quick change over which took about 15 mins. Two screws out and cowling removed. Both stalks out.

2D64846F-03BE-4183-9EE3-6CE5400F54F3.jpeg

New one in place and all working as it should.

AEBC9FF3-8075-4661-84EF-8CED2337AE2A.jpeg

Also my OCD was kicking in as I had a boot grommet/stop missing.

3C2FDD44-2590-4760-A0FB-2CFE7CA8B25B.jpeg

10 seconds later and a new one fitted.

6195D5A1-9986-45BF-A18E-2CF834BA4663.jpeg


OEM part number for reference. Cost me £2.05 from my local dealer.

7A1458D2-20C3-4AB0-9DD4-C9A7D43469F2.jpeg


Jobs done so gave the car a quick bath to get the salt off.

AFAD2769-6F8F-4CB8-8643-81BC96C30CDD.jpeg
 

Attachments

  • B99F6238-89E9-453E-829E-EBCFED20F338.jpeg
    B99F6238-89E9-453E-829E-EBCFED20F338.jpeg
    3.2 MB · Views: 12
New parts delivered today. Brand new Recaro seat base for the drivers side. Picked up for a great price fro Gus on the Clio Sport forum. New bulbs to shout and swear at when trying to change.
C4C2B522-01EE-45F6-B2E6-C7874C1C4A7A.jpeg

Seat OEM part number for reference.

AA8C10BC-CDE9-4FFF-B6E3-67014A752490.jpeg

Also changed the dodgy boot switch. I can now get in the boot. Another 2 minute nod.

26F5B33A-4C37-42B0-B26F-99E060198DCD.jpeg
 
Bit more done today.

Had a blown headlight bulb so changed the lot on both sides.

Has to be the worst car ever made for changing bulbs. 1.5hrs later, after dropping the covers in the sump guard and after at leats 1,000 swear words they’re in.

Removed the washer bottle filler neck for the drivers side and this part (not sure what it is) but made it easier to get to the passenger side bulbs.

8463C064-9F17-48A8-B7C0-7FDC5CFCEBFB.jpeg
3A631C49-25F7-46F2-8208-165FA170145B.jpeg

Trip out to a local tint company called Utopia Tints.
Went for the full on limo tint on the rears.

B11D045F-D404-4BF6-A496-7FBE7BA4A7E7.jpeg
8550801F-0C8D-46B8-9CA2-BE45BA8573B5.jpeg
59AEF173-DBE7-4903-8BAF-7E37549815A3.jpeg
91420987-6D91-4628-8181-054A485210A8.jpeg
2B7BC5D8-2617-4346-8146-BA552094DB3A.jpeg
9AC7132F-6534-44A6-B77E-8C68D6781951.jpeg

Few more jobs planned for tomorrow. Weather permitting.

Cup spoiler (if ready).
TRC side skirt extensions.
Recaro seat base your change.
 
Going to give these a try. Std washer jets are poor a rear that these give a good spray. Little bit of modification required but should improve the spray.

25033E15-31E4-444D-83ED-248B04E74CB6.jpeg
 
  • Like
Reactions: lewishunter98
Very productive Sunday on the AG200.

Managed to get the C3 washer jets fitted. Took all of 10 mins.

IMG_8436.JPG
IMG_8437.JPG
IMG_8440.JPG

Slight mod to the jet by cutting a plastic section off. Made sure the rubber seal was taken off.

IMG_8442.JPG

Fitted in place with a little bit of gentle pushing. The spray coverage is 100% better.

IMG_8444.JPG
IMG_8447.JPG
 

Similar Thread Suggestions

Thread starter Similar threads Forum Replies Date
Mossy Clio 200 Area 12
Northloopcup Projects/Progress Threads 81
A Spotted 2
Paul Spotted 0
Rogue Spotted 0