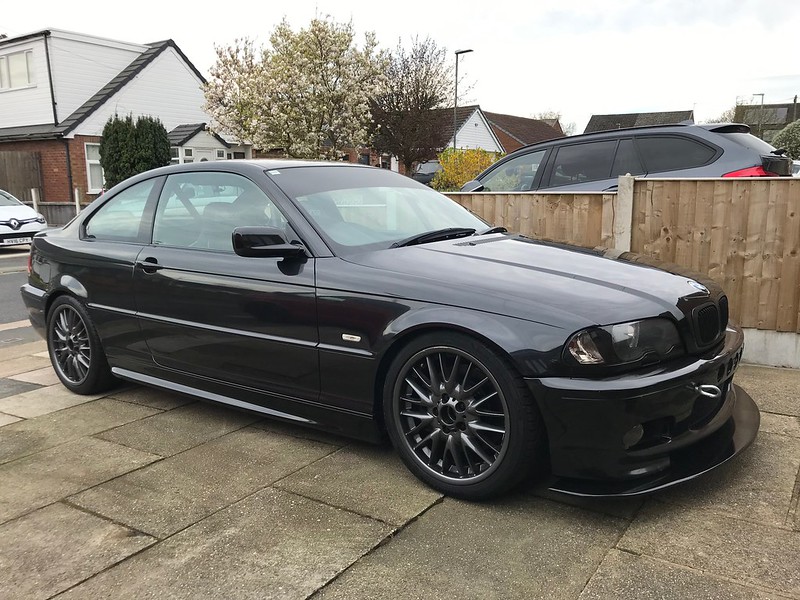
Albi Blue 200 >> BMW E46 Track Car

Progress to finish off the last few jobs...

Waiting for it to stop raining between storms has meant for slow progress but slow progress is better than no progress.

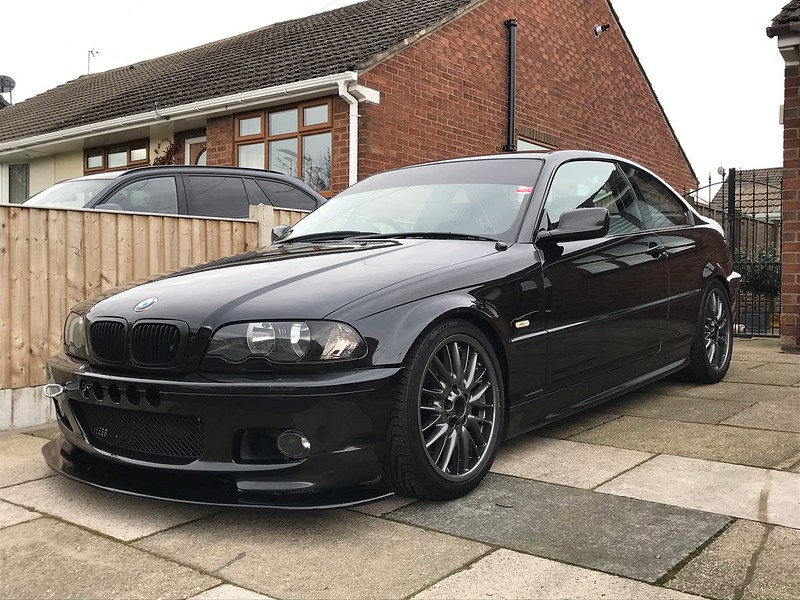
Got the splitter mounted up to the chassis mounts and bolted to the subframe.

49523093971_37f2f5887a_c.jpg

Little bit bigger than the previous version, should just be enough clearance to pop it on a trailer with the XL ramps and low Brian James trailer

49562224786_731d725bca_c.jpg

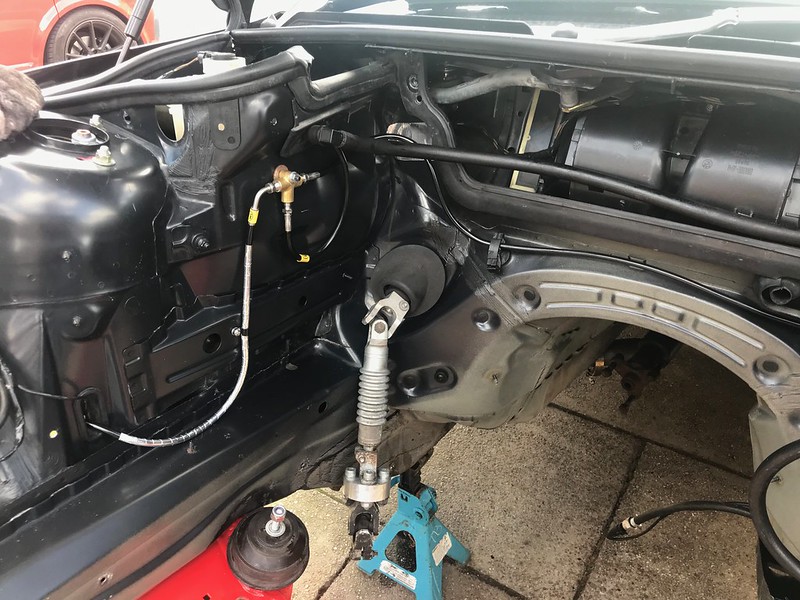
Fitted a set of replacement front lines I picked up in the sales in the new year. Every line was replaced when the car was built except the front lines as these were already braided lines, but over the last 6 months I've had the niggling feeling I should replace these for peace of mind as their age and previous use it a bit of an unknown

49184316568_031b663909_c.jpg

Also replaced the air cooling ducts. This ducting is dual layer, making it a bit thicker and more durable. Ripped both of the front ducts off when I came off at Oulton in December. They ripped cleanly off so I've fitted these in the same way in case the same happens again at some point.

Still a few bits of mud lurking on the car. Will get another wash before it goes out again to remove a couple of bits I've spotted while working on it.
49562267236_325cdccbeb_c.jpg

Gave the brakes a bleed before putting the car back on it's wheels and a quick hoover to remove some of the dust off the seats from getting in and out.

Need to get out and test the car somewhere soon. Going to have a look if there is any cheap or weekend days at Anglesey during March. With the aim to get the car reliable again, confident in the new diff and then continue to use it this year.
Not the most exciting of updates but brings the thread up to date.
 
Progress to finish off the last few jobs...

Waiting for it to stop raining between storms has meant for slow progress but slow progress is better than no progress.

Got the splitter mounted up to the chassis mounts and bolted to the subframe.

View attachment 138427

Little bit bigger than the previous version, should just be enough clearance to pop it on a trailer with the XL ramps and low Brian James trailer

View attachment 138428

Fitted a set of replacement front lines I picked up in the sales in the new year. Every line was replaced when the car was built except the front lines as these were already braided lines, but over the last 6 months I've had the niggling feeling I should replace these for peace of mind as their age and previous use it a bit of an unknown

View attachment 138429

Also replaced the air cooling ducts. This ducting is dual layer, making it a bit thicker and more durable. Ripped both of the front ducts off when I came off at Oulton in December. They ripped cleanly off so I've fitted these in the same way in case the same happens again at some point.

Still a few bits of mud lurking on the car. Will get another wash before it goes out again to remove a couple of bits I've spotted while working on it.
View attachment 138430

Gave the brakes a bleed before putting the car back on it's wheels and a quick hoover to remove some of the dust off the seats from getting in and out.

Need to get out and test the car somewhere soon. Going to have a look if there is any cheap or weekend days at Anglesey during March. With the aim to get the car reliable again, confident in the new diff and then continue to use it this year.
Not the most exciting of updates but brings the thread up to date.
Get yourself over to Cadwell on the 14th mate. Shouldn’t be too hot this time!
 
  • Like
Reactions: Beany
Another month brings another update.
This time, very little in the way of modifications and actually some use of the car.

Wanted to try and get some miles on the car as it's not been out since the beginning of December. Wanting to find a weekend track day due to the start of the racing season the dates were few and far between, had the option of Oulton Park on the 7th March or Cadwell on the 15th. Decided to go with the local option as it meant I didn't have to drag the car and trailer to the other side of the country being the first test of a few changes as well as the fact Cadwell isn't the best circuit for winter track days.

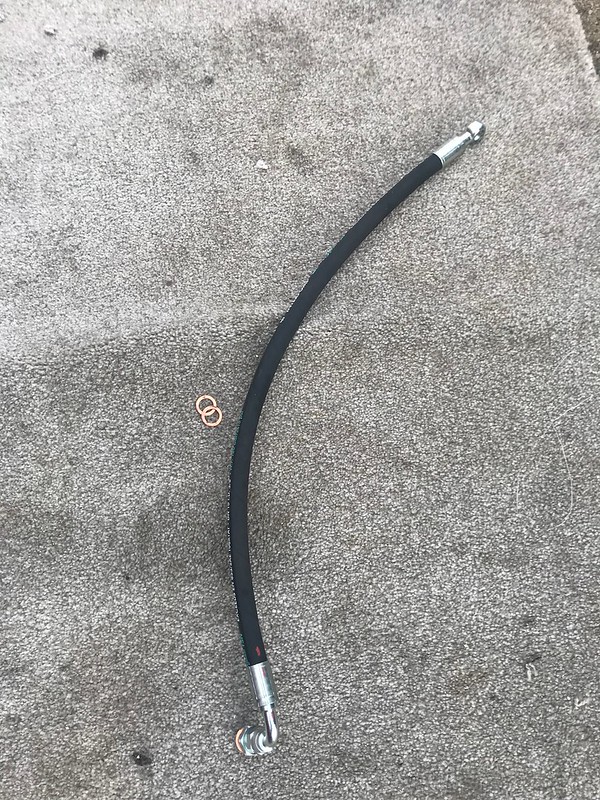
Before that though I had a couple of jobs I wanted to finish, one being a bit of preventative maintenance, even though this car had a new power steering set of lines and pump in around 2012 from a BMW dealer the lines were looking a little crusty. I had already replaced one of them when I fitted the PAS cooler but the high pressure line from the pump to the rack was looking a bit rusty and would no doubt fail at some point. Replacements from BMW are well over £100 and pushing towards £150 but a new line from a hydraulics place was £35 made with the correct high pressure fittings and lines.

Stuck with the Banjo fitting on the rack which is M14 and fitted a M16 - AN adaptor at the pump end. Nice short and direct hose, hopefully one let thing that can fail in the future.
49645242843_c02e8f9877_c.jpg


Saturday 7th March.
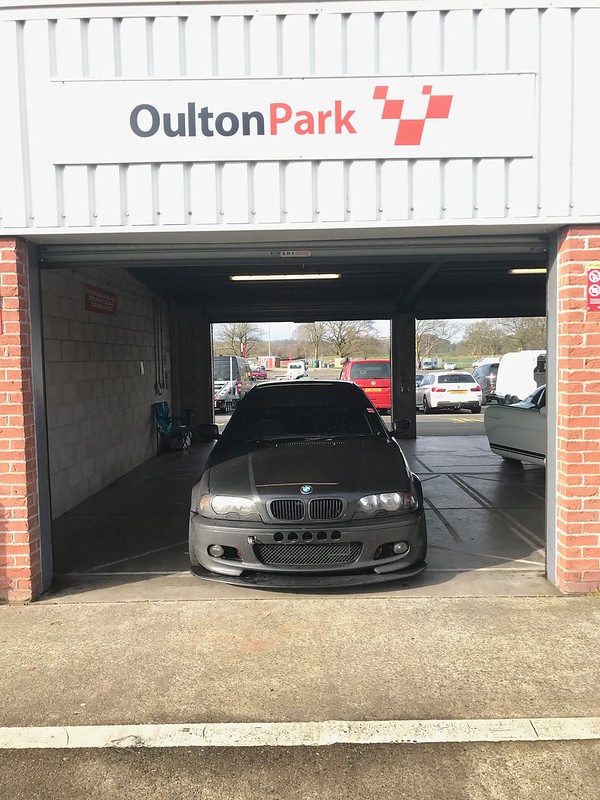
Turned up at Oulton as usual about 7 o'clock and set about unloading the car from the trailer and doing a couple of checks to make sure everything is spot on, coolant, oil, power steering fluid all where I wanted them to be. Suspension settings set to where I left them from Oulton in December with the exception of softening off the rear as since i'd moved to softer springs I could see the rear end skipping and bogging on some bumps from the last track day so brought the damping back to match the spring rate. Tyre pressures set at 28PSI cold and the car was ready to go.

Sadly damp roads and a little bit of rain on the way down there on the trailer meant the car was already dirty before it made it out on circuit.
49646053847_0f26b387d8_c.jpg


Sighting laps out of the way, I then got the car noise tested, 5000rpm the car was 99db, slightly louder with the pops but they ignored that. Well under the 105db static but the car gets louder each track day as the silencers get more and more use.

First sessions from the morning took a little bit of getting used to, the car felt great, setup felt really balanced, but the shorter final drive at 3.73 took a little bit of getting used to, car felt much more alive to drive with the shorter gearing but it required more changes to 5th on the straights which obviously meant more shifts back down the box for the corners through heavy braking areas. Took a little getting used to. Stuck to doing 20 minute sessions through the day and clocked up 70 miles on track by 12 oclock. I'd been taking it reasonably easy through the morning getting used to the gearing, making a couple of minor suspension tweaks and adjusting tyre pressures but mainly just enjoying lapping and driving the car.

49645768121_686cd401b7_c.jpg


In the afternoon a couple of friends came down the join me and wanted to do some laps in the car as a passenger. Afternoon sessions were a little longer getting towards 30 minute sessions, was able to find a groove and put together some really good back to back consistent laps as the track was so quiet with so few interruptions from red or yellow flags it was perfect, bone dry and quiet track time.

Here's a video from one of the sessions, put together 3 laps back to back all withing 0.5 of a second of each other. plenty of time to be found and improvements to make to my driving but at least they're consistent. Feel like my driving it improving the more time I spend behind the wheel of a RWD car.


Second video from the afternoon sessions, mainly showing the MX5 race car which decided to fly up my backside through the first corner after catching me up only due to the fact I'd got caught up behind the Ferarri on the previous straight. Ended up putting himself into the wall, not sure what happened with the car as it exited stage left rapidly, driver error or badly set up car. You can see for yourself.
Had planned on letting him through after the pit exit bleed line as he was pretty quick in the corners.


Other points from the day...
Back in the summer I ran out of fuel at Cadwell with 30L in the tank - Managed to run down to the petrol light coming on now with ~11L in the tank without any loss of fuel pressure to the rail. Massive improvement with the swirl pot fitted - Having a fuel pressure at the rail on the logger is really good for monitoring this. I now know i an use a full tank of fuel without issues.

Opted to stick with the softer compression/rebound suspension setting in the rear to compliment the softer spring I am running now. This removed the hopping and skipping which I was finding happening on corner exits which I thought was down to too slow rebound, appears my thoughts on that were correct.
The car has never felt so good and planted coming out of corners, able to get on the power much sooner with more throttle now without it sliding, the car just squats on the rear now and drives you out of the corners with a slight rotation rather than a slide and any smaller slides are much more controlled as you will see from the videos.

Still feel like the brakes are lacking when trying to balance braking and heal toeing. Back in December I did faster lap time breaking into the 2:03's when I was focusing on braking and not rev matching as I could brake later and harder with my foot solely on the brake pedal. Something I'm continuing to work on before the next track day which is slightly adjust the pivot point on the brake pedal to give slightly more force to the master cylinder with the same pedal effort at the sacrifice of a slightly longer pedal, but I can adjust the bite point to be in the same location anyway.

Also planning on fitting pressure sensors to the front and rear circuits of the brakes to be able to log brake pressures front and rear. I'm really interested to see what the line pressures are with the standard MC and brake proportioning valve and see how it's all working. Not too difficult of a job to swap the T pieces over and add a few more lines of code to the Arduino logger.


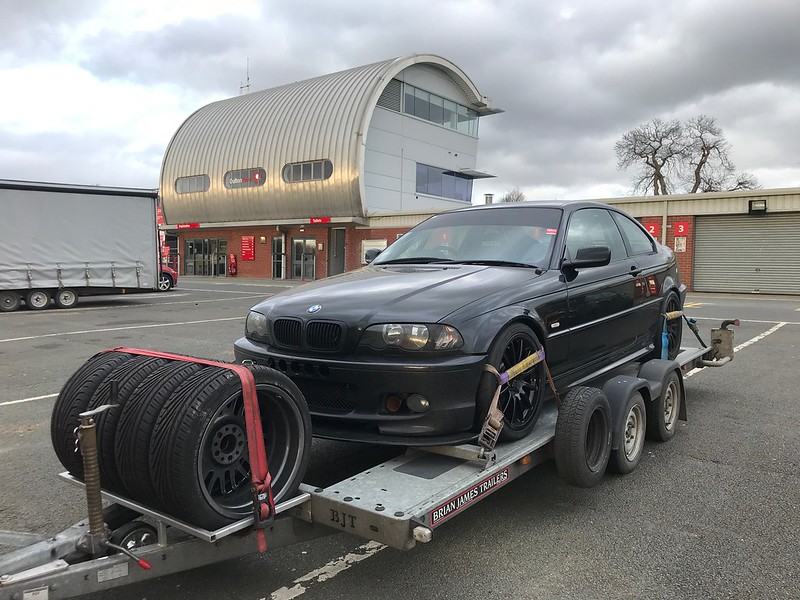
4:45 - Car all loaded up on the trailer, wet wheels still strapped in the tyre rack thankfully not having to use them this weekend. Really happy with how the car is at the moment, obviously there is more changes in the pipeline. There's no fun in leaving it the same, part of the fun is always looking at new ideas and finding things to develop for next time.

49646053972_6a8c9133b6_c.jpg
 
Update - March 2020

I was going to wait a little longer and make some more progress on things before posting the next update. But with half of the world being off work I thought I would post up on here and give people something to look at.
First job on the list at the moment was to add in the sensors I've been threatening to add for a while into the Arduino logger so I can monitor what the brakes are actually doing.

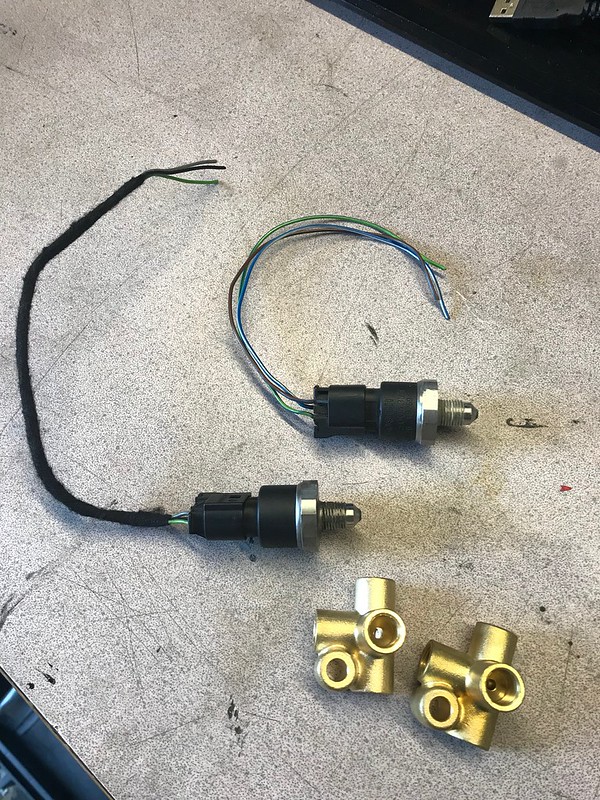
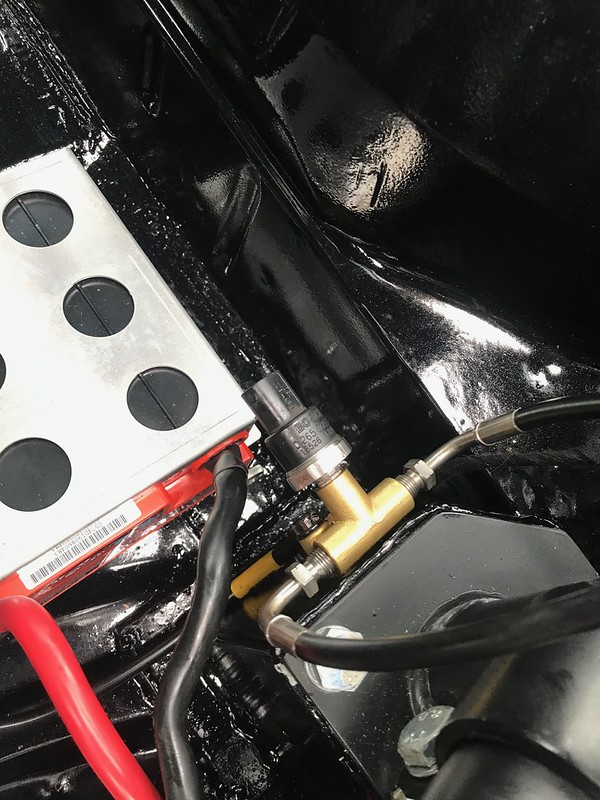
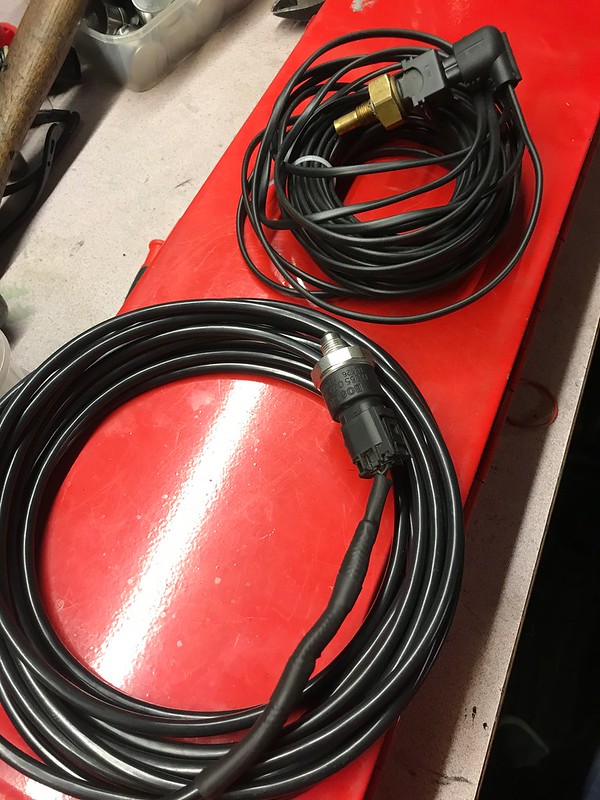
Started off with some Bosch sensors from the master cylinder of an E46 i'd taken from a scapped car last year, I'd cut off the plugs so I could make my own wiring loom to them, these are brake pressure sensors rated to over 3000psi, the plan is to add them into the brake circuits using a 4 way T-piece

49688618437_7a4a480411_c.jpg


Added one of them into the rear circuit in the T piece for the rear lines
49688314096_a72781a244_c.jpg


I was going to tap into the front lines in the engine bay but decided to utilise the two sensors on the master cylinder which gives me the ability to monitor the brake system in 3 places, Front circuit, Rear circuit prior to the proportioning valve and post proportioning valve.
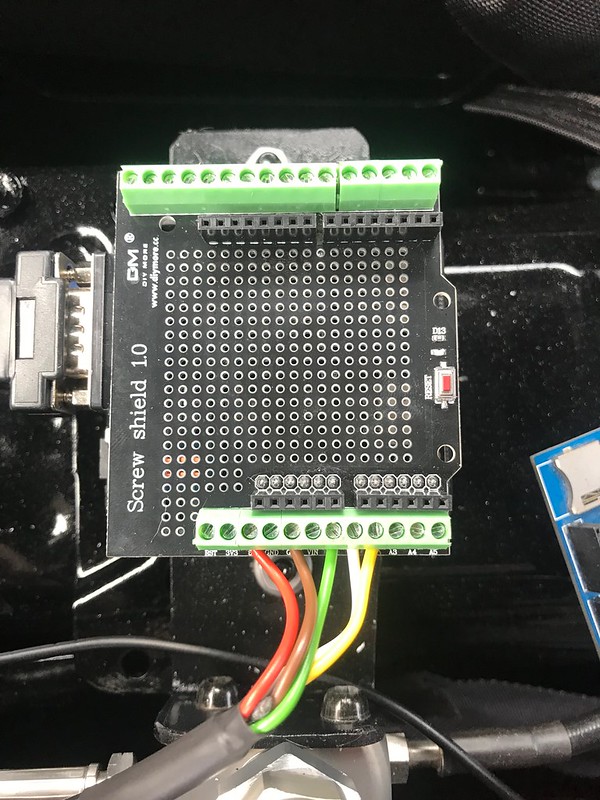
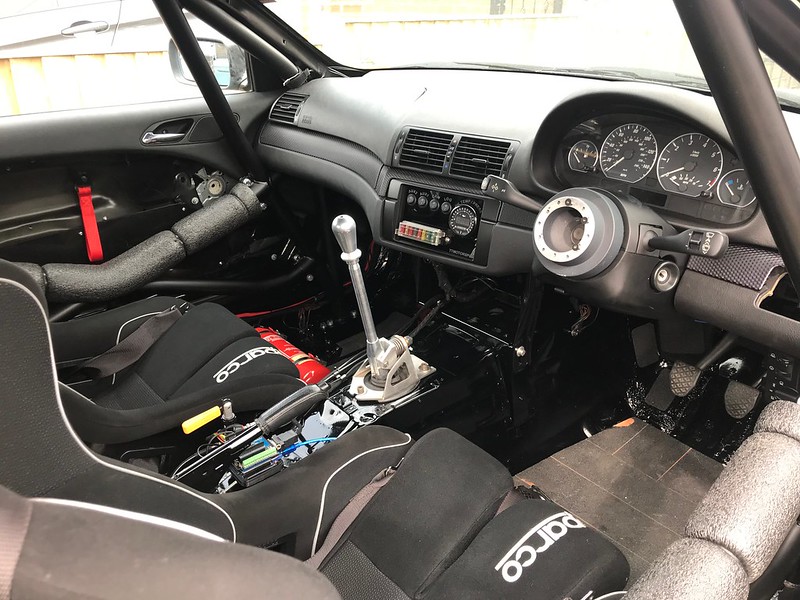
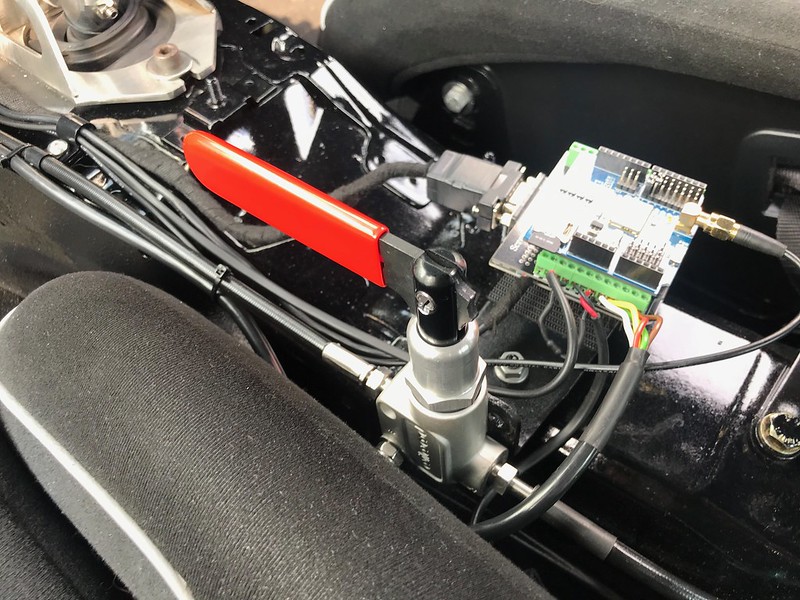
With the sensors fitted I had to add the additional sensor wires into the car, I've done this by running 3 core cables to all the sensors including the fuel pressure sensor I already had running to the logger, I ran all these sensors from various locations to a box under the dash to keep it nice and tidy and ran a multicore cable from the box to the logger with a common power and ground for the sensors and the signal wires keeping it all tidy inside on piece wire. This goes to the breakout board on top of the arduino and canbus shield with the GPS board sitting on top of this
49687824088_2e7f85d4fd_c.jpg


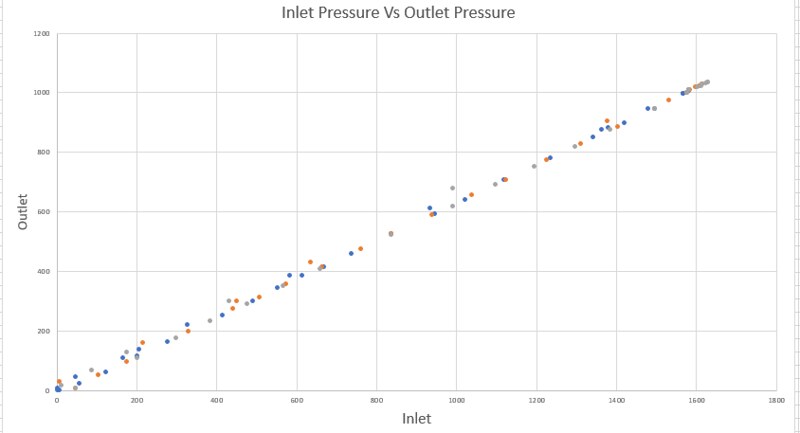
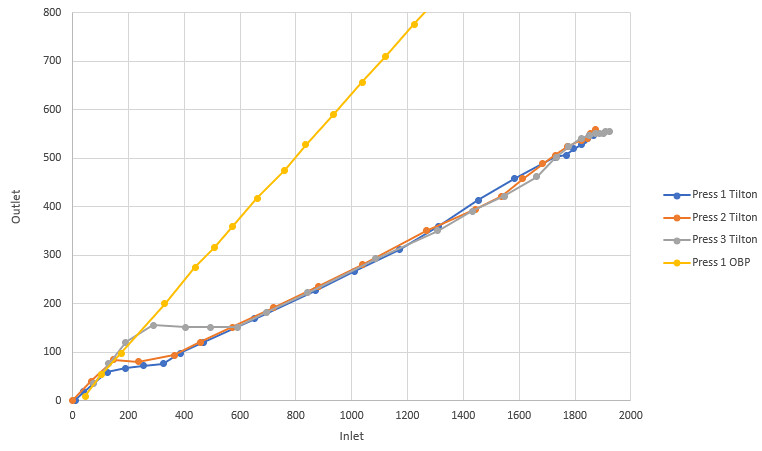
I was then able to log the pressures pre and post the OBP Proportioning valve to see what effect it was having on the brakes... This graph shows 3 pedal applications with the valve set at 3 different positions... Shows no change from the valve despite it being tested at both ends of it's range
Also looking at the gradient of the line it was only giving a pressure drop in the line of 37% across the proportioning valve

49688610752_a28a79c359_c.jpg


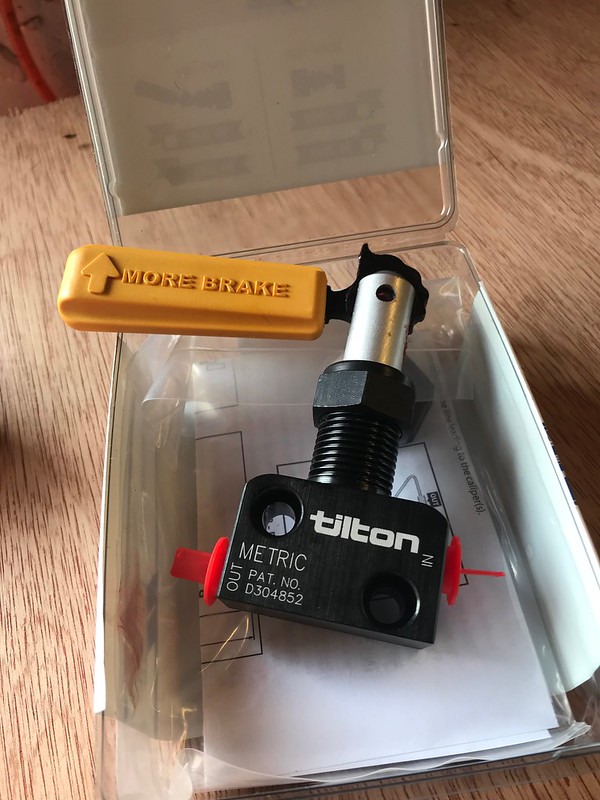
Decided to change the valve and do some more testing. Ordered a Tilton Valve which was a bolt in solution for my lines as well as the mounting bracket I have on the exhaust tunnel

49688536432_32e16e94c7_c.jpg


You can see a dramatic drop in the rear line pressure on the graph below comparing the cheap OBP item with the Tilton. At this point I was only testing 3 places in the levers travel, Position 1 - Min rear brake, position 3 and position 7.

49688535932_6a022f8c8c_c.jpg


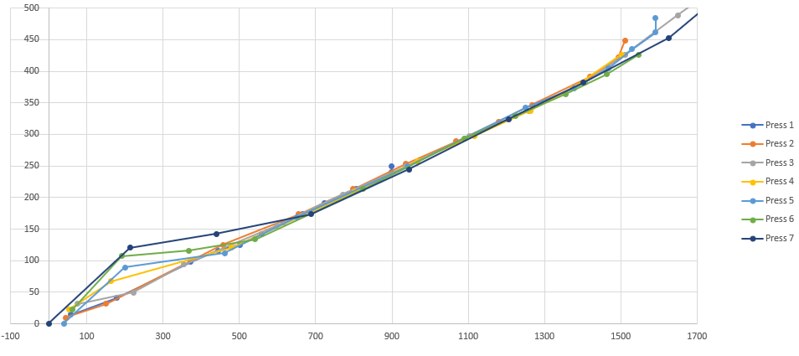
I also did some logger of all 7 positions of the Tilton Valve, interesting to see here when comparing the pressure drop across the valve it only appears to effect the initial application of the brake and then all positions go to a fixed proportion of 3:1, this is actually different data to how Tilton explain it in their technical information so I've sent them an email with the data. See what they say.

49688230066_26449c4dc8_c.jpg


Anyway with this additional reduction of pressure to the rear brakes I can now run some proper rear pads. i'll be refitted the Carbon Lorraine RC5 rear pads i've had for two years in the spares box and never been able to use them. This was something I need to sort as even though the brakes were good at Oulton due to me running a cheap brembo pad I had chewed through them in a full track day,


More to come on this as I keep working through it.

Big news

I've been doing some online shopping and bought something I never thought I would ever consider never even mind buying!

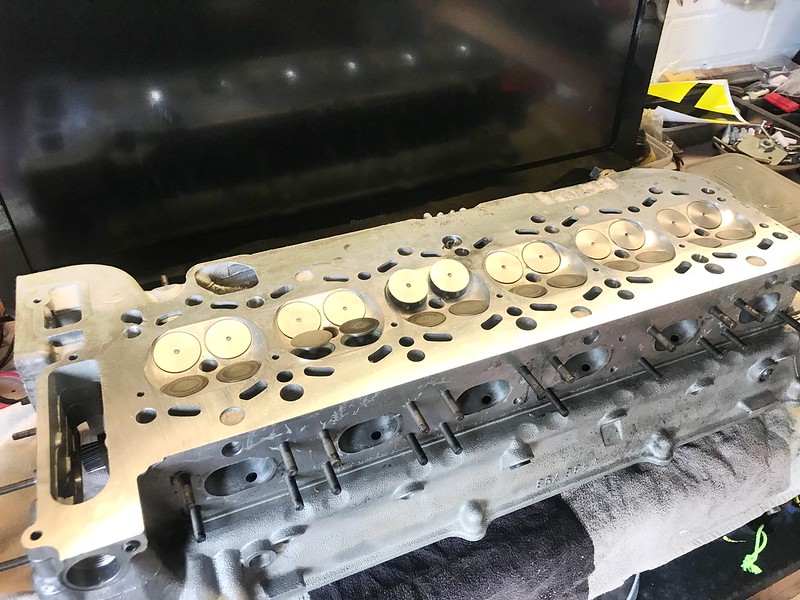
-M54 CNC Ported and polished head
-Schrick 272 10.9mm lift Inlet cam
-Schrick 256 10.4mm lift ext cam
-Vac Motorsport Dual spring kit, spring and retainers
-Single piece valves
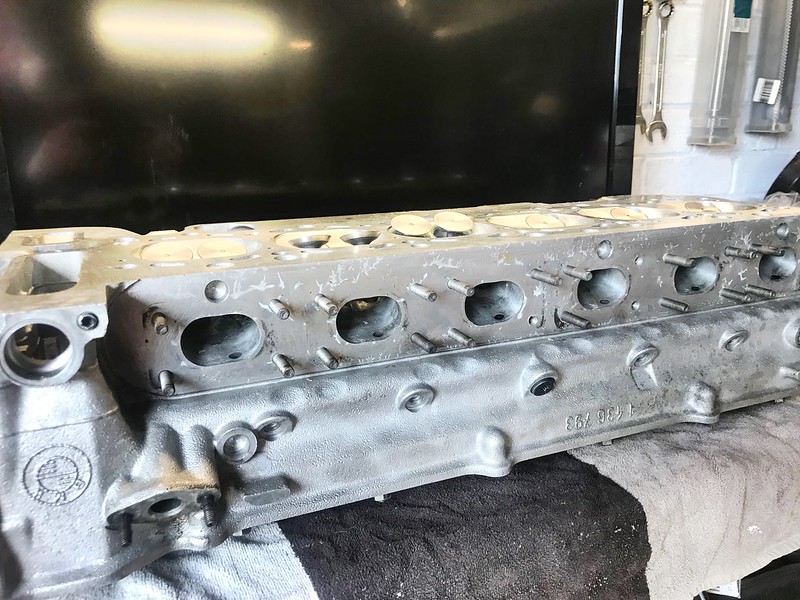
-Exhaust side of the head has been opened up to suit the S50 manifolds I run.
-Exhaust side has been drilled and tapped so no longer need adaptor plates to run the S50 manifolds

The head has been rebuilt in 2019 with paperwork for pressure testing, skimming and rebuilding with new seals.

49688313941_78c58578cf_c.jpg


49688314386_2e6be2ac22_c.jpg


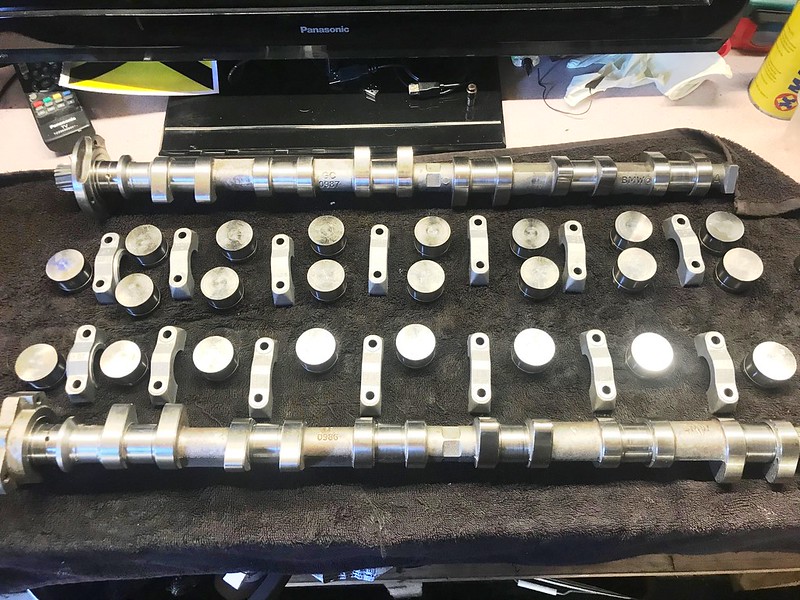
First job was to take the head apart and give it a good checking over, cams and lifters/tappets removed

49687781703_6e607e086a_c.jpg


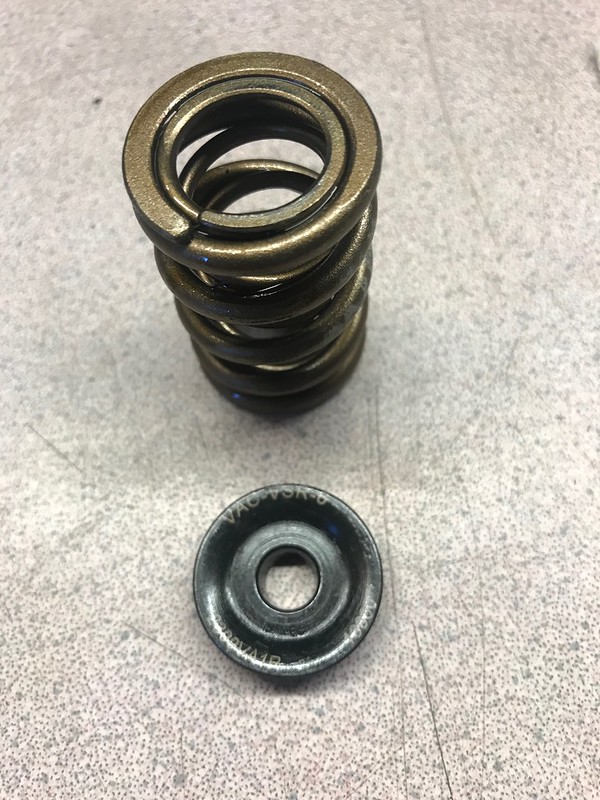
The Vac springs and retainers

49688313851_fc5722410d_c.jpg


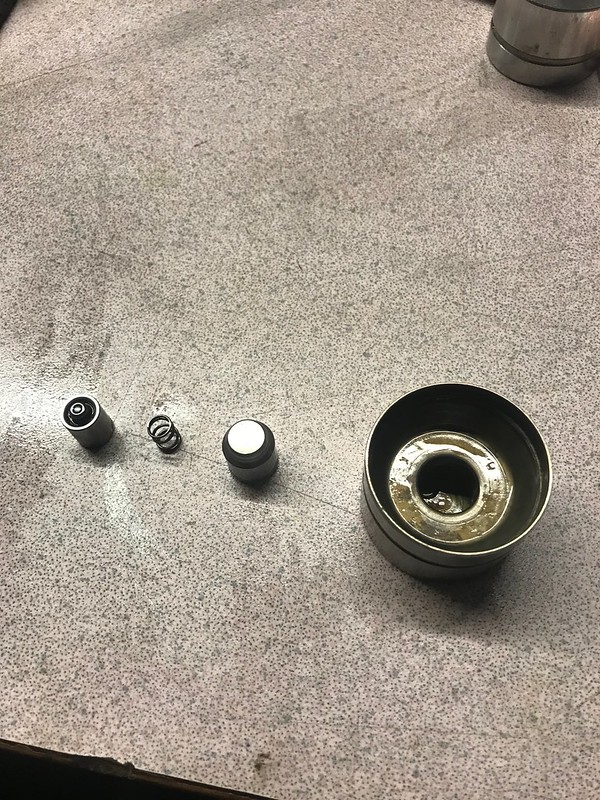
A couple of lifters had stuck down with the head being sat for a while so they have been pulled open and cleaned up. Back to working fully now

49688618392_0122410670_c.jpg


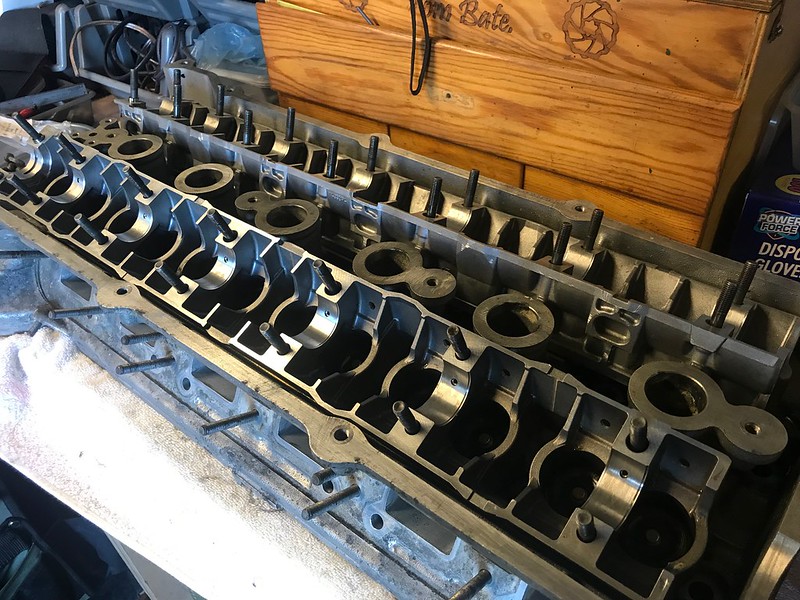
Cam trays removed and put through the parts washing with everything else making sure it's all clean ready to go back together
49688314391_81f019f937_c.jpg


Waiting on a couple of bits then i'll start to put this together, unsure on how quickly this will progress as i have got a few track days booked between now and June but I don't think any of them will be taking place now. Need to remove the engine at some point and get that stripped, cleaned and machined before rebuilding, I already have a lot of the key parts to put this next engine together, Vac Motorsport oil pump, APR rod bolts, a spare set of King Racing Big end bearings. Planning on using a set of head studs rather then the standard BMW head bolts with the block being aluminium. But for now that's us up to date for the moment.
 
Last edited:
Awesome work @tombate911, very clever. Love what you are doing with all the data logging.

Will this new brake pressure data be able to overlayed over your onboard videos?

Also, any plans to go to Snetterton soon?
 
Awesome work @tombate911, very clever. Love what you are doing with all the data logging.

Will this new brake pressure data be able to overlayed over your onboard videos?

Also, any plans to go to Snetterton soon?

Cheers, keep trying to develop it step by step, not changing too much all in one go and learning new things as I progress. Will be adding a couple of bar graphs with the brake pressure in PSI to the overlays. Similar to what I use for brake and throttle now.

Was supposed to be going to Snetterton at Easter weekend but sadly that isn't going to go ahead soon. Not been there since 2017 in the Clio so would love to get back there.

Throwback!!

33986787992_655937f11e_c.jpg
 
  • Like
Reactions: Sean197 and Beany
Update

So at the moment I'm working from home and have two weeks off as well so plenty of time to do a few little jobs and pass some time too.

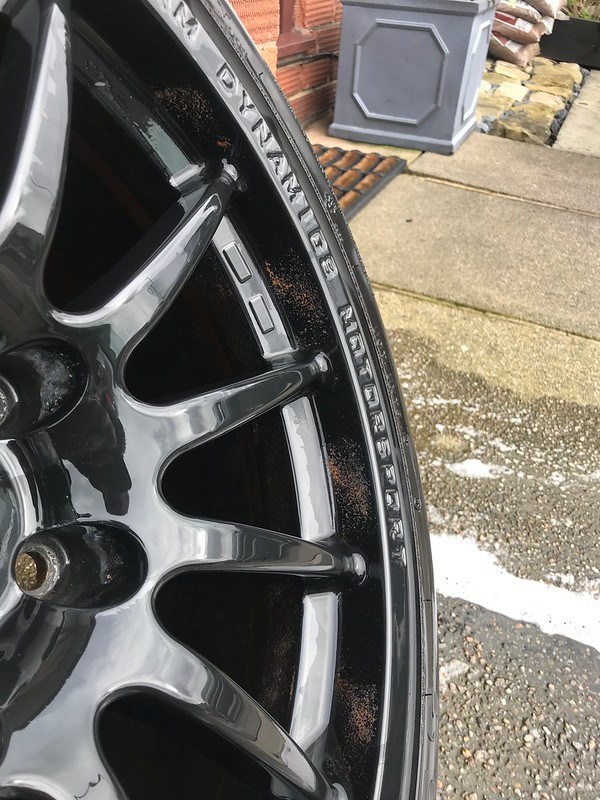
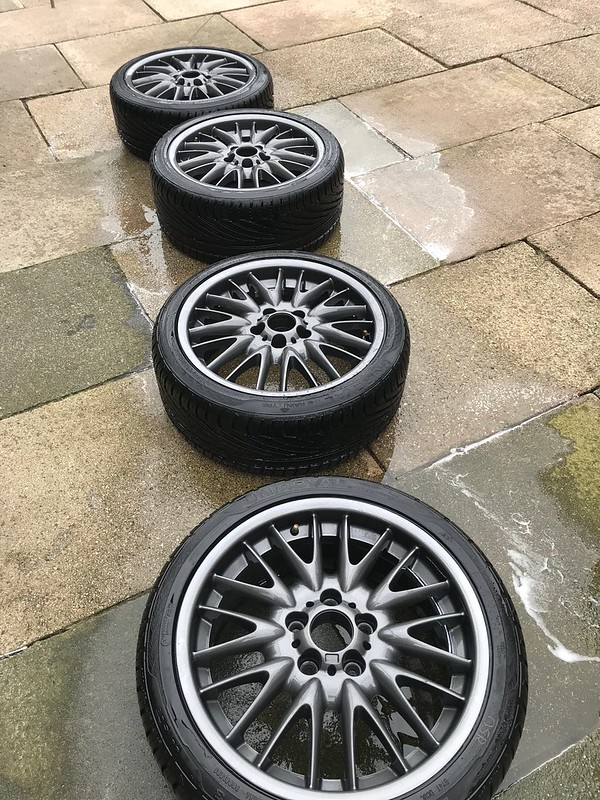
First job on the list was to try and tidy up the wheels, they were a mess from the last track day in March, mainly the rears where I was running the cheap brembo pads, between each of the spokes and all the the inner dish of the wheel was covered in metal particles from the brake pads.


49735678973_d68449fce9_c.jpg


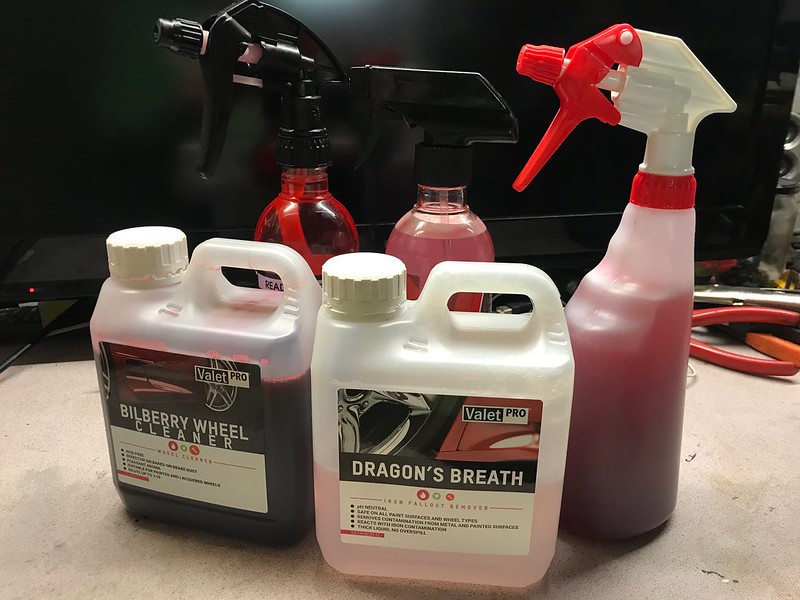
My usual wheel cleaner wasn't shifting it so invested in some different wheel cleaner as well as from fall out remover.

49736219281_c6d268b166_c.jpg


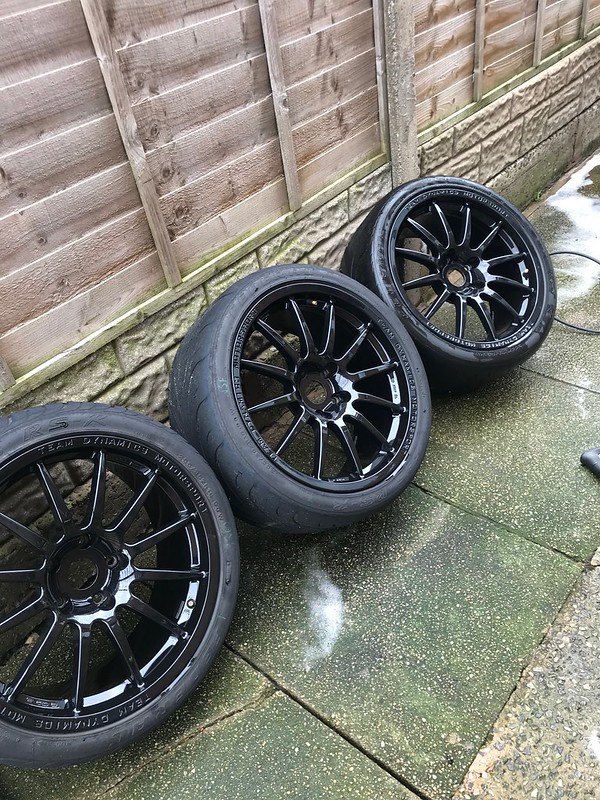
Spent Saturday afternoon cleaning the wheels, it took a good two hours of soaking, scrubbing and jet washing to get the wheels back to looking like new again, I then gave them a polished and resealed them ready for when they go back on again, hopefully being able to change the pads with the new proportioning valve will cut down on this as the RC6's aren't too heavy on dust and wear

49736550647_cfa413f74f_c.jpg


Gave the wet wheels the same treatment.
49735679123_b19d9ced83_c.jpg


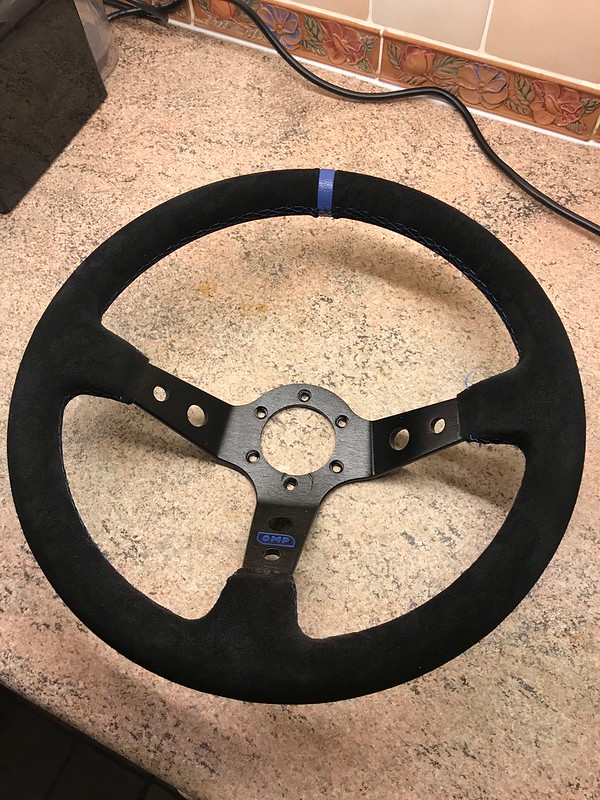
Took the steering wheel off to give it a good scrub and a tidy up, It has started to fade in the sun so may look at getting some dye to bring it back to black
49736219446_939c498e96_c.jpg


While the car was on axle stands for the weekend sorting out the wheels it was a perfect chance to do a few more little jobs.
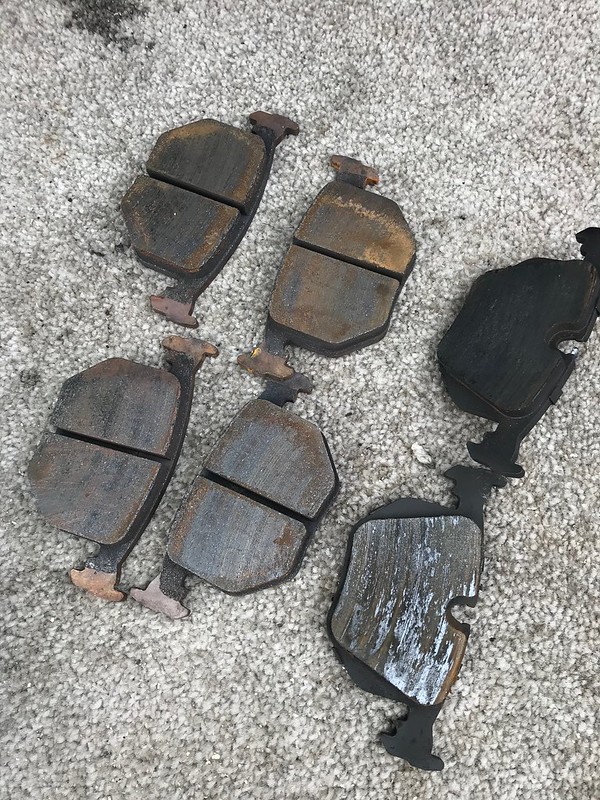
Swapped the rear brembo pads out for the spare set of RC5's. No fun going through half a set of brembos on a track day and the dust from the cheap pads is terrible. Back to the RC5's now I've got the Tilton proportioning valve in
49736219511_abe6ab07ba_c.jpg


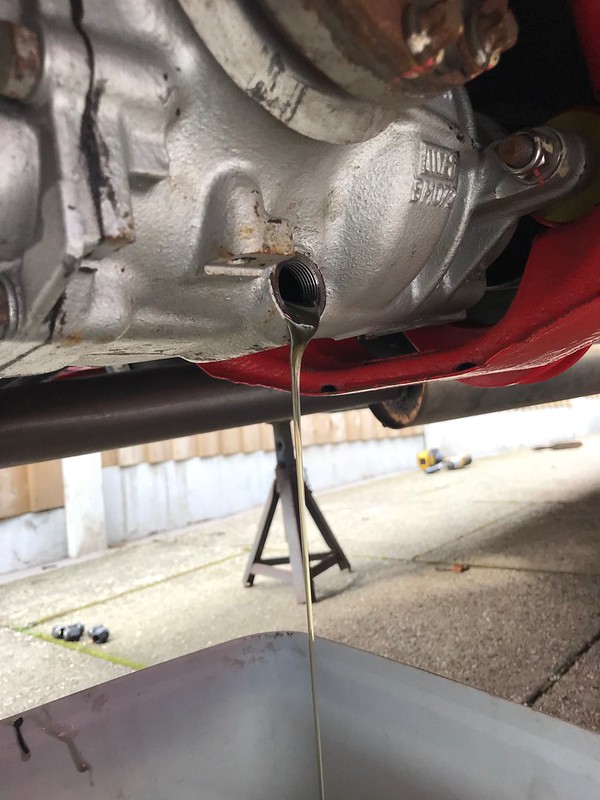
Dropped the diff oil out of the diff, this was the freshly built diff with the 3.73 final drive in. Wanted to check the oil to give an indication everything was ok.
49736550432_021edce895_c.jpg


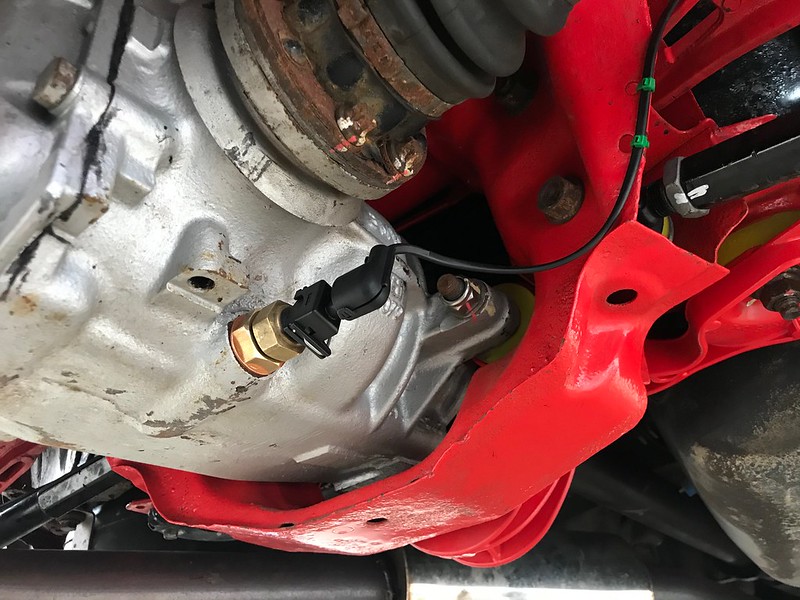
However the main reason for dropping the diff oil was so that I could fit a temperature sensor, this has been a job that i've wanted to do for ages, I know a few people running diff cooling set ups on E36/E46 and a conversion with company that builds race cars especially E46's said they had experienced high diff temps not only with plated diffs but with helical diffs. Only way to find out is to monitor the diff temp myself.
Diff temperature sensor fitted and the wiring ran up along the diff cradle and into the brake line holders on the underside of the boot floor before entering the cabin with the brake lines.
49736550447_f6fd0096f6_c.jpg


Did a little more wiring, one wire for the rear diff temp sensor above, another for an additional fuel pressure sensor for the swirl pot so I can keep an eye on what that's doing. Another reason for this Is the current fuel system is running about 64psi at the rail which is about 10psi too high. The standard ECU copes with it fine with the fuel trims and the AFR's are solid on the dyno but it's something i'm looking into at the moment... Pressure in the swirl pot is 10PSI so there's no problem there so will swap the fuel pressure regulator this week and see how it goes from there.
Ended up swapping the fuel rail from a 328 fuel rail to the M50 fuel rail as the regulator from the M50 was a slightly different diameter and with the old seals it wouldn't seal correctly. But with the M50 rail on there 50psi. Going to replace the regulator in the 328 rail as that is pointing towards the higher fuel pressure.

49718087851_0e9d235dee_c.jpg


Gave the interior a good clean, blowing out any dust with the compressor and giving it a hoover and wipe down
49739371132_d5dee52e90_c.jpg


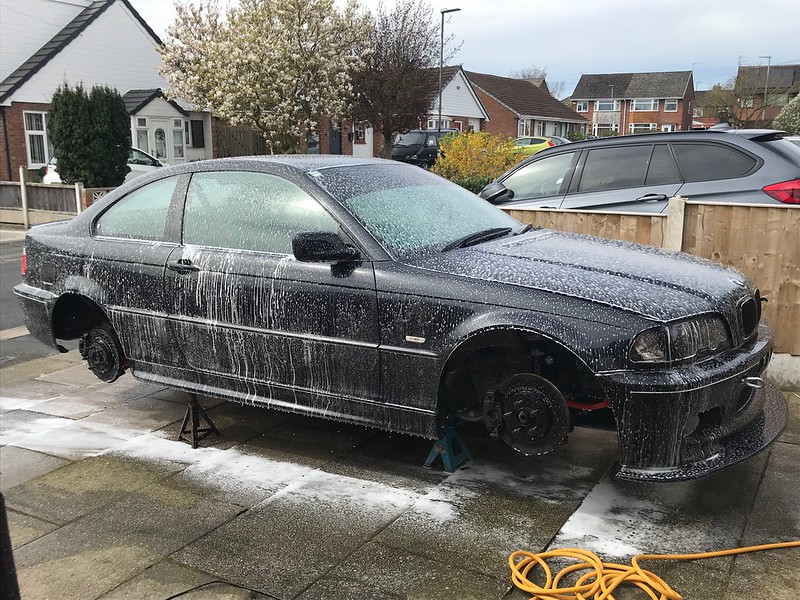
Hasn't moved off the drive since it was washed after the last track day but I thought it wouldn't harm to be washed again this weekend
49739371272_33cd3b7e98_c.jpg


Gave the car a coat of wax to try and keep it clean between washes, also moved the splitter back a little and to the side to make sure it was central with the car
49739371282_269658b3f7_c.jpg


That is pretty much it now until it goes out in the future, just need to swap the fuel pressure reg over one evening and test the rail pressure
49739047611_8ed2e09ed8_c.jpg


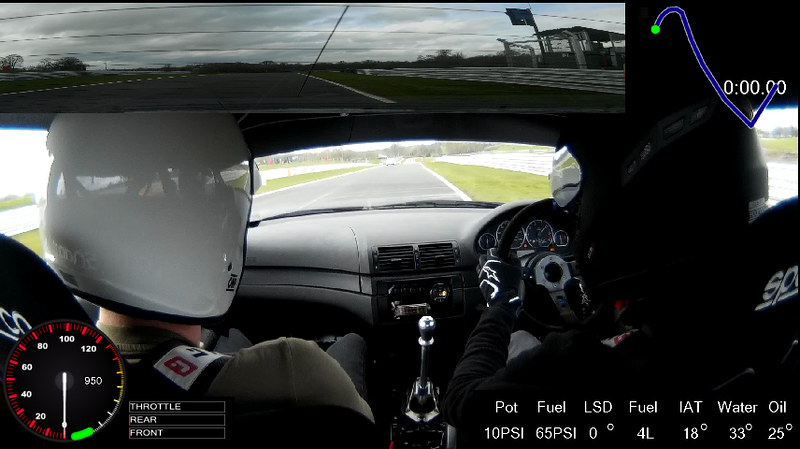
Last job this week has been to adjust the overlay for the Data logger. Added in some more data fields in the bottom right corner. Merged the dial for the RPM to be part of the speedometer and created front and rear brake pressure bars to be the same as the throttle. Not all the data will be visible on video edits but it's there to be shown If i decide to leave them in.

49742053508_b285606f5f_c.jpg
 
Last edited:
Lock down update. Only small things but I thought it was a good chance to sit down on a Friday evening and pass some time writing down a few things i've found and been messing with along the way.
Carrying on from the last update were I was adding in additional sensors, one of the sensors I added in was a pressure sensor into the top of the swirl pot. the idea behind this was to tell me a little more about what was going on in the system. I started this train of thought because ever since I swapped the fuel system to a pot, high pressure pump and return style rail i've had a fuel pressure around 60-65psi with and without vacuum, never really had an issue with it, car ran fine on the dyno with the standard ECU. I thought there might have been some back pressure in the pot potentially but this sensor has told me there is around 8-10psi in the swirl pot which is perfect for feeding the pump for the rail.
Popped out the regulator in the rail for spare i had knocking around and perfect 51psi. Really strange, ordered a new one to replace it with as the history of the spare was unknown. Got to the bottom of that mystery eventually.

49924428712_51e928e4be_c.jpg


With the car going no where soon with the lock down but with a lot of messing with it, the odd start and having the ignition on from time to time i thought it was a good idea to get a trickle charger for it. Nice and simple wiring onto the battery with a plug on it, really easy to get the car on charge now, only takes a minute to plug it into the car.

49923603053_a6b2d20648_c.jpg


A week or two into the lock down I found myself stuck at home, nothing to do and facing a couple of weeks off work so decided to play with an idea i've had for a long time but never really started it because I knew it was going to be quite time consuming.
I've already got the Arduino data logger on the exhaust tunnel of the car which collected data from the CANBUS, a handful of analogue sensors as well as GPS data and writes it to an SD card. This is great for looking at information afterwards but real time live data I only really have the coolant temp on the dash and the oil temp gauge which only gives me a rough idea and an alarm set at 120 degrees.

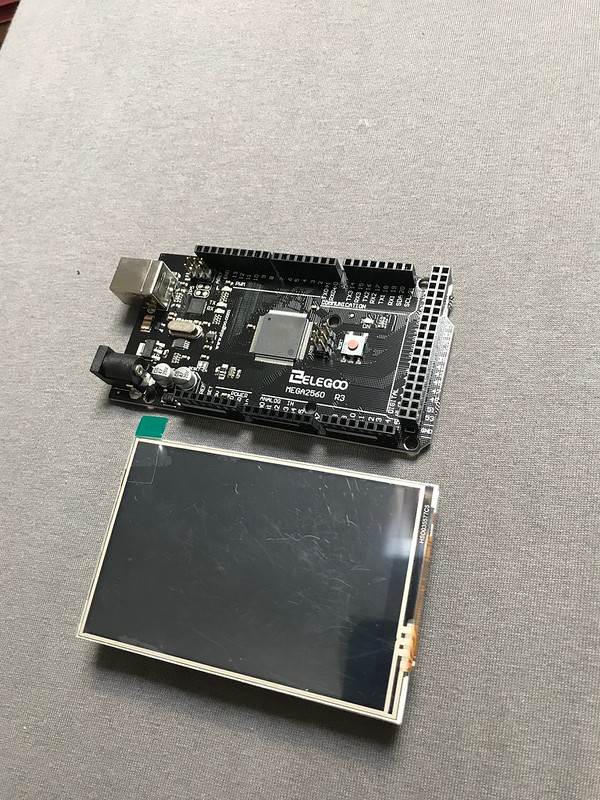
Ordered a couple of bits of Amazon to kick off the ball rolling, starting off with another Arduino Mega and a 3.5" colour and touch screen LCD. Only a cheap one to get me going, can always develop and spend more in the future if it works.
49924122721_81df5d149c_c.jpg


I already had the data available on the logger Arduino so i started off making a couple of screen to display the data on.

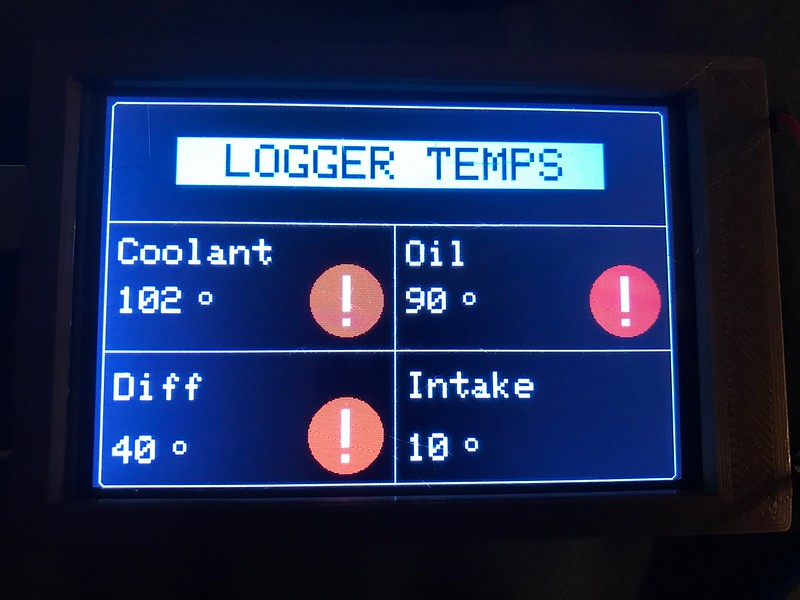
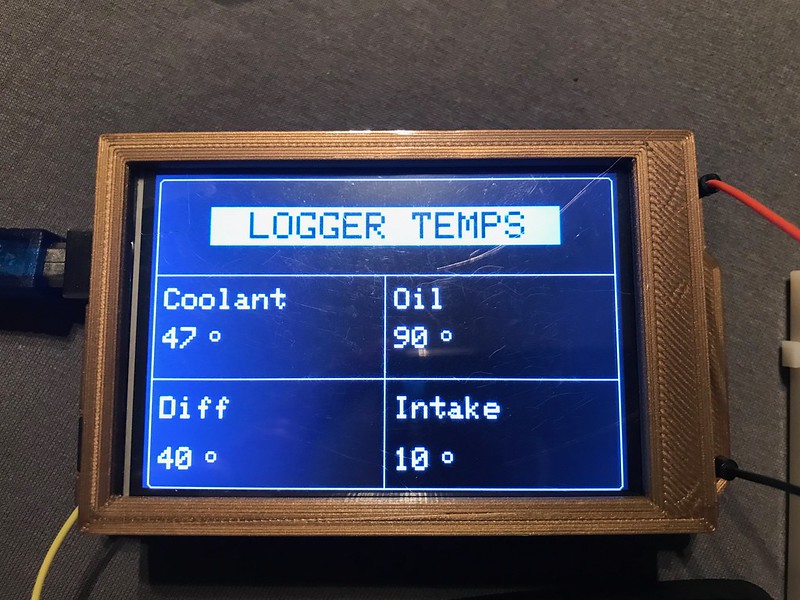
Temps which would be nice to be able to see while driving.
49924426982_e2704f8669_c.jpg


Pressures
49923601403_0dba51aa02_c.jpg


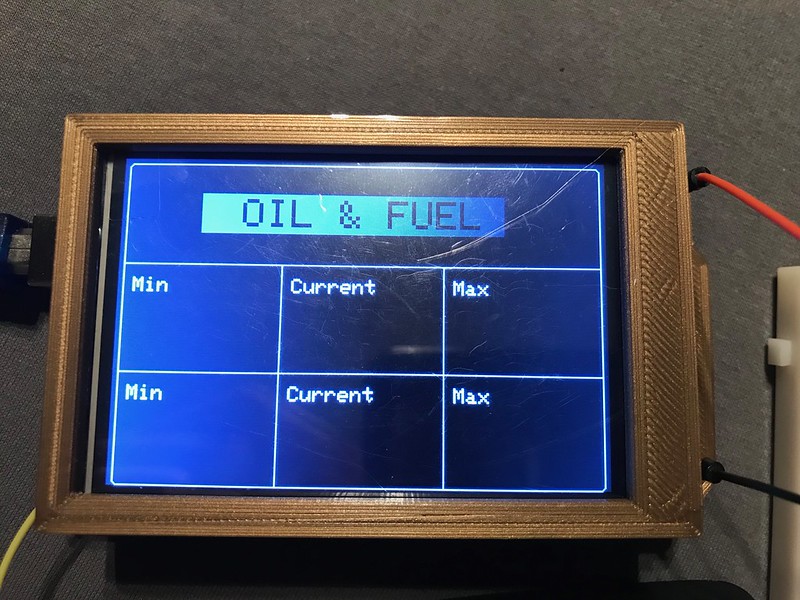
Another way of viewing oil and fuel pressure min and max over a session out on track
49923601523_c96e008af3_c.jpg


Added a basic alarm functionality to each of the temps for the Oil, Coolant and Diff. The beauty of making this myself is I can make it do what ever I want. At the moment a basic alarm with a flashing red ! mark.
49924427002_4b545833d1_c.jpg


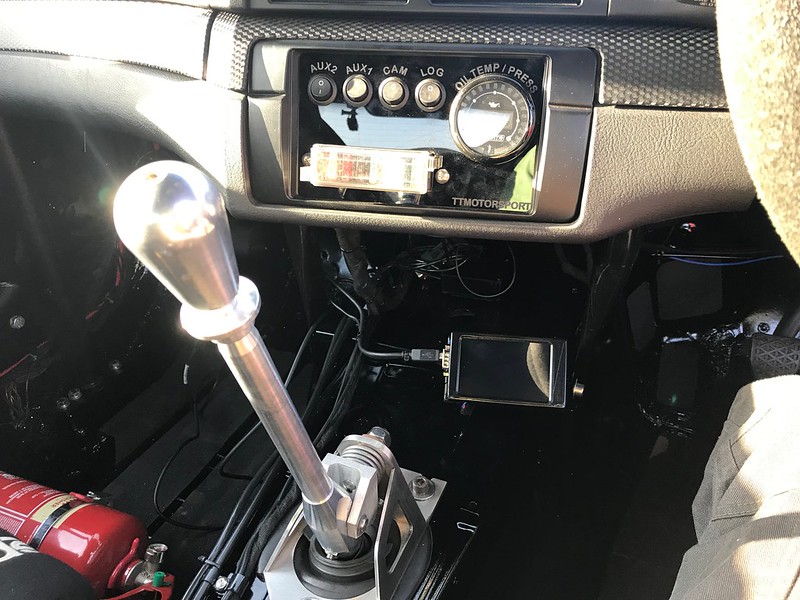
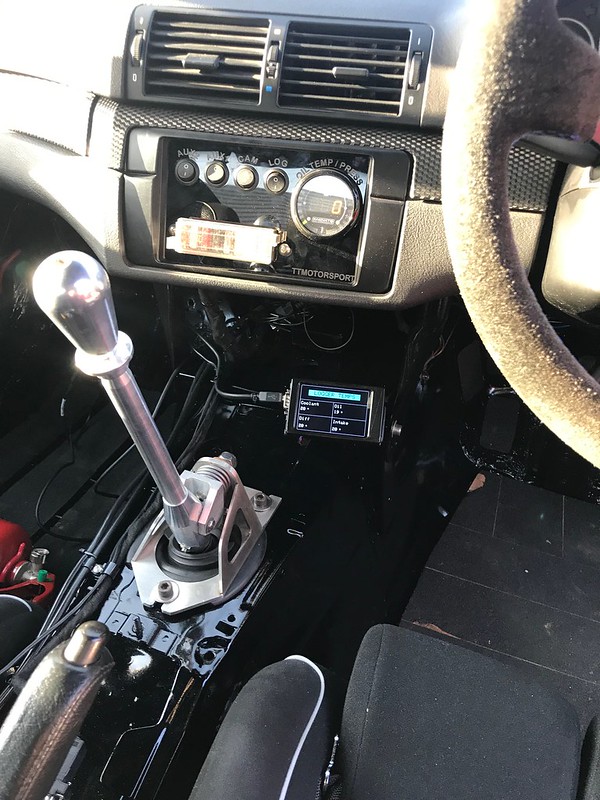
Spent a bit more time developing the casing and the mount for it to bolt into a hole in the exhaust tunnel, mounted it in a black plastic case and powered it through a USB cable so it's nice and tidy.
49923601508_ab6cf722a4_c.jpg


The beauty of it is that it's connected to the CANBUS of the car which enables it to receive all the data from the ECU but I have modified the code on the logger to broadcast the analogue sensor values that it's reading onto the cars CANBUS so it can be read by the screen and displayed.

Touching the screen enables you to cycle around the 3 different screens of data. Automatically comes on with the ignition
49924122676_8ebe8524a0_c.jpg


This will probably be something I continue to develop further in the future with more sensors, data, bigger screens with gauges, I've got a few ideas for using this screen more but that's not too difficult to develop now I've got the basic functionality.


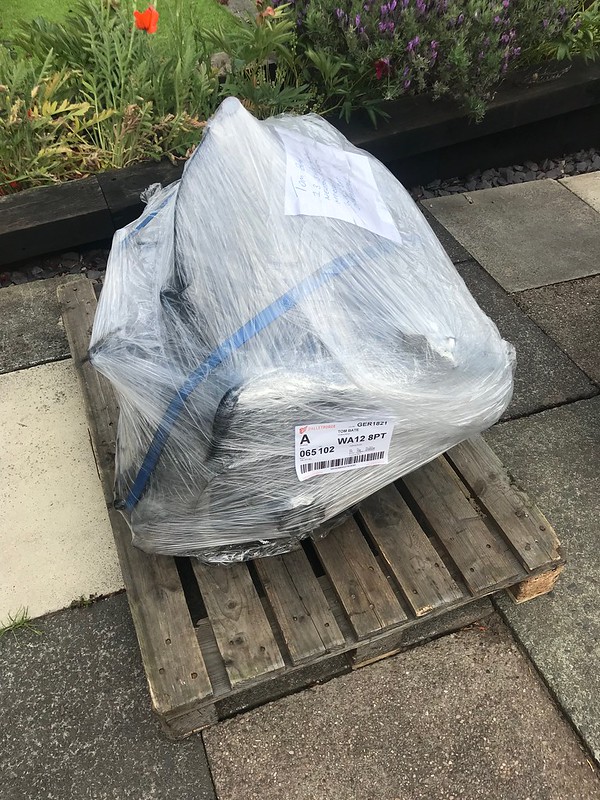
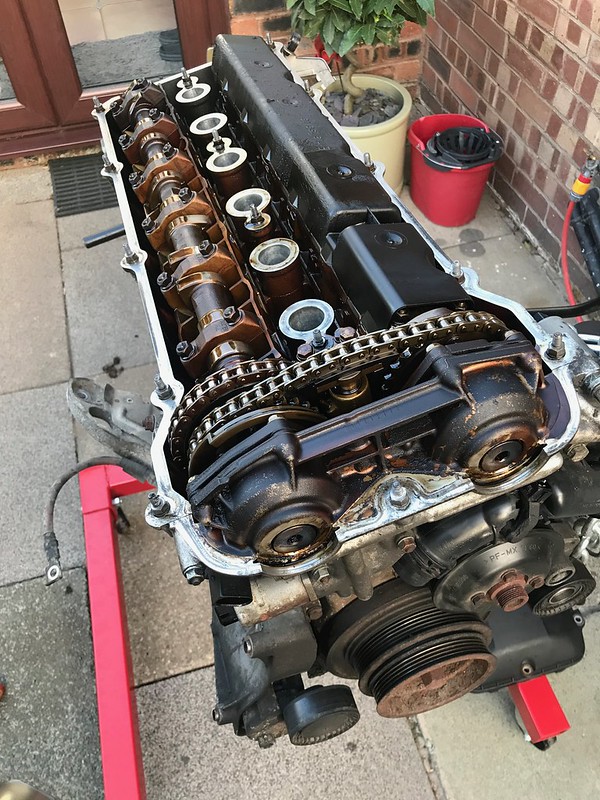
Another large parcel turned up in the post for me this afternoon too, another M54B30 complete engine which i'm going to be stripping down and using as a donor for the new engine build, this enables me to get on with the build while still having the car in one piece and being able to use it should I have the chance to get out on track.

49924427207_6acf309deb_c.jpg


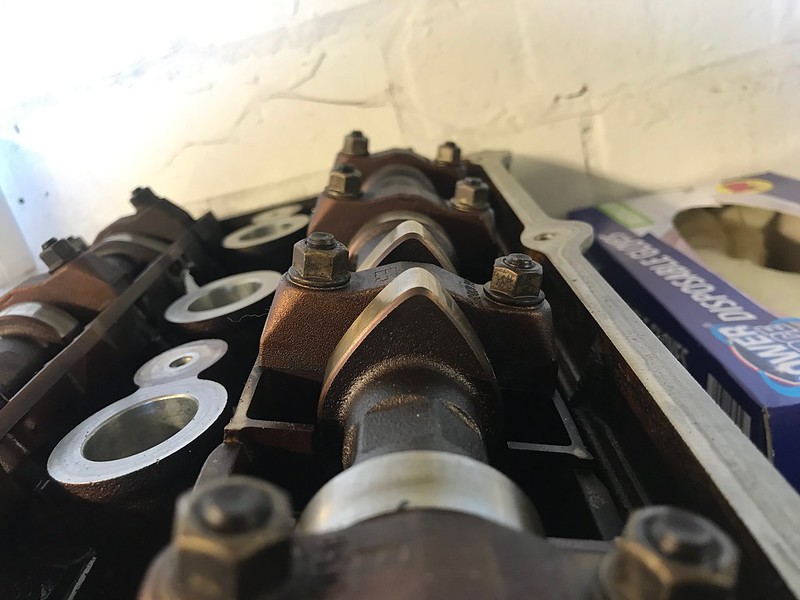
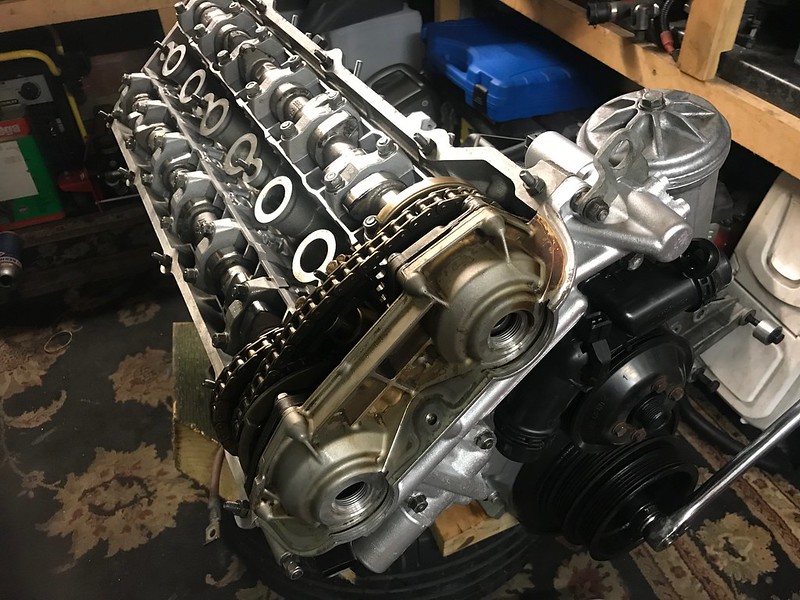
Couldn't help getting it on an engine stand this evening and popping off the cam cover for a look inside checking the part numbers on the cams and the block Will have some more photographs of this as I strip it open this week.
49923601568_b7ba62c7f7_c.jpg
 
  • Like
Reactions: Sean197
I was going to save this for one but update but with the amount of photographs and steps I thought I would break it up a little bit and write down some of the progress so far. This obviously isn't every step I've gone through so far just some of the stages I've taken photos of.

Engine strip down

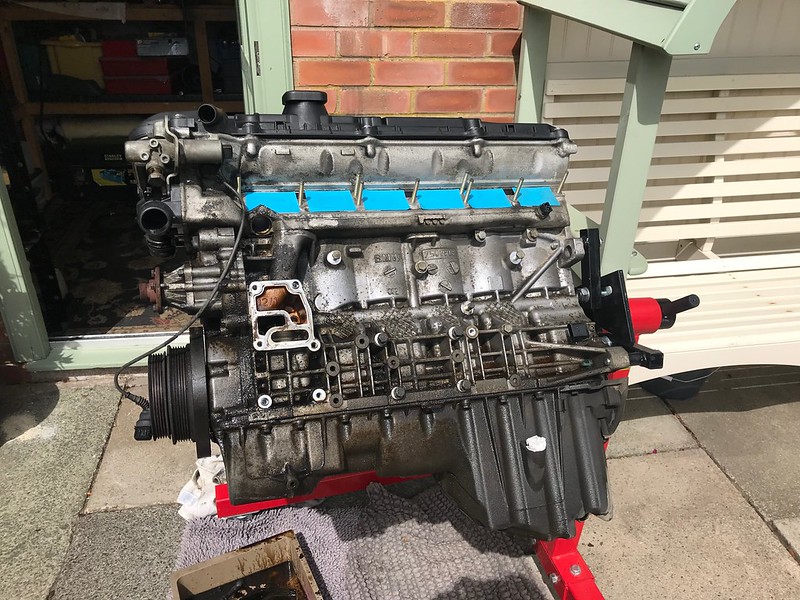
Started by removing a lot of the parts from the engine to get it back to a bare block. Put all these parts in a plastic box out of the way for now, not a lot of these are going to be used on the car so will just be kept for spares
49955854857_1d3d815a4e_c.jpg


Plugged up any holes and covered the engine in degreaser, lots of scrubbing with a stiff brush and finally jet washing the engine to get rid of 120,000 miles or dirt and oil.
49955065743_fcc8989f36_c.jpg


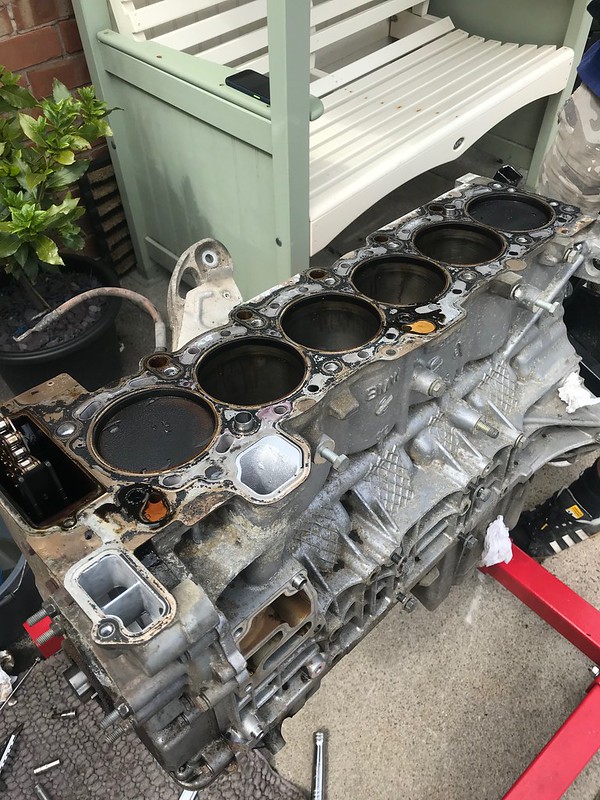
First job was to take the head off complete, I wont be using any of this so I've removed it with the cams in place and put it on ebay for sale.
49955853662_de7734fe91_c.jpg


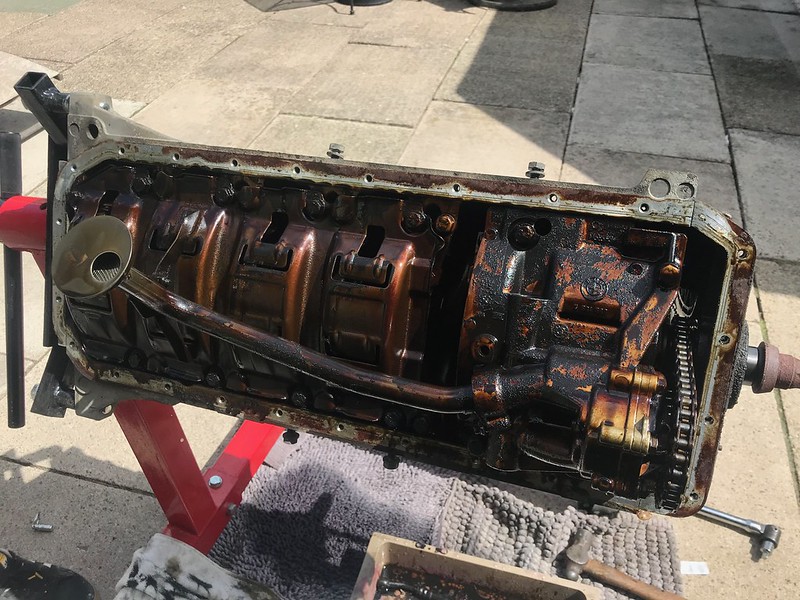
Oil drained and the sump and oil pump removed, again not something i'm going to be using as I'll be using the oil pump from the current engine with the Vac motorsport shaft and nut kit.
49955066113_e96519a5c6_c.jpg


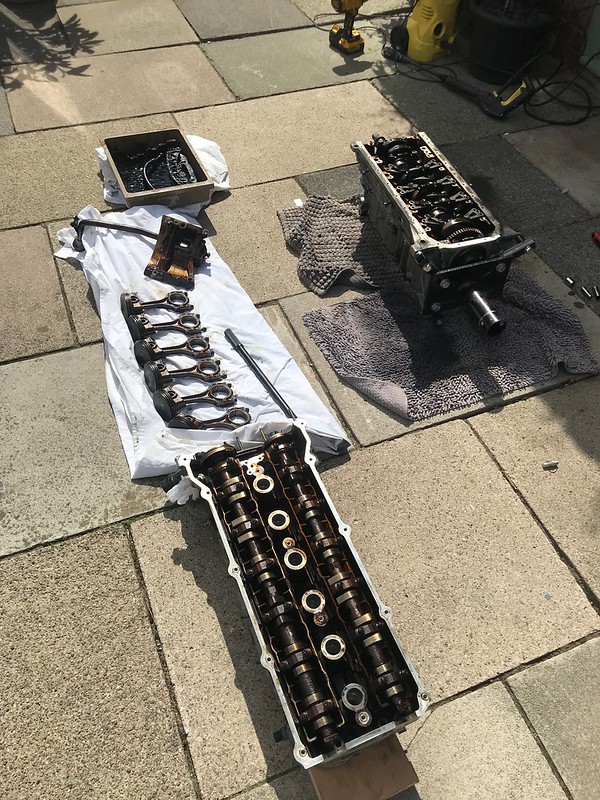
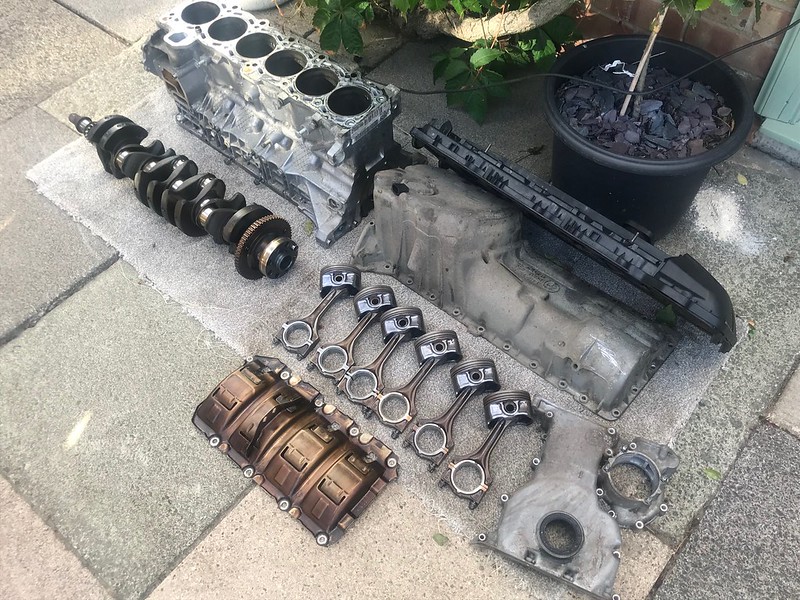
Engine broken down into it's main components
49955571126_8aab4faaa5_c.jpg


Lots and lots of cleaning and scrubbing to get to this stage, everything will be disassembled and cleaned in the parts washer before reassembly but it's nice to get rid of all the old oil from everything
49955571091_25b0f1ecd7_c.jpg


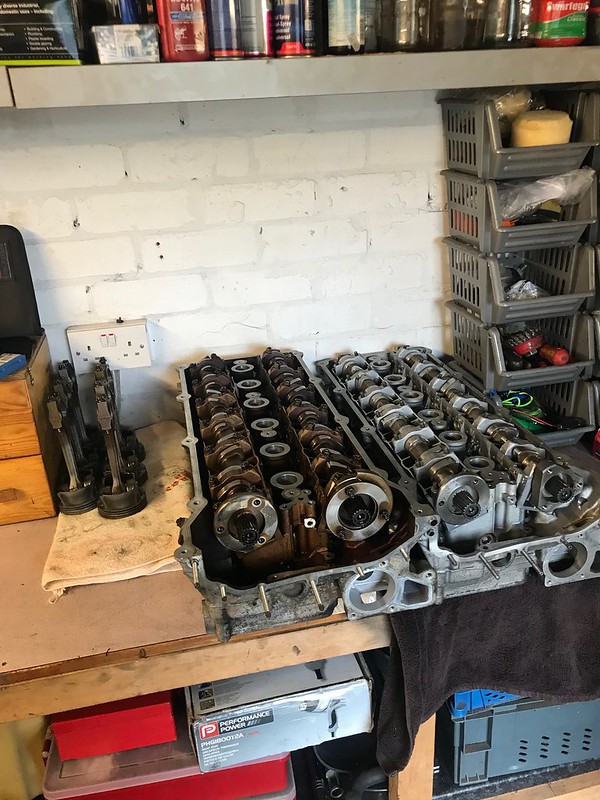
Old head and new head sat side by side in the garage.
49955067888_bba7ca58d1_c.jpg


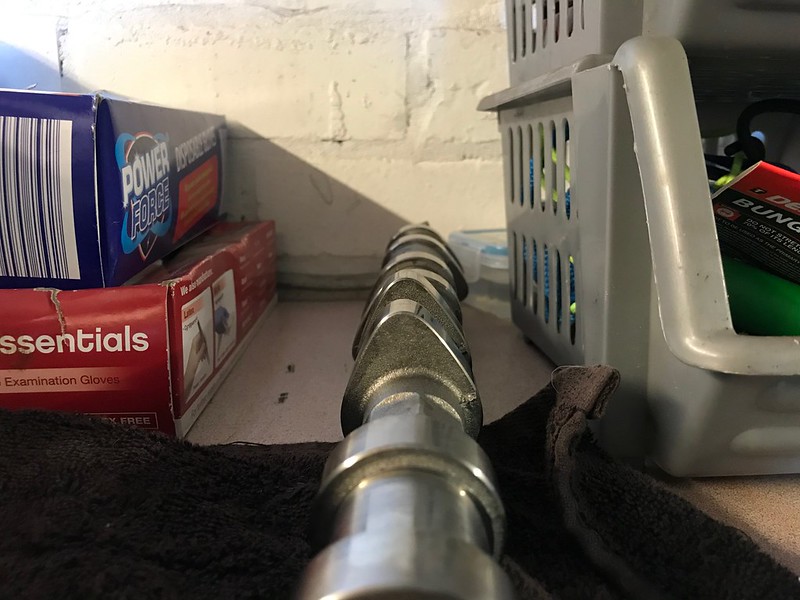
For comparison here's the different between the intake cam standard vs Shrick 272 with 10.9mm lift
Standard
49955591411_82264d07a9_c.jpg


Schrick
49955875187_c041009879_c.jpg


I dropped the block off at the machine shop for machine work doing.
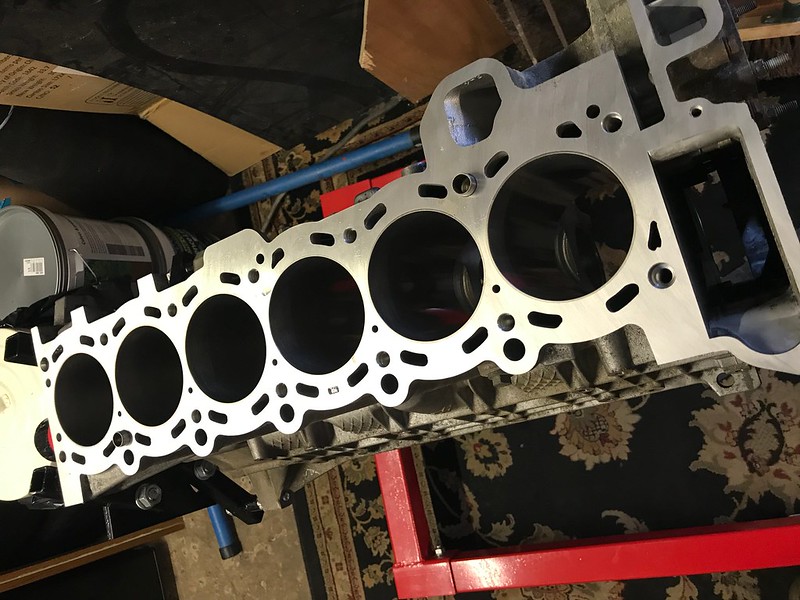
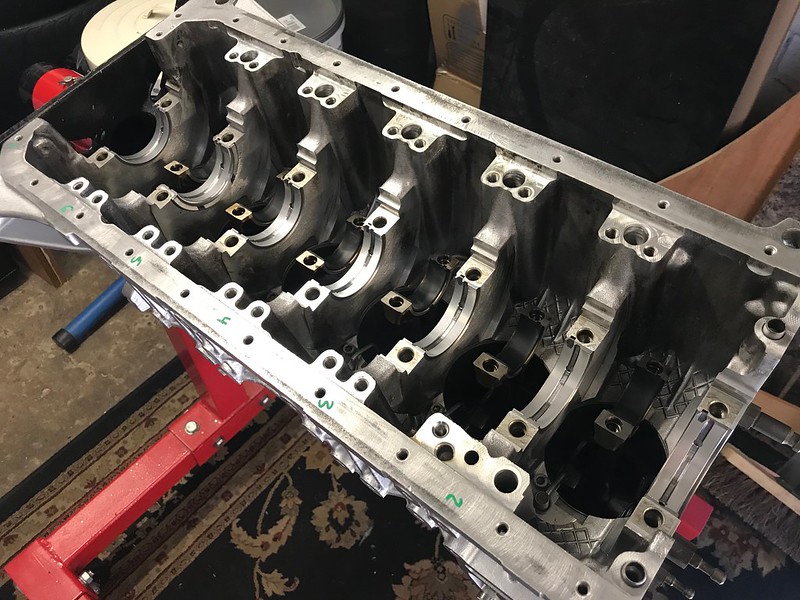
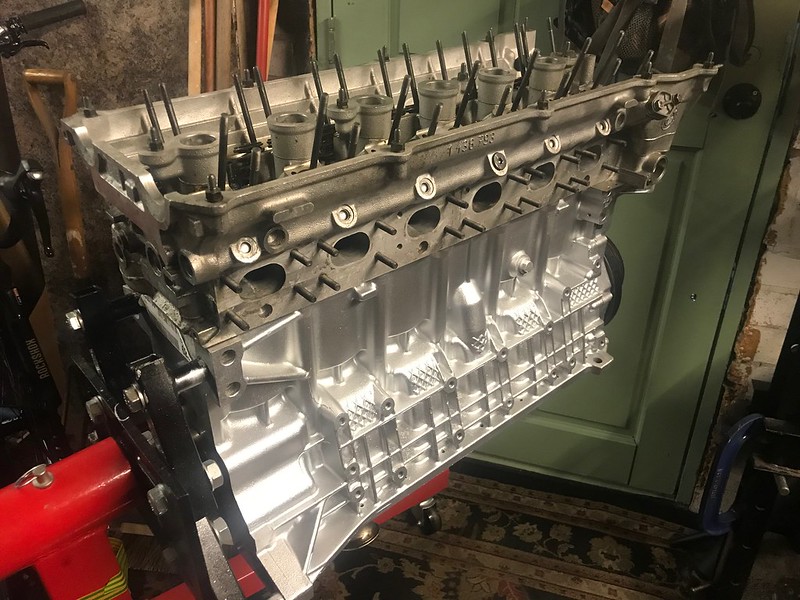
Skimmed the deck and honed the bores to give a nice fresh canvas for the engine build. I know someone will eventually ask what I am doing with the threads in the Aluminium block, I was going to have inserts put into the block but I have since decided to spend the money on ARP headstuds. I've tracked down some ARP studs which are longer than the kit that they sell for the M50 steel blocks which give more thread engagement inside the aluminium block. Main advantage is these can also be reused and transferred to another block should I need to.
49955570871_4a76bfb10a_c.jpg


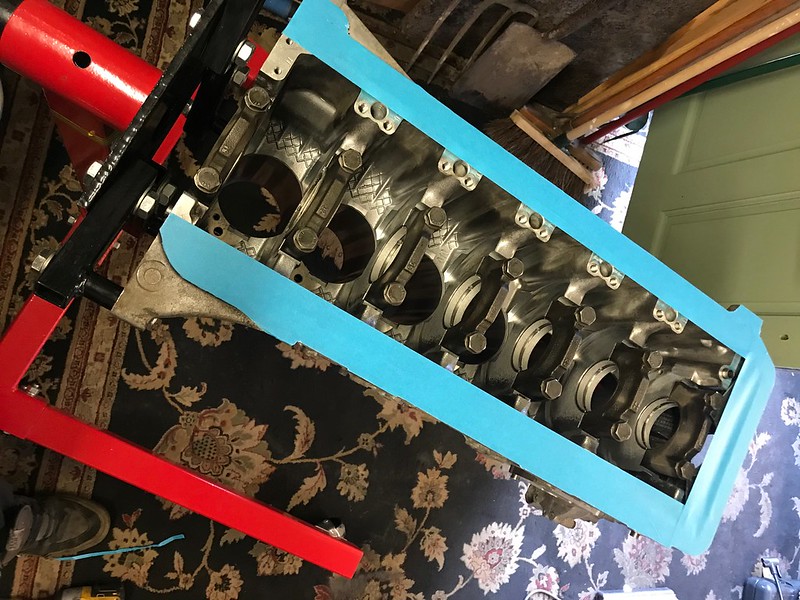
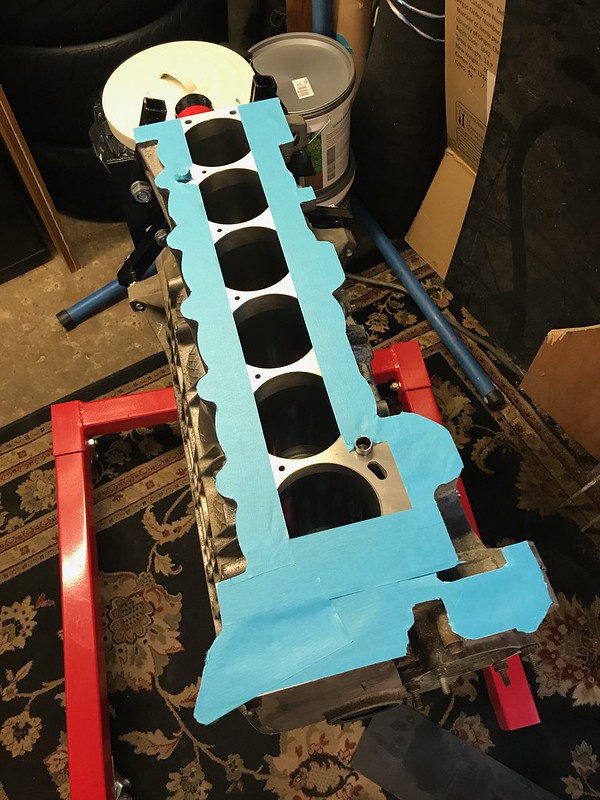
Masked up the faces on the block
49955570926_e3e74b0292_c.jpg


49955570916_2ed52c9541_c.jpg


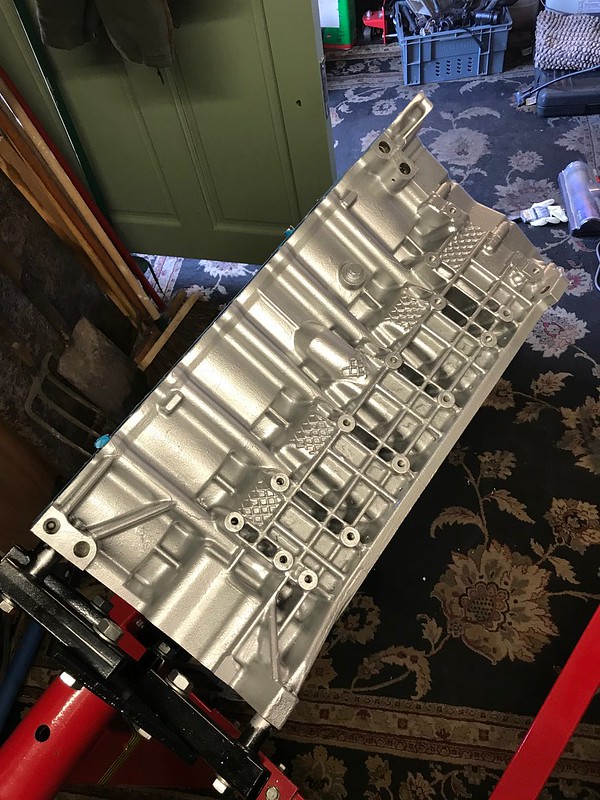
Painted the block a nice silver, Painted nice and easily after the block had been through the parts washer at the machine shop.
49955854807_9236b0f6d4_c.jpg


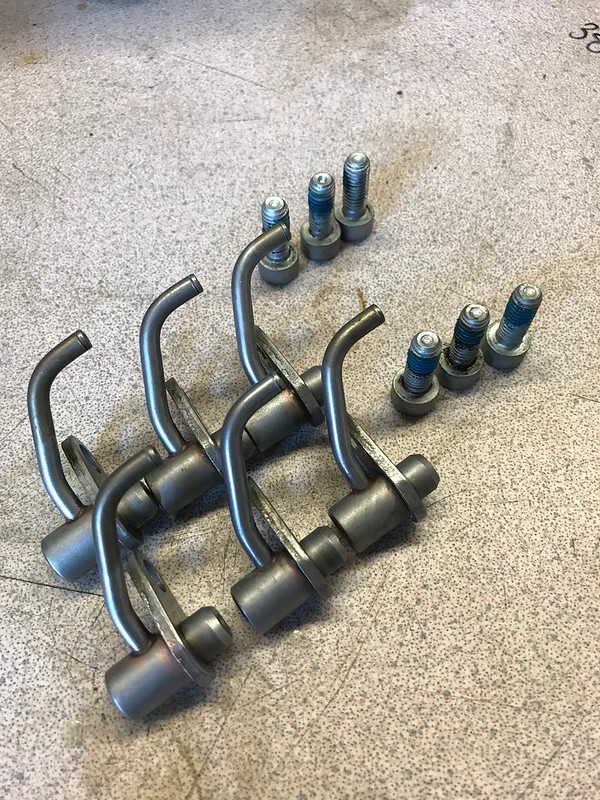
Cleaned out the oil squirters and refitted them back into the block checking the oil galleries in side the block and inside the squirters where cleaned and blown through before refitting
49955854852_b47236726c_c.jpg


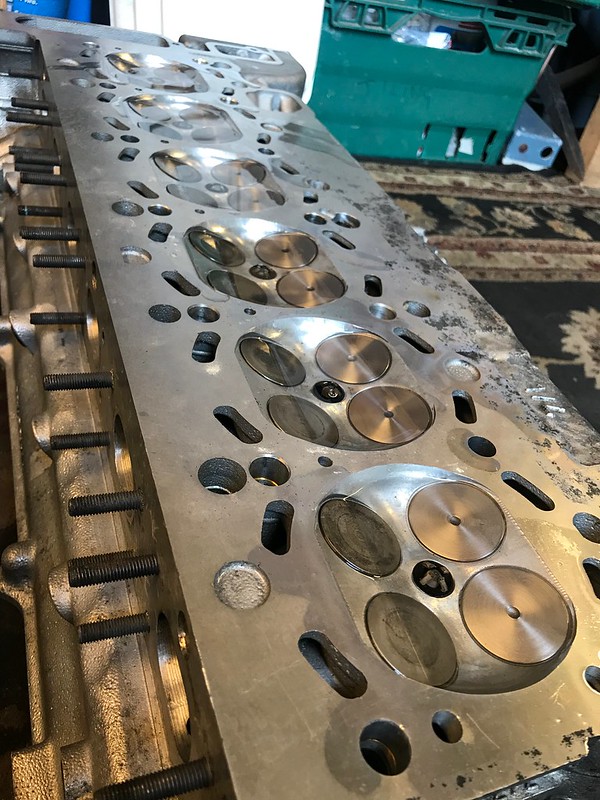
Before refitting the cams to the head or the head to the block I did a quick leak down test with some white spirit to check the valve seats on this head as it if freshly built to make sure everything is as it should be, no issues with leakage just evaporation with the heat yesterday
49955854747_f268c935bc_c.jpg
 
  • Like
Reactions: Sean197
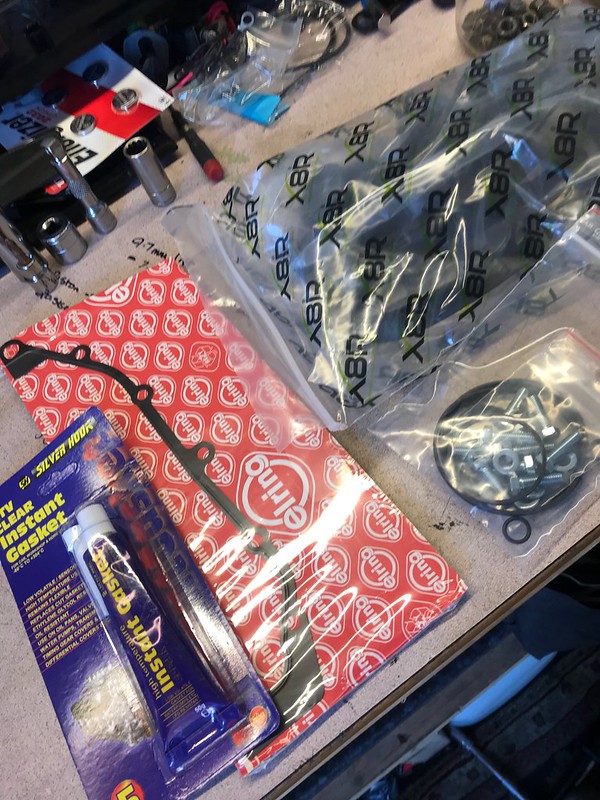
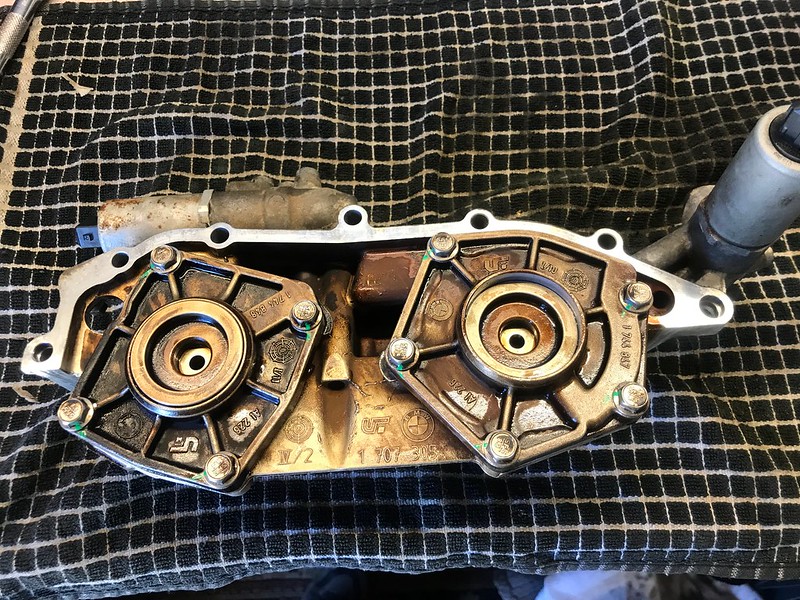
First few parcels with engine parts started to arrive a the end of last week. First ones being the Vanos rebuild kit
49955854802_2aaa87d755_c.jpg


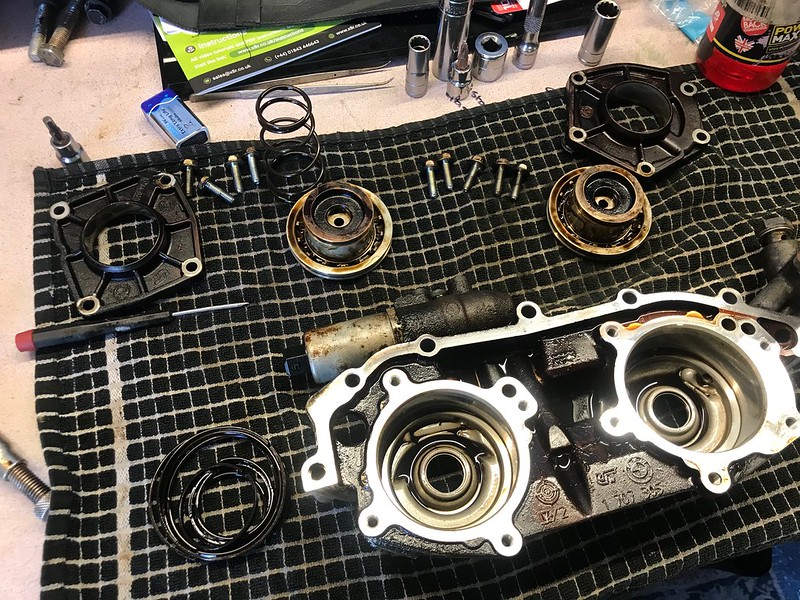
Stripped the unit open and pulled out the seals
49955874802_2e1c6d289f_c.jpg


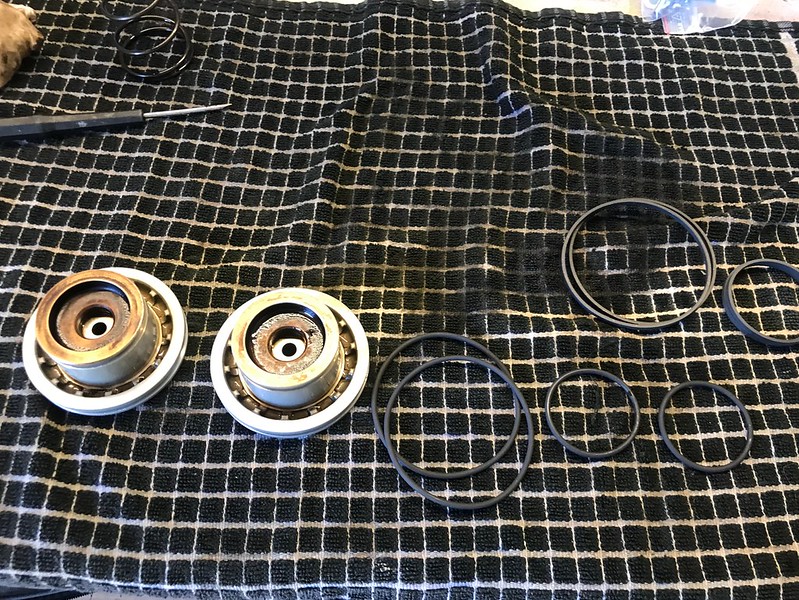
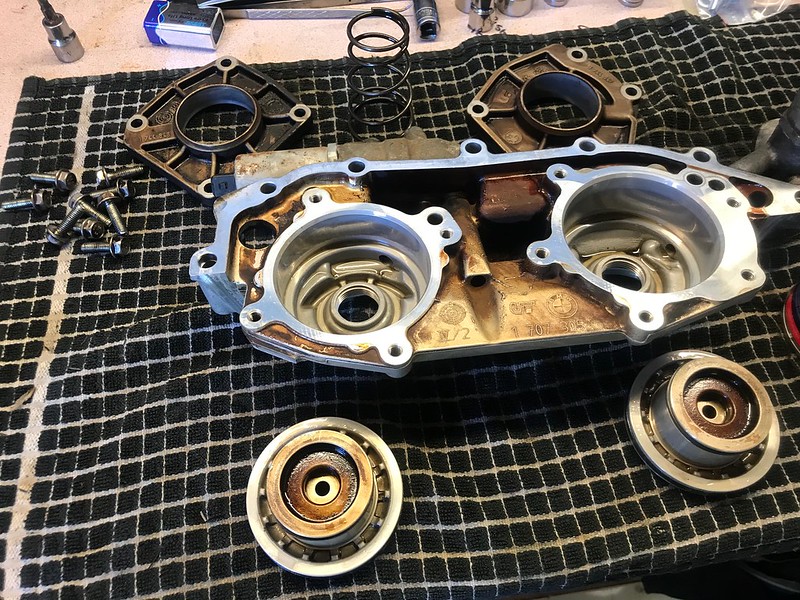
Cleaned the pistons in the parts washer and refitted the new seals
49955591066_1581762c8e_c.jpg


Time for reassembly
49955875292_72229a95ab_c.jpg


Done...
49955875337_d163a019a6_c.jpg


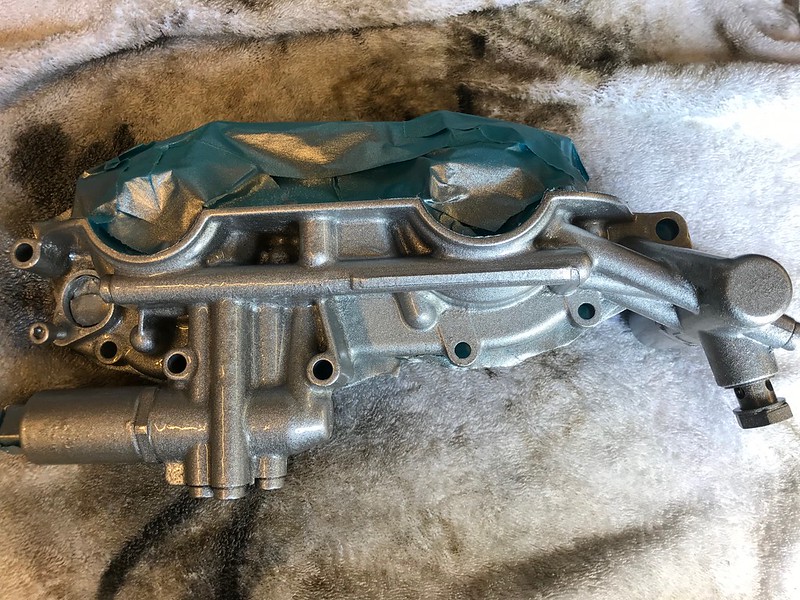
Bit of paint to tidy up the tired vanos unit too.
49955591716_2e8432026f_c.jpg


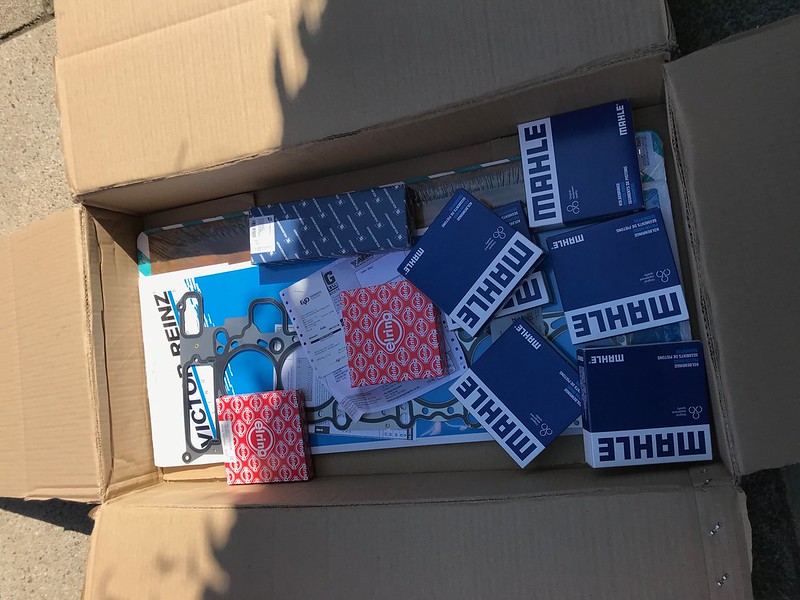
Engine building parts arrived yesterday so I was able to crack on with the first bits of putting the engine together.
49955088733_d1df32a130_c.jpg


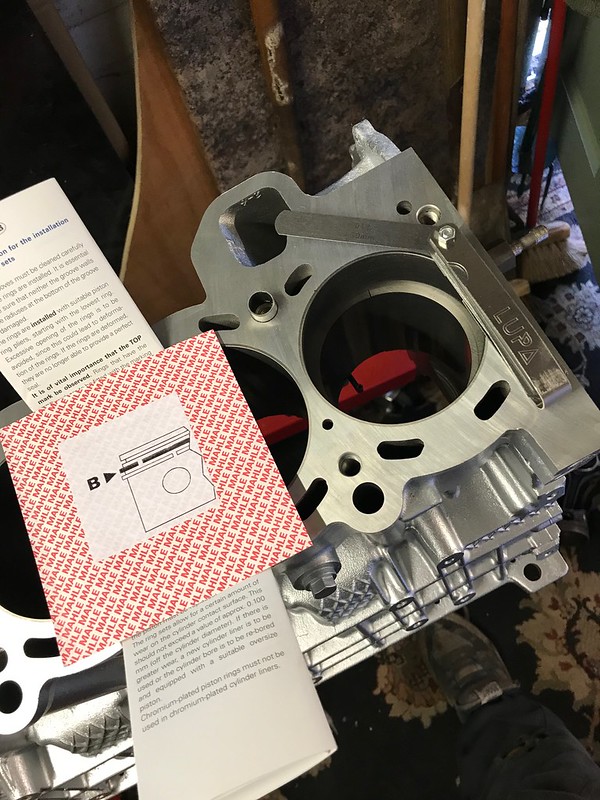
Checked the ring gaps in the bores, all checked out ok pretty much in the middle of the BMW tolerances
49955088798_747a989a5a_c.jpg


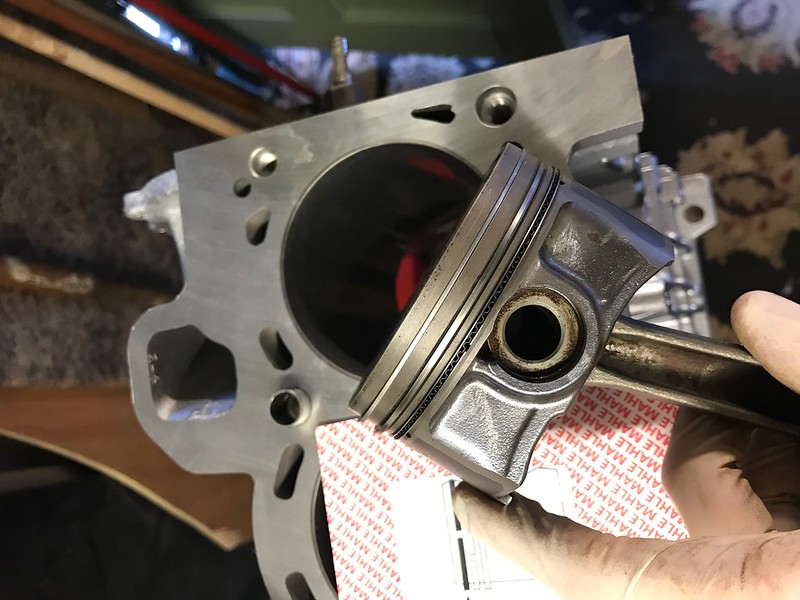
Piston rings fitted to the pistons
49955875207_c42258b535_c.jpg


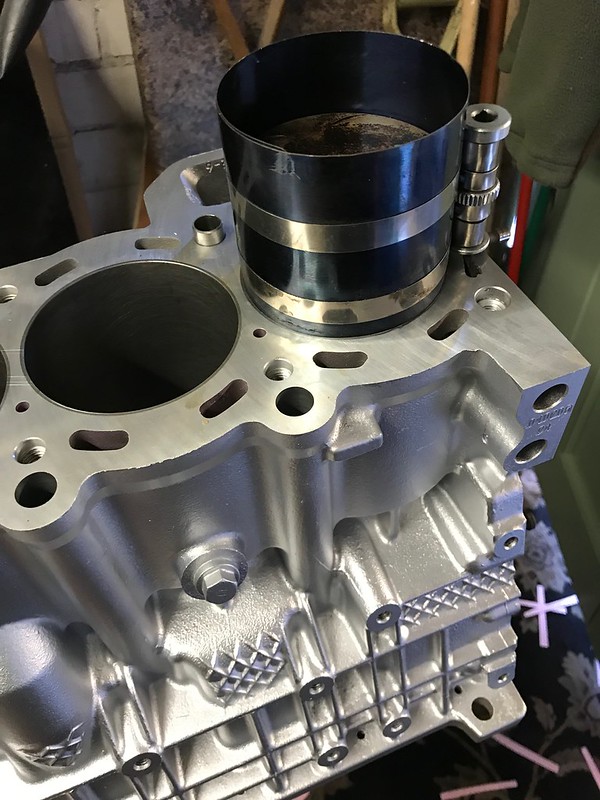
Popping the pistons into the bores with the new rings fitted
49955591561_2d4e411b73_c.jpg


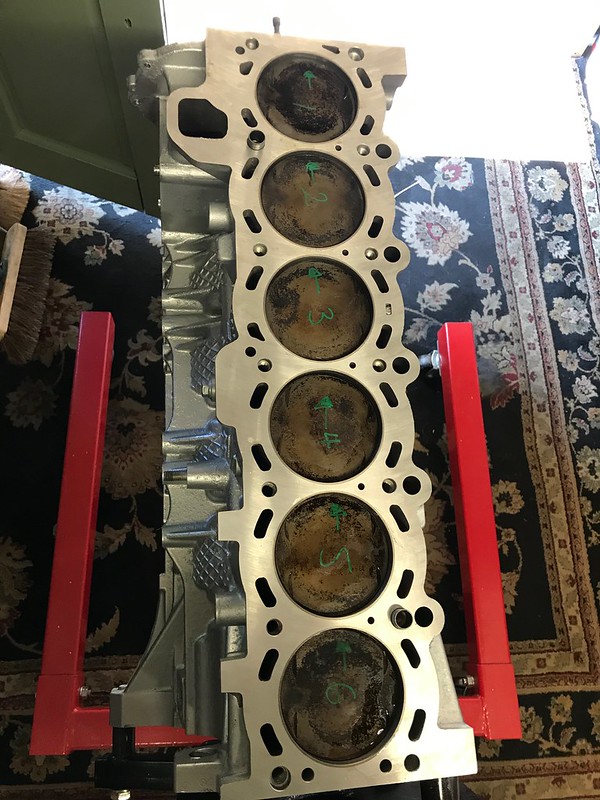
6 pistons fitted into the block, even though the bores and the rings are new i've kept everything numbered and orientated throughout the cleaning process. Trying to make the process as simple as possible when rebuilding
49955088778_1feeac4d80_c.jpg


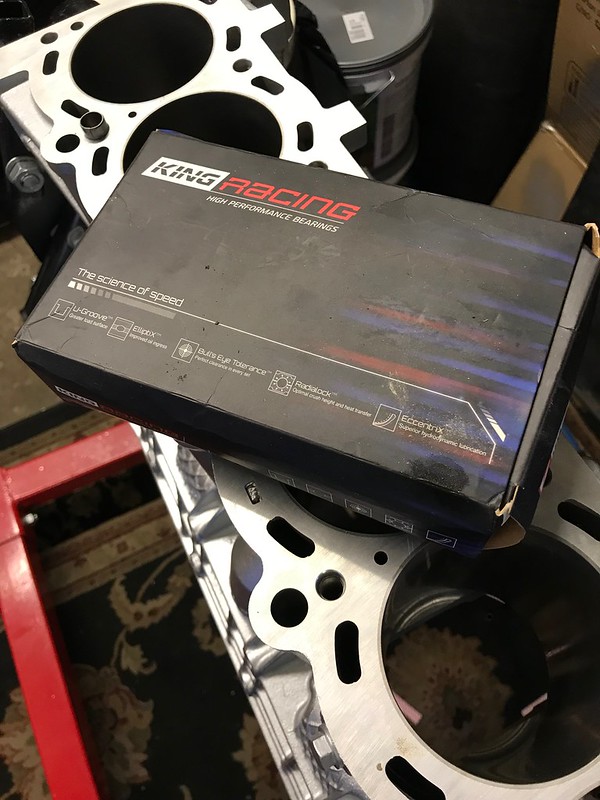
Set of King Racing bearings for the rod bearings this time,
49955591526_1b0390190f_c.jpg


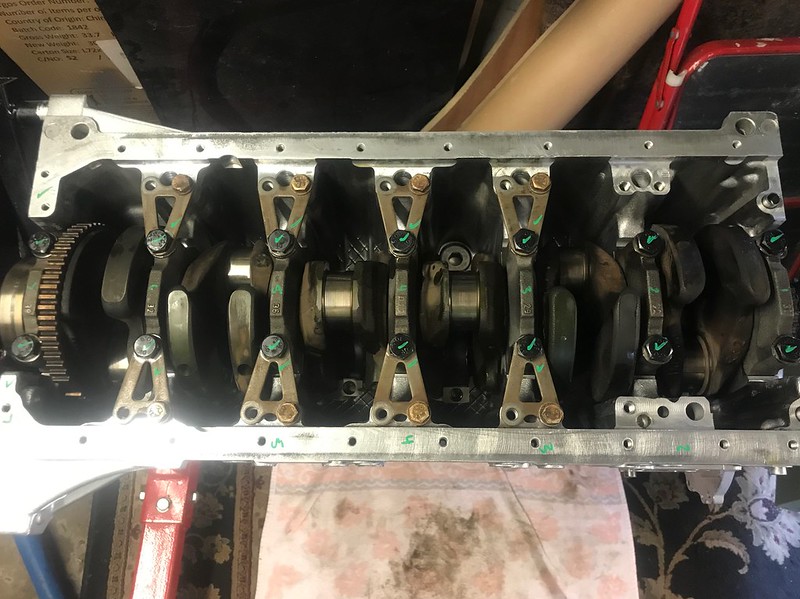
King Racing rod bearings and brand new mains bearings fitted ready for the crank to be dropped in
49955875317_1bcd4b568b_c.jpg


To be continued when the remainder of the parts i'm waiting for arrive.
 
Engine building continues. I was waiting for the mains bolts to arrive so I was able to start to put the crank in and assemble the bottom end.
While doing this I checked the bearing clearances on the mains and the big end bearings. all of these were right in the middle of the factory tolerances.

49999312646_5a6af9a2e5_c.jpg


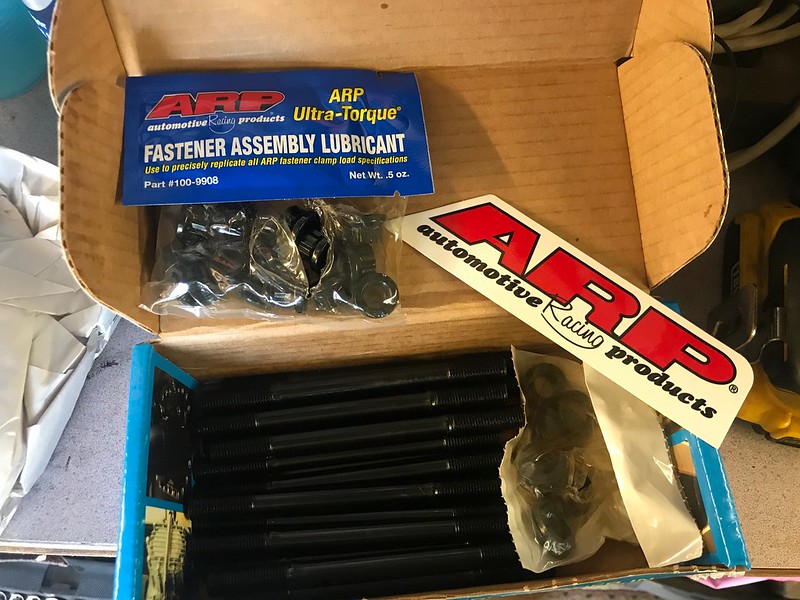
Another expensive but worthwhile purchase for this engine build turned up. Set of custom ARP studs and nuts which are loner than the M50 kit ARP sell giving full thread engagement in the block. Decided to go down this route rather than spending the money have timeserts fitted to the block.

49998793018_e04a89dcb5_c.jpg


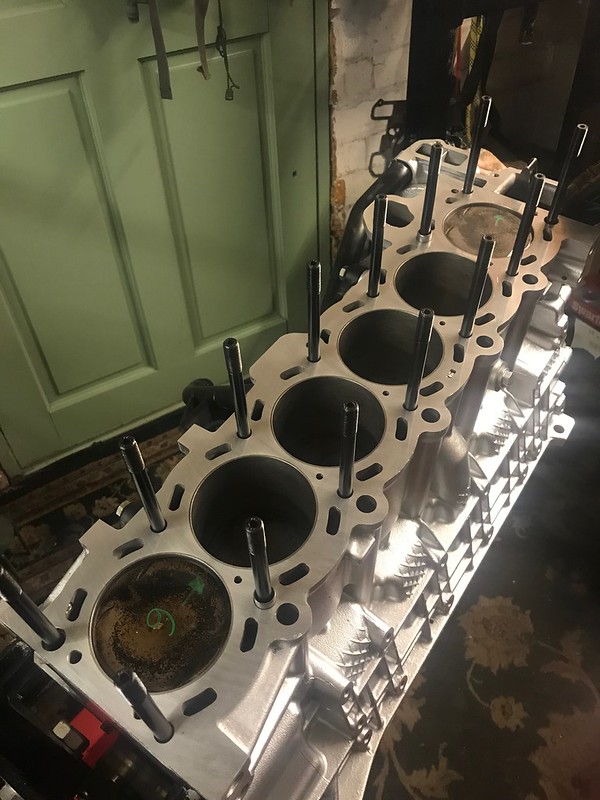
ARP head studs fitted into the block
49998793093_6391e5b3d5_c.jpg


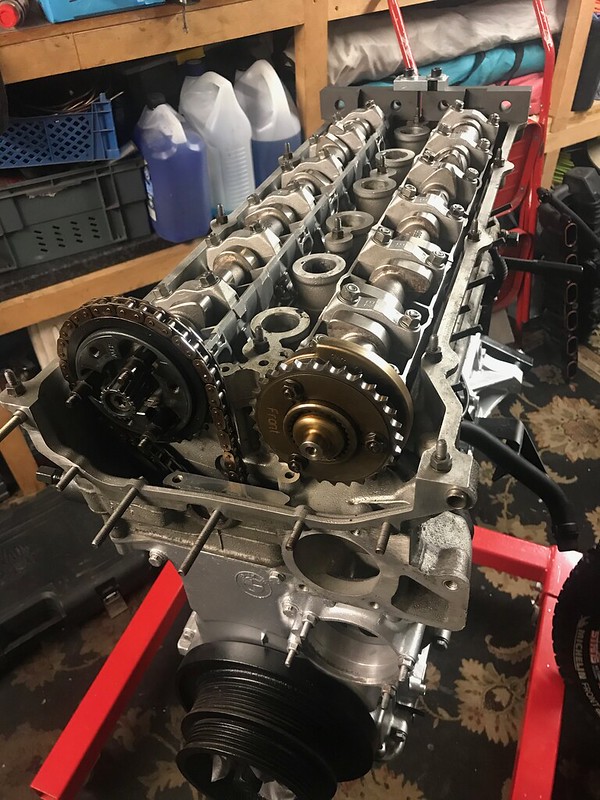
The new ported head fitted to the block and torqued down. What a stressful job that was getting the head torqued down, still worrying about pulling the threads out of the block but with the longer engagement on these ARP's and only pulling on the threads in the block rather than turning at the same time the head is torqued down and ready to go
49999565197_f6fdbb38a2_c.jpg


Dropped the cam trays, lifters and cams into the head and torqued down the cams
49998793188_f720a1865d_c.jpg


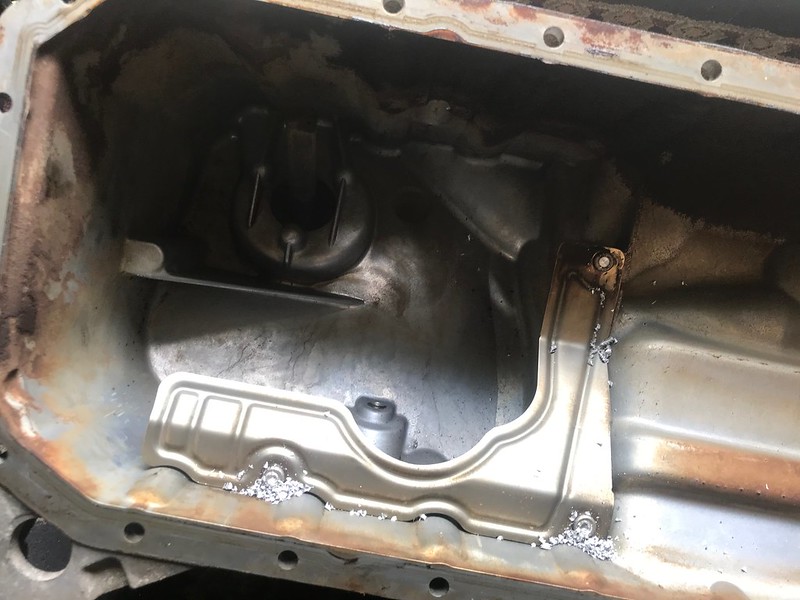
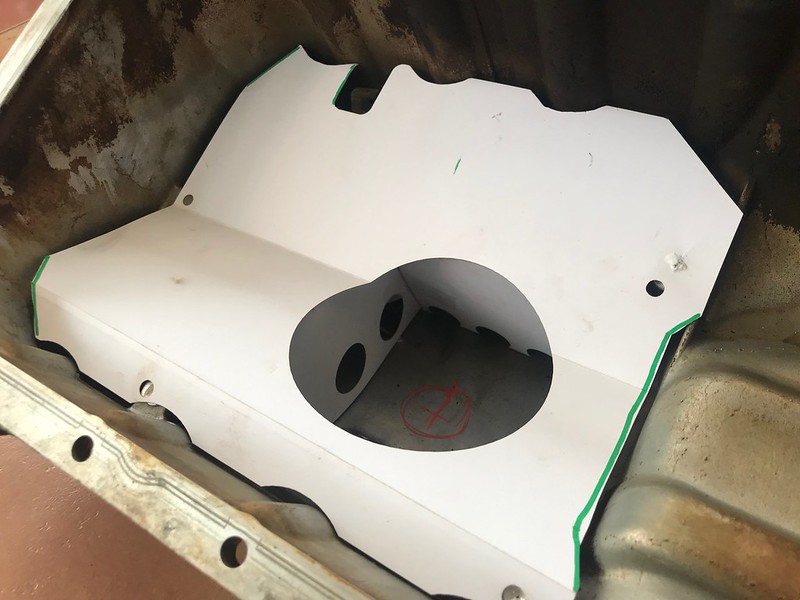
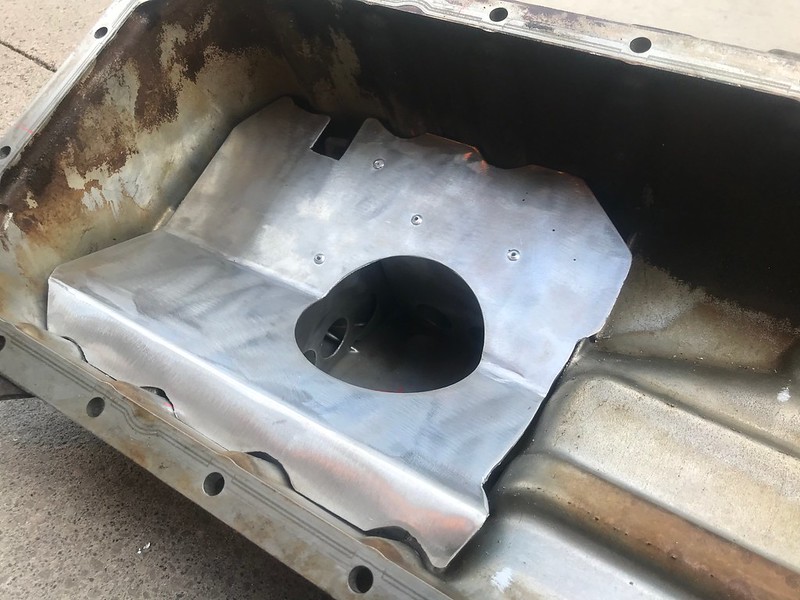
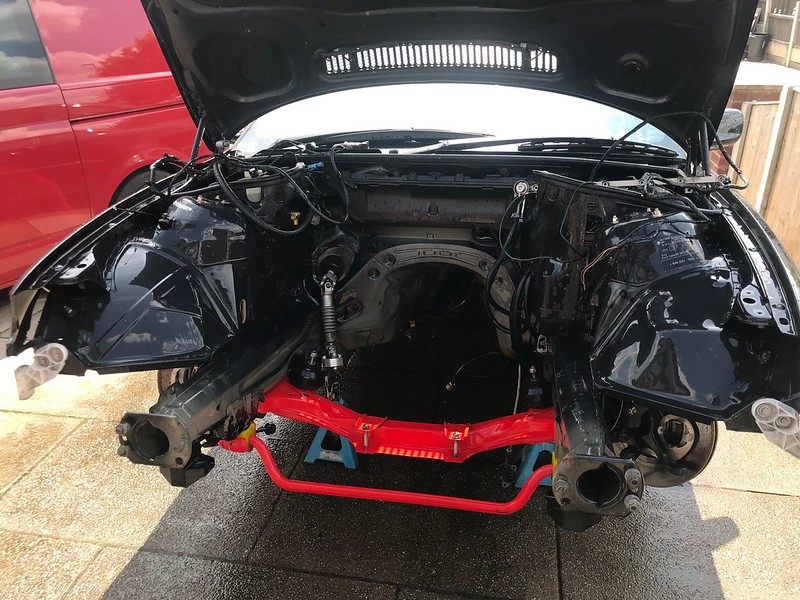
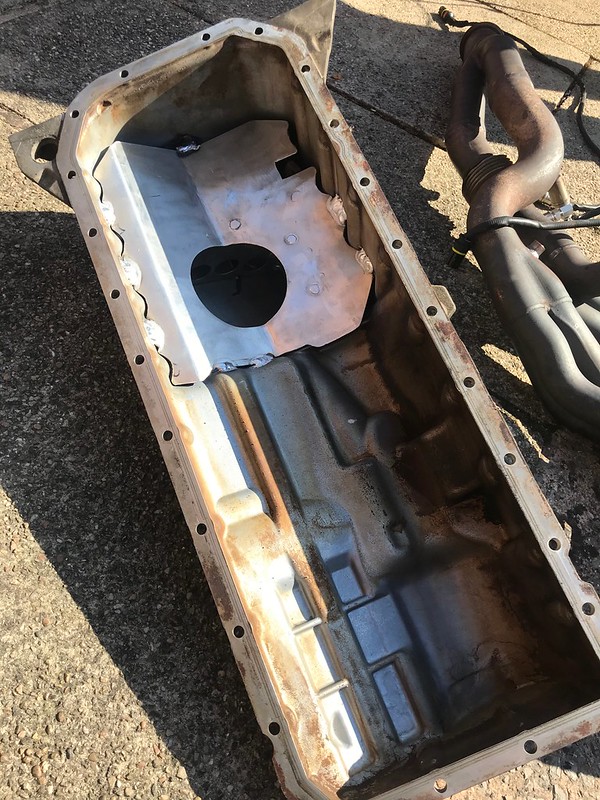
Before I could go any further with finishing off the engine building there was some other jobs which needed tackling first. One being the sump. I was seeing oil pressure as low at 8psi under braking and it was dipping in some corners. No wonder as the sump has zero baffling it. I started by drilling out the little tray that is in there from factory
49998793003_9611a2629e_c.jpg


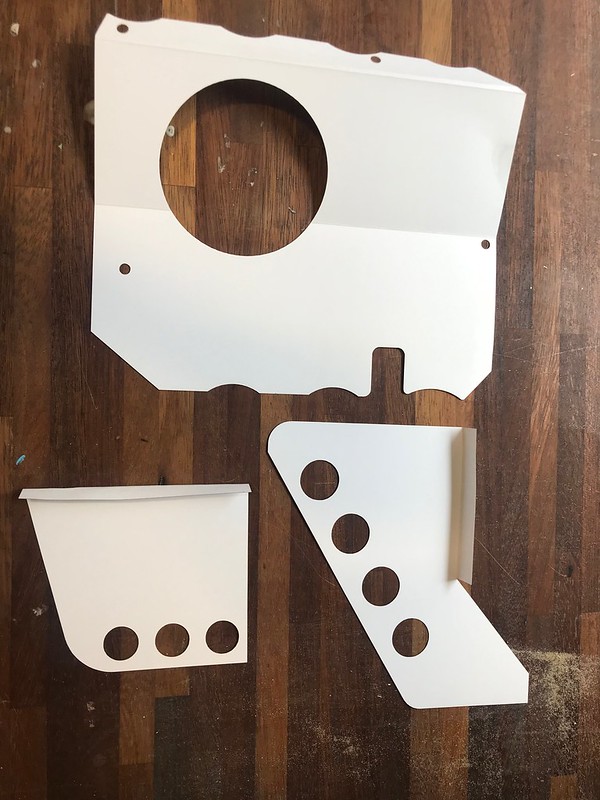
I drew up some ideas for some basic baffle plates go so inside the sump to stop the sloshing of the oil under braking and cornering, these were cut from card using a laser cutter from the CAD drawing
49998793058_a82c1eea29_c.jpg


Test fit in the sump, highlighted a few areas which needed adjustment
49999565082_2bfa36492b_c.jpg


Finally made the final version from 2mm aluminium, ready for welding into the sump tomorrow.
49998793068_743d6fe32a_c.jpg


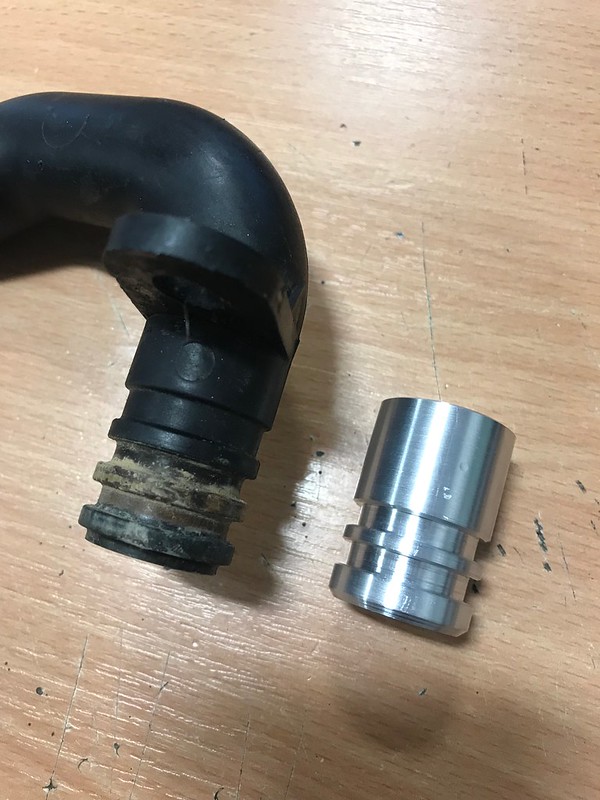
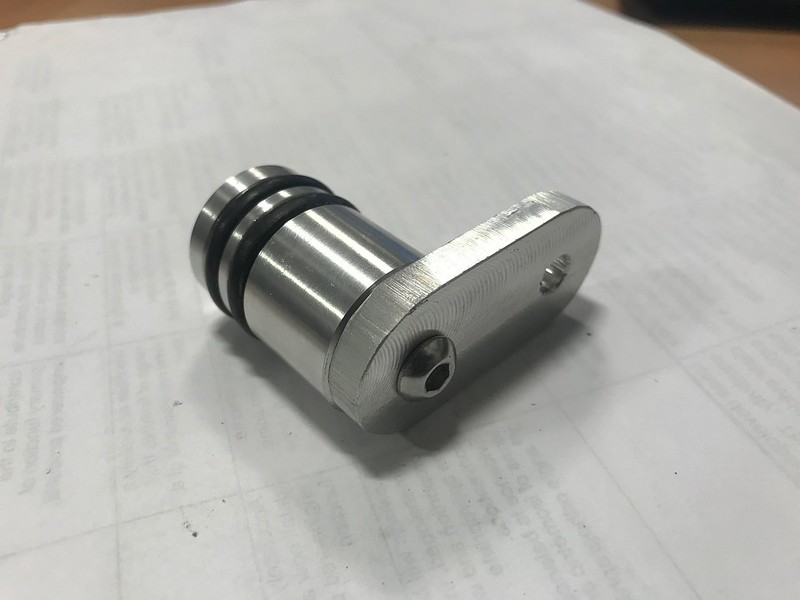
Also been busy on the lathe, I looked at the coolant system I'm running and by removing the heater matrix It has become apparent that I have introduced a coolant loop which isn't required now I dont run a heater matrix so wanted a nice soluation to save running the pipes along the block while they're not needed. Aluminium plug made with grooves for orings
49999565057_fa3474180c_c.jpg


Added a plate to the top of it so I can be bolted into place so it doesn't come out of the block due to coolant pressure
49998792863_b6668c9b0a_c.jpg


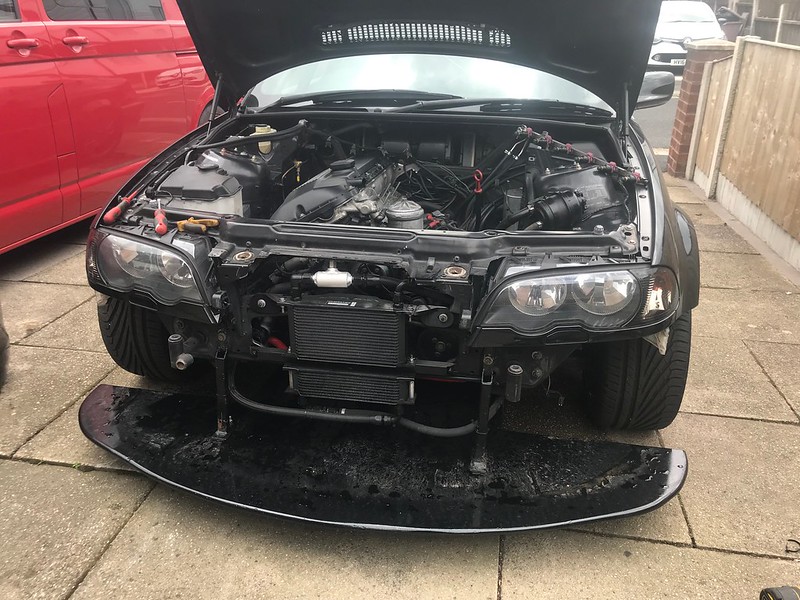
While I was waiting on parts I thought I would spend a few hours in the evening this week getting the car ready for removing the engine.
49998793203_37339ec6e9_c.jpg


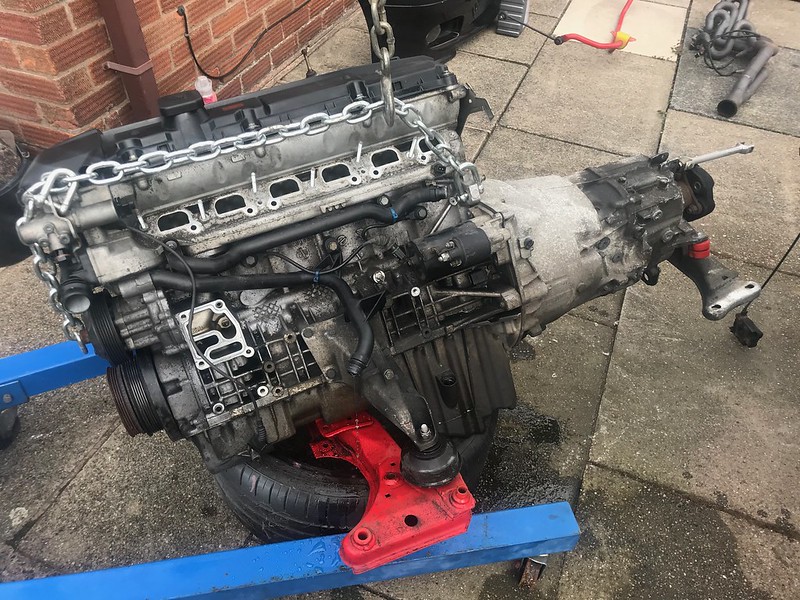
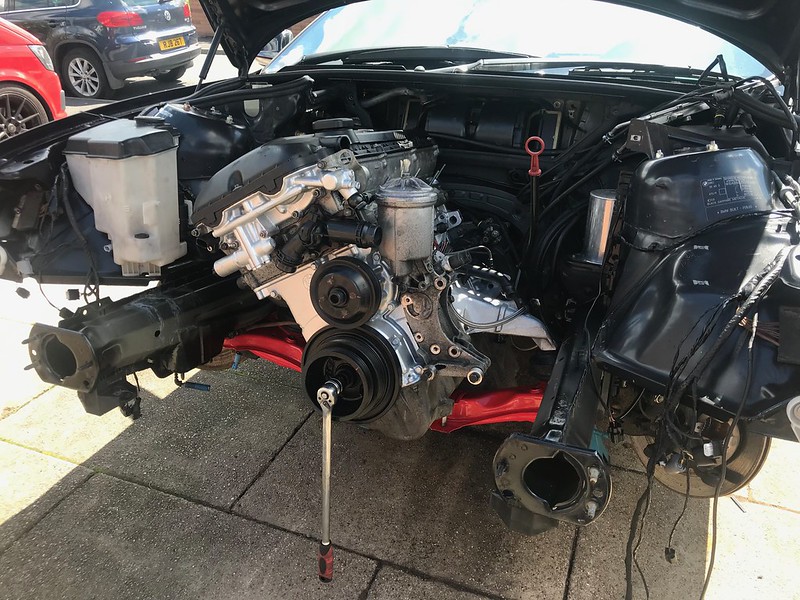
A few hours later it was ready to lift out, found it was nice and easy to bring the engine and gearbox out of the front of the engine back by lowering it down with the subframe and gearbox mount in position
49999565232_45bb96ef3c_c.jpg


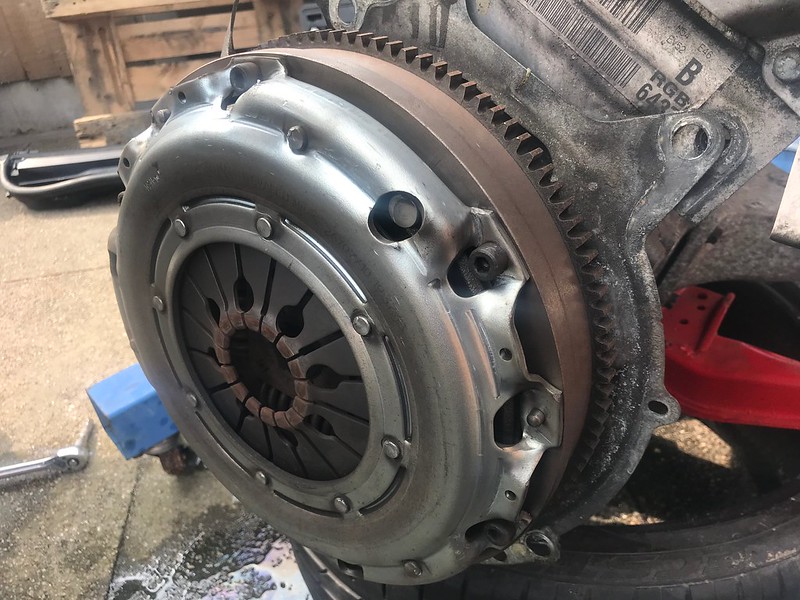
Removed the gearbox to find someone had already fitted a single mass flywheel. I thought someone had but couldn't find proof of it in the service history.
This will be going back in with the new engine
49999312841_e00d2fae6b_c.jpg


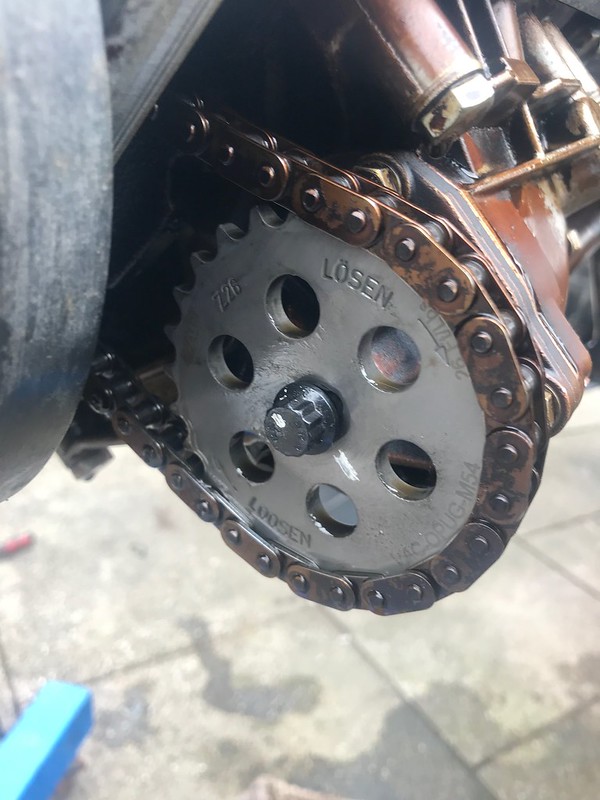
I dropped the sump off as I want to use the oil pump from this engine as it has the uprated oil pump kit in it from Vac Motorsport. I dropped the sump off to find this...
49998793033_f2eedeca10_c.jpg


The bolt has also managed to unwind it self half a turn. Luckily due to the design of the bolt not being able to unwind it's self fully due to it hitting the sump this prevents the gear from falling off the shaft and completely losing oil pressure. However what the gear has done is be moving backwards and forwards on the shaft causing it to wear and damage the gear. Luckily the shaft is hardened and the shaft can be reused without issue
49999565052_29ccb6c0b1_c.jpg


I took the oil pump with the Vac Motorsport shaft in it to work with me with a spare gear I had on the shelf and machined the centre of the gear to match the keys on the Vac shaft.
the Vac motorsport kit comes with an ARP left hand bolt which is pre drilled so when this is built up I will be wire locking this from both sides to try and maintain the balance of the shafts.
Amazing the issues that the harmonics of this cranks shaft cause.
49998793048_30a5da731c_c.jpg
 
  • Like
Reactions: suj
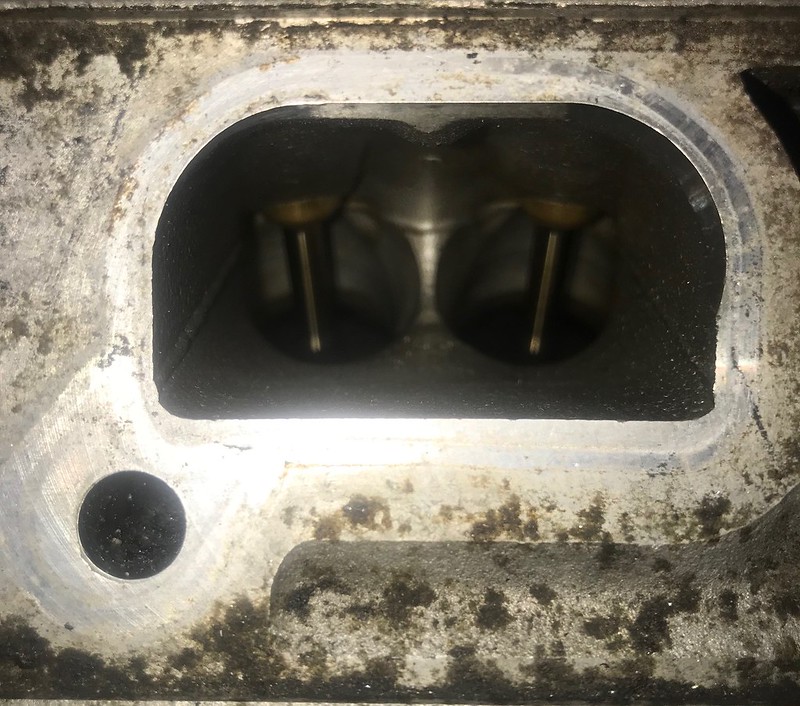
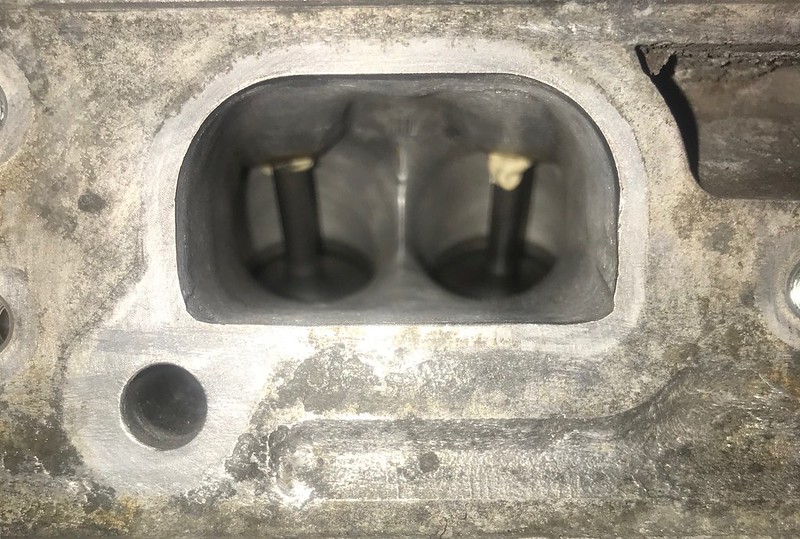
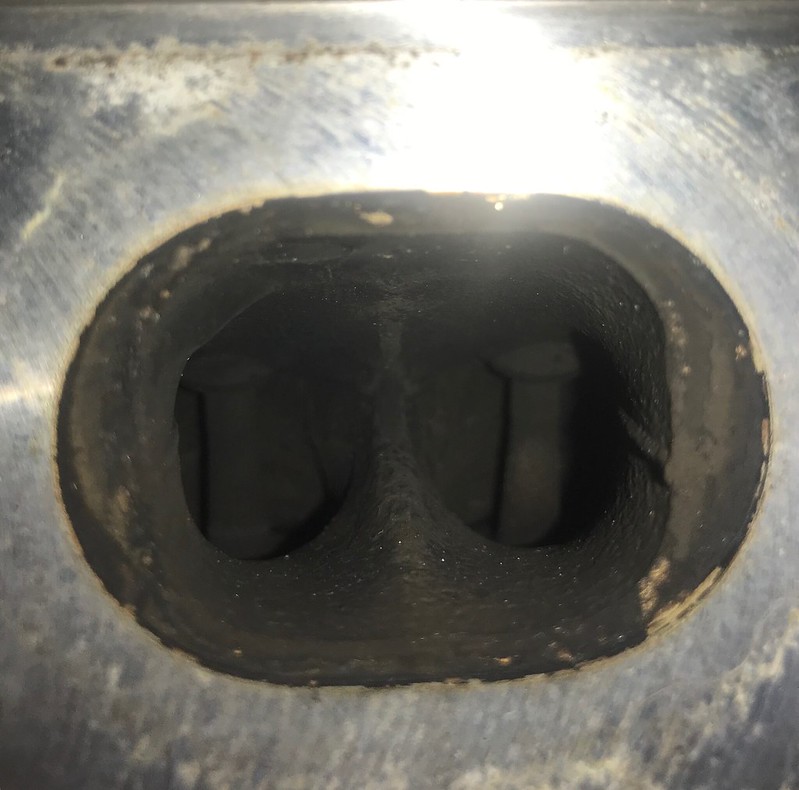
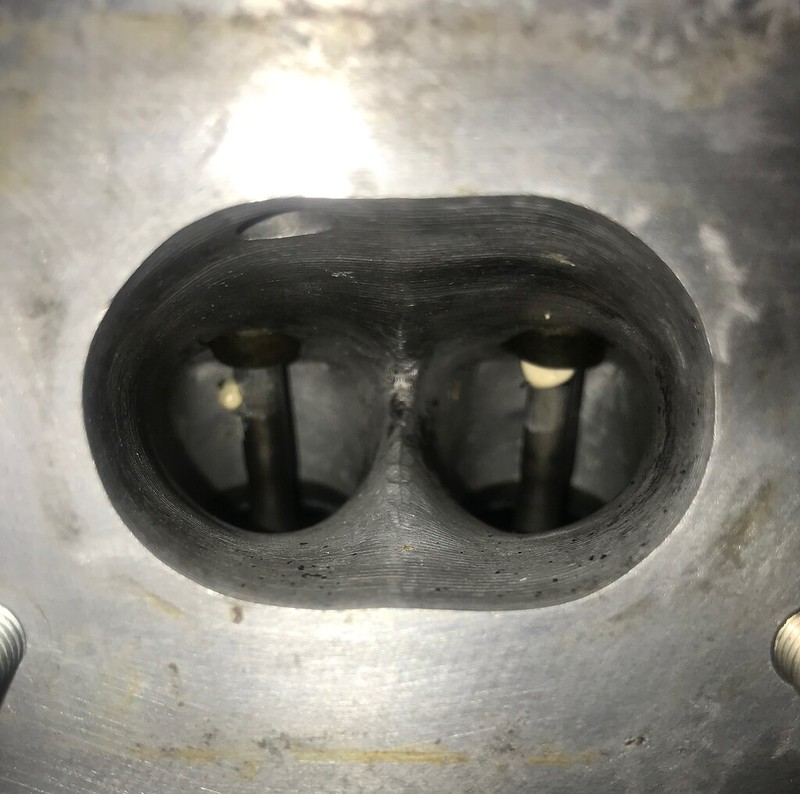
Just because I've taken some decent photographs of the porting on the head here's the comparison.

Standard inlet side
49998793083_dff0755e42_c.jpg


Ported inlet side
49998793038_01bc58cb0c_c.jpg


Standard exhaust side
49999312656_d4c57a51ea_c.jpg


Ported exhaust side (to match the S50 exhaust i'm running)
49999312701_71273151db_c.jpg


Engine building continues this weekend, I will be cracking on with wiring in the engine bay as well as finishing off the last jobs on the engine when the sump is back from welding I can finish off the timing of the engine and finish it off.
 
  • Like
Reactions: suj
@tombate911, what are you using as a phone holder? I would like something similar for my track days. I can't mount anything up on the glass because of track policy, so your solution here is perfect.

This was just a simple 3d printed mount which clipped into the CD slot on the centre console to hold the phone I had at the time. Bit off a one of I designed to hold the phone at the time.
 
Weekend was here again which gave me a few hours each day to get on with the engine build.

First job before starting to think about putting the engine in was to get the engine bay cleaned and a few jobs in their tidied up. A good jet wash and degreaser with a scrubbing brush brought off the 17 years of dirt.
50030723666_12127e764c_c.jpg


When I did the ABS delete on the car I ran copper wires around the engine bay. This was fine for the function but the appearance of the bent copper line wasn't really in fitting with the rest of the car so decided to get some braided lines made up for the engine bay. Cant really see them unless you point them out which is good really.
50030985917_9e3f13e1da_c.jpg


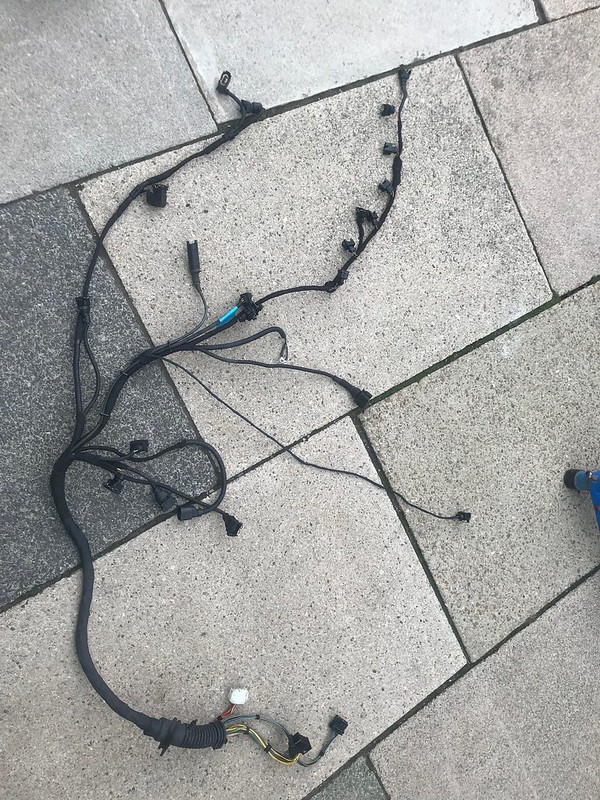
I have stripped back some of the wiring loom just to tidy it up and remove some of the excess plugs and the silly plastic box that is part of the BMW loom on these which is unsightly and doesn't fit with the inlet manifold I am using. Retaped up some sections of the loom to removing some of the plastic outer covering.
50030185113_b14de491f0_c.jpg


Baffled sump arrived back from welding. Nicely done, the rivets I put in to hold it together have been replaced with weld now and the 3 different plates have been stitched welded together before welding into the sump with a few small welds.
50019281171_5cab47f840_c.jpg


Finished off the timing of the engine and got the Vanos assembly bolted into postion. Ended up doing this a couple of times making sure the timing was perfect. It was a good job I bought the full kit fo the M54 dual vanos as without it you wouldn't be able to time up these with both cams being variable
50030184753_06a7f5fa3d_c.jpg


Spark plugs, new rocker cover gasket and it was torqued down in the place. Actually starting to look like an engine now.
50030985777_bfebdbf34e_c.jpg


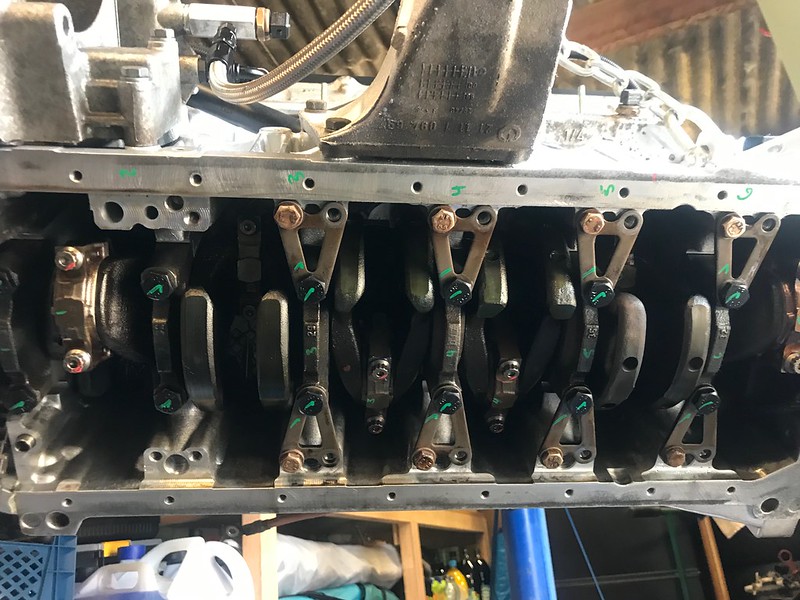
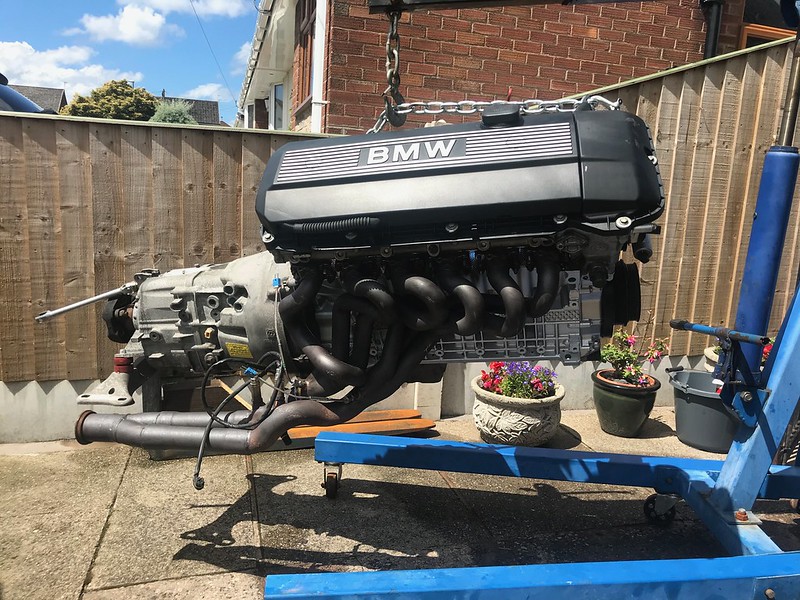
Once the engine could be lifted into the air again, it's a little awkward with this engine as you need the flywheel on to be able to time up the engine so can't leave it on the engine stand. I have gone back through the bottom end and fitted my ARP Rod bolts as well as the oil pump from my original engine. This time with the replacement oil pump gear and the ARP bolt in the Vac Motorsport shaft wire locked to prevent it from coming undone again in the future.
50030985717_6b1332aa25_c.jpg


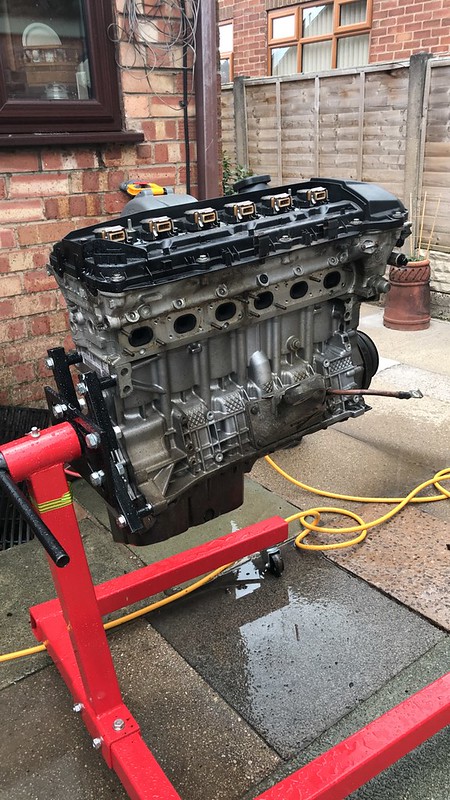
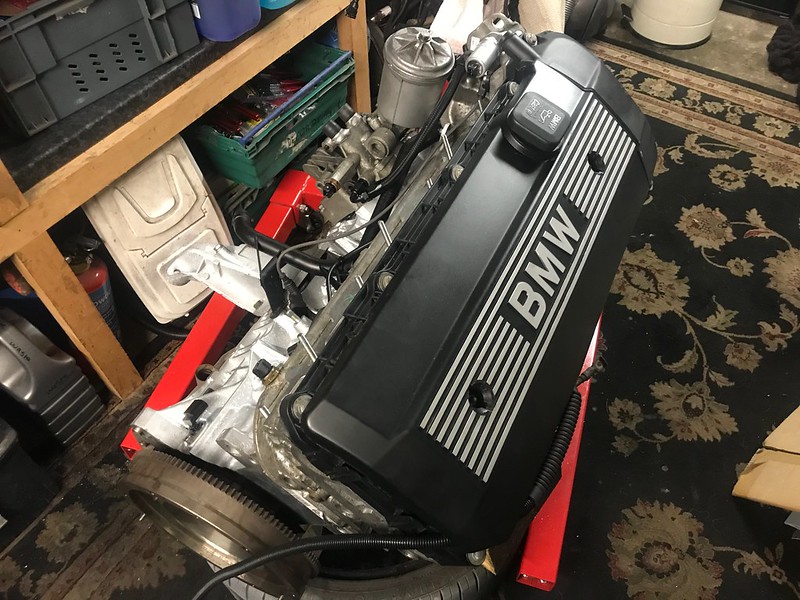
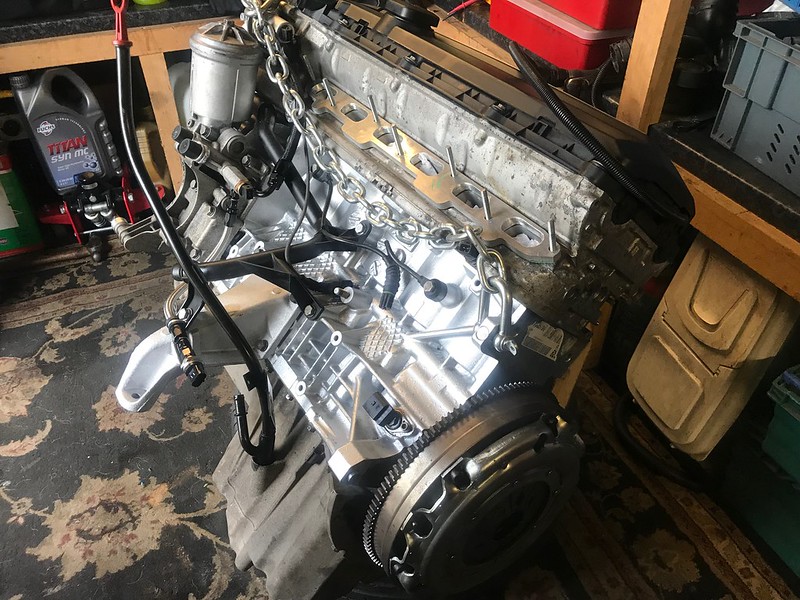
One finished M54B30 ready to go back into the car. Quite a lot of the parts, sensors and pipes onto the engine while it is nicely accessible on the garage floor.
50030723736_87a18f49a0_c.jpg


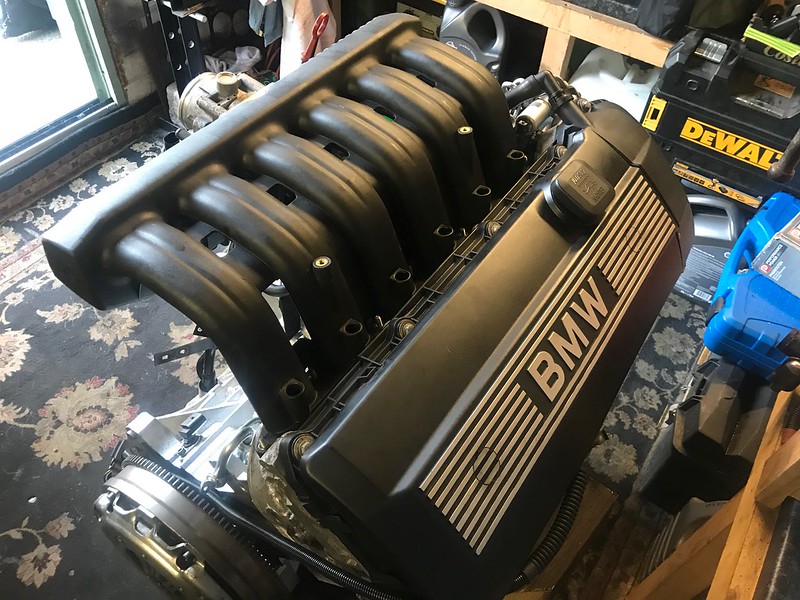
With the M50 Inlet placed on it.
50030985937_3bc0fab597_c.jpg


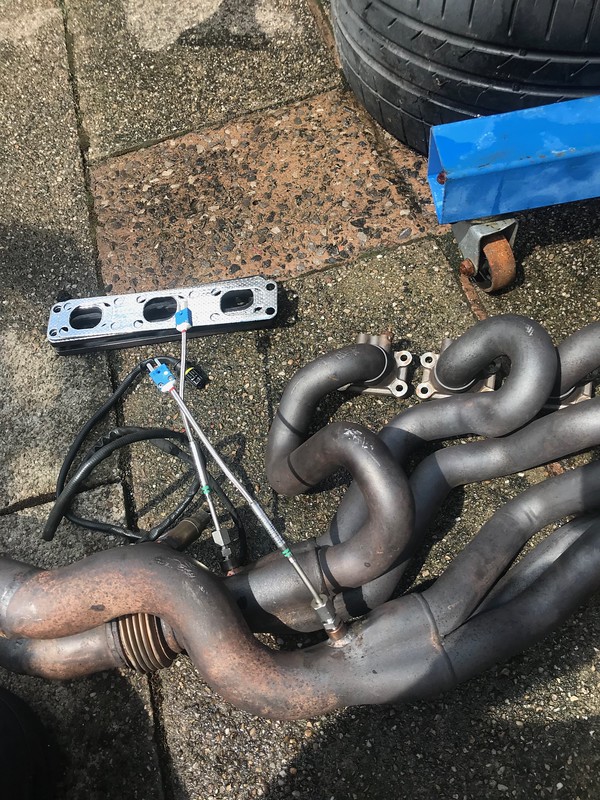
Other jobs I've been working on at the same time is having 1/8th NPT Stainless bosses fitted to the exhaust to be able to fit a Thermocouple. Will add EGT's to the data logger purely for reference. Might as well put them in there while the exhaust and engine is out and accessible.
50030185088_10be93fa55_c.jpg


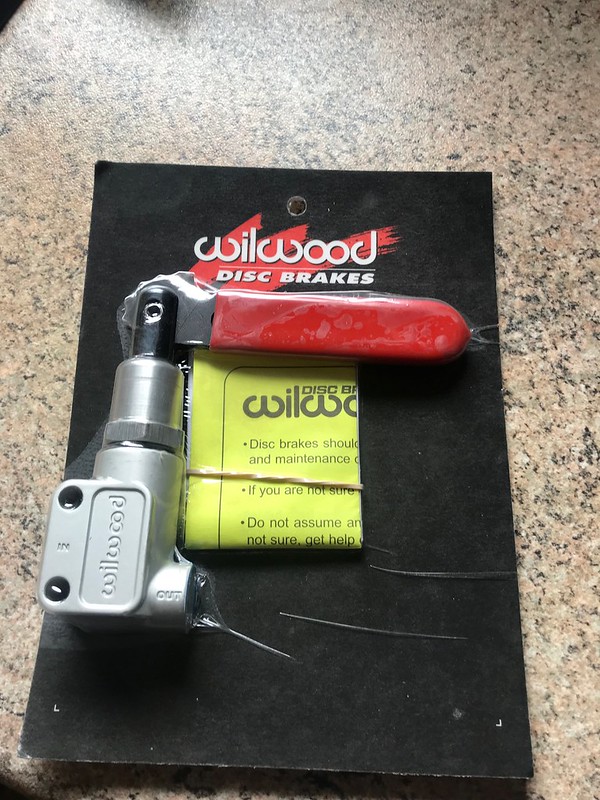
After months and months of emails back and forward and data sent to Tilton it turns out that Tilton have admitted there is a major manufacturing fault with a large quantity of their proportioning valves. To the point when they bench tested some to send to me they weren't able to send a replacement that actually did what the technical documentation says it should. This is something they're going to be looking into post Covid 19. But for the moment I've got a refund on the valve I purchased in Feb and replaced it with a Willwood valve. When the car is running again I will be collecting some data from these valve and will share it and compare it too,
50030184998_e8f4f9f888_c.jpg


Mounted the gearbox onto the engine with the S50 (E36 M3) manifolds into the position on the engine. Continued to use the adaptor plates which I manufacture for this conversion as they space the manifolds off the black by 10mm which means they clear the engine webbing and the bell housing.
This photo gives a good view of the exhaust manifold set up into a 2.5" single v band.
50030986112_8665795cc2_c.jpg


Swung the engine and gearbox into the engine bay and mounted it in position.
50030986067_4d3f246562_c.jpg


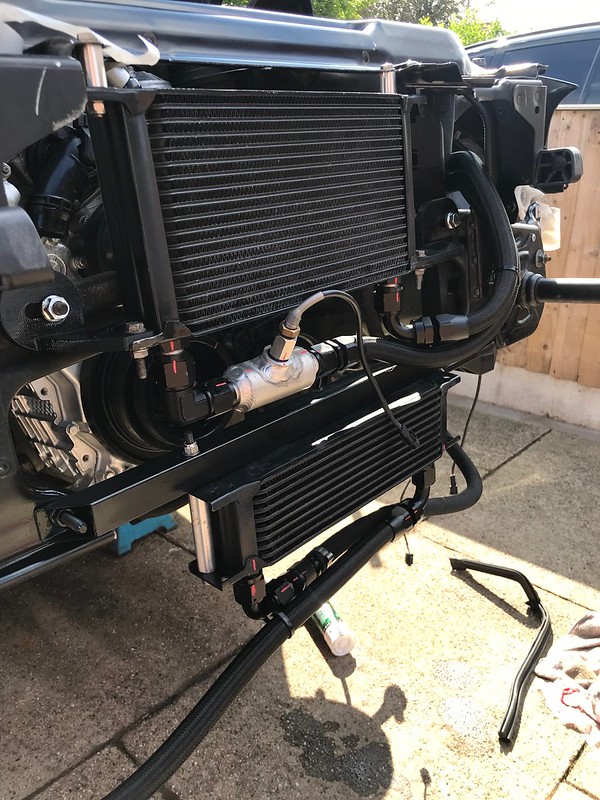
Started to build up the engine bay around it. I've made a few changes to the oil cooler set up. I've flipped it upside down and mounted it higher up in the kidney grills so it's directly in the air flow rather than being slightly hidden behind the bumper
50030723761_431961a541_c.jpg


Spent the day putting the engine bay back together. Nice to take my time with it and tidy up and clean things as it goes back together. It was also time to try the first start on it too. Filled all the usual fluids with oil, water and power steering before leaving the injectors unplugged and cracking the engine over for 30 seconds to get some oil flowing around the engine.
Time for the first start. Engine fired into life after a couple of cracks. Let it build oil pressure for 15 seconds or so then turned it off to check for leaks and top up the fluids.
Ran it again for a further minute afterwards, not enough to get any temp into anything and nothing about 1000rpm for the moment but enough to get the engine full of oil and look for any leaks. So far it seems to be ok, sounds similar to the old engine, will run it again this week when I have the laptop handy and can get the engine for fault codes and the likes and look at the engine data on INPA/ISTA.

50030185013_dc739371f3_c.jpg


Got another 4 weeks till the car is booked in for running in on the dyno but it gives me time now to check everything over and work through a small list of other jobs on the car. Still feeling pretty apprehensive about the new engine but today was a big step in the right direction. Will hopefully feel more confident with it when it's up and running on the dyno and making some power hopefully.
 
  • Like
Reactions: j!mbob
It's been a month since the last update with not a lot going on until yesterday so I've been saving the update till today.

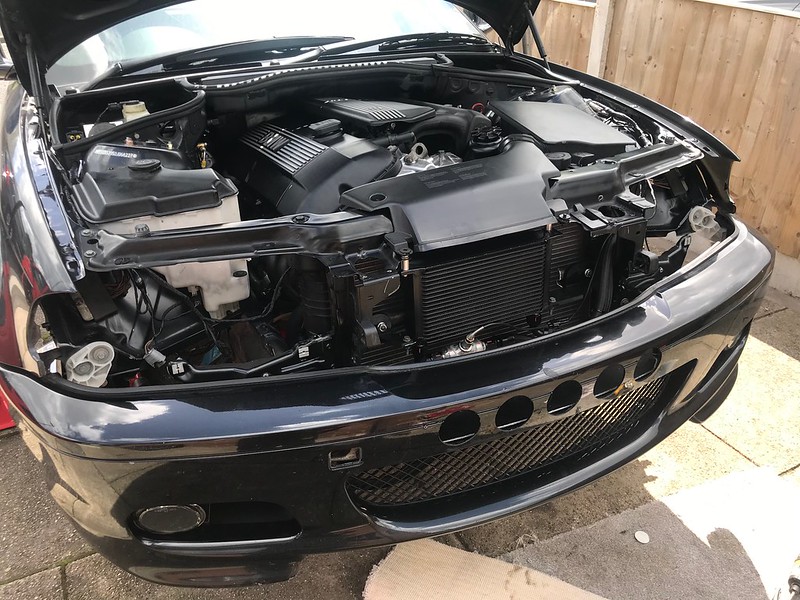
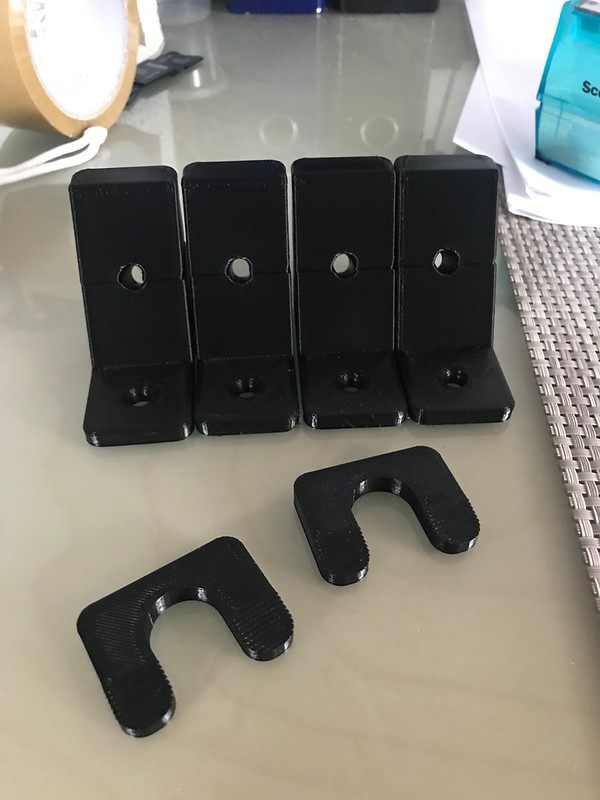
As usual there is always some 3D printing on the go. This time it's some mounts to hold an air dam under the radiator to close off the large 50 mm gap under there to keep the air going through the radiator rather than under it, and some small mounts to go under the brake line springs on the front to ensure they're solidly located using the factory brake line clips in the chassis mounts.
50055956682_1b7f961d64_c.jpg


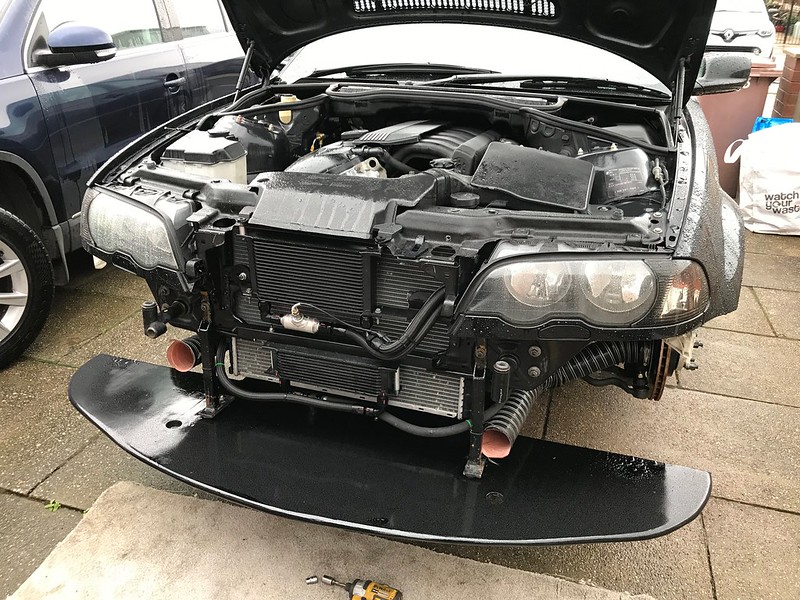
Test fitted the splitter after giving it a freshen up with a quick sand and a fresh coat of 2k gloss black paint.
50113718727_ebb6ca8dd0_c.jpg


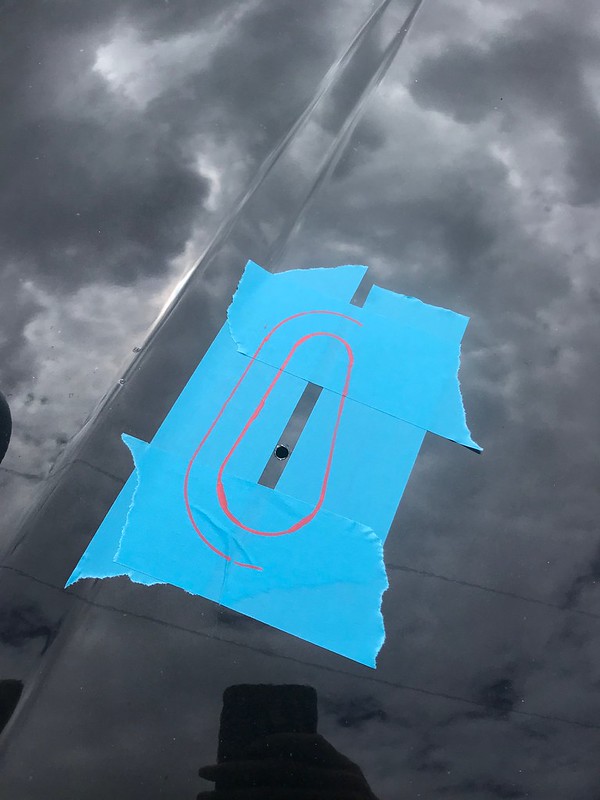
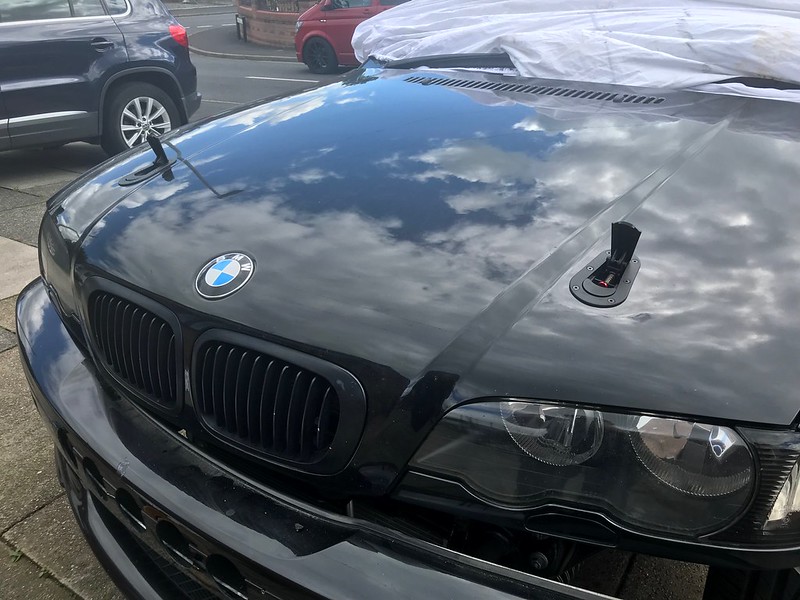
When I had the front of the car removed to swap the engine I noticed how rusty and old the bonnet mechanism was starting to go. While it was removed to remove the front slam panel it wasn't going back on so finally time to get the aero catches fitted.
Measure twice and cut once, marking out on masking tape on the bonnet to ensure they're fitted in the right position
50113485851_4902906afd_c.jpg


Done and dusted. Something I've wanted to have fitted on the car for ages but always let it on the to do list due to cutting holes in the bonnet
50113718667_ce23d140ee_c.jpg


Fired up the engine for the first time about 2/3 weeks ago, did the usual checking for leaks, not running the car for more than a few minutes ready for running in on the dyno but when doing some checks, I come across the old fuel pressure issue which has always been an ongoing issue with this car since I removed the standard rail and filter set up for the swirl pot and a M52 rail with an uprated pump.
A few months ago I posted that I had fixed the issue as I had diagnosed it as being a faulted regulator by swapping the rail for a M50 rail, turns out that wasn't to be the case, when running the car I noticed that the fuel pressure was between 62-67psi whenit should be at 51psi (3.5bar)
After a few hours diagnostics with plumbing the mechanical gauge into various points in the system and finally going back to the standard in tank pump we found that the pump was too large for the standard regulator in the standard fuel rail.

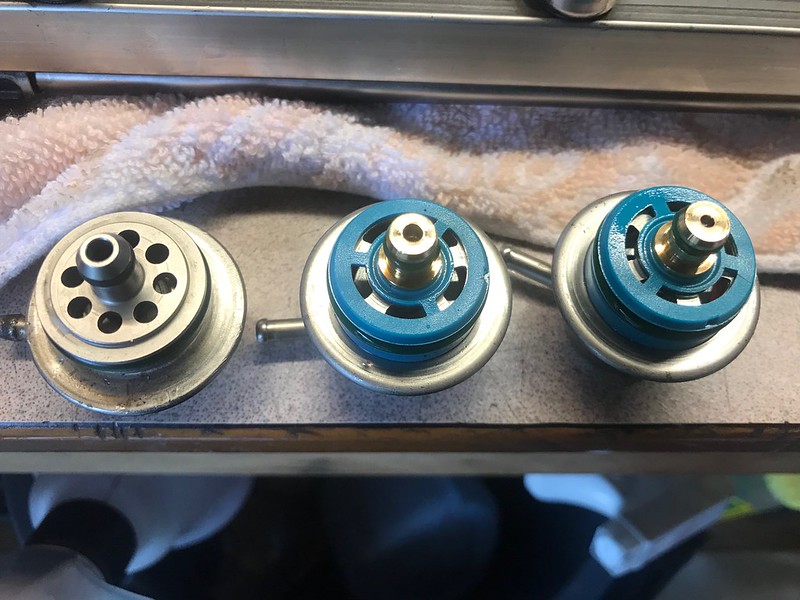
Looking back at it's pretty obvious especially when looking at this:
50137749123_9962c2f95e_c.jpg


Left is random regulator from a US Spec M50, you can see the bleed off hole in the middle of the regulator is much larger.
The middle regulator is a M52 regulator I have drilled out to give the regulator more flow on the return.
The righ regulator is a stnadard M52 regulator prior to being drilled.

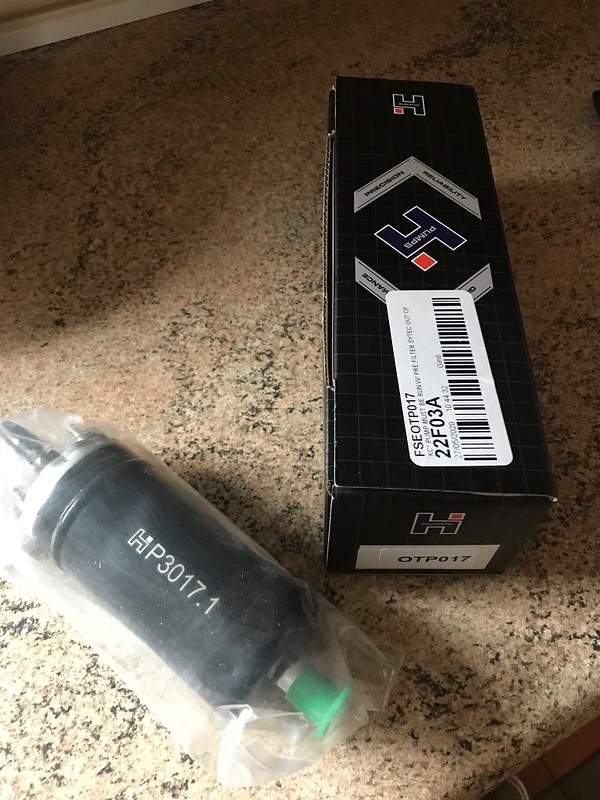
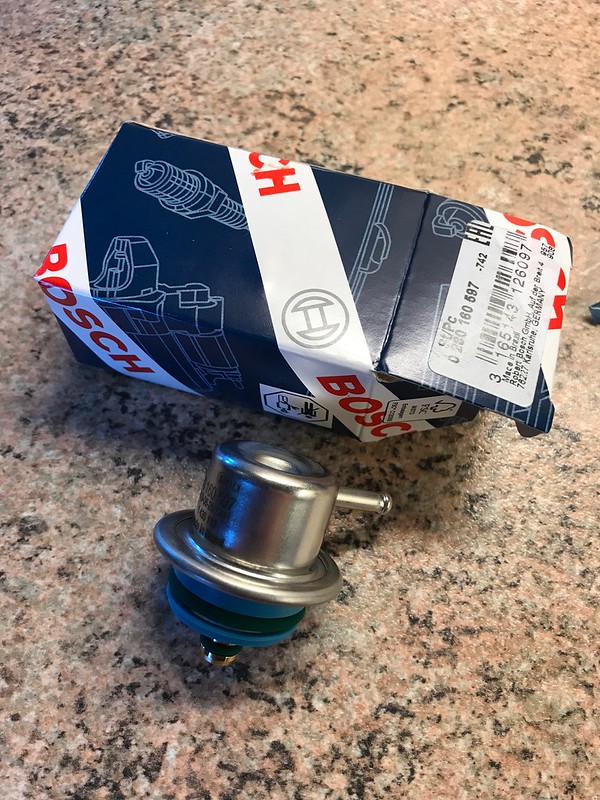
Along with drilling out the regulator I have also changed the fuel pump for a smaller Bosch replacement fuel pump.
With that fitted with the drilled out regulator the fuel pressure is perfectly stable 51psi. Finally!
50137749023_529beab0e1_c.jpg


Monday 21st July - Running in day for the car.
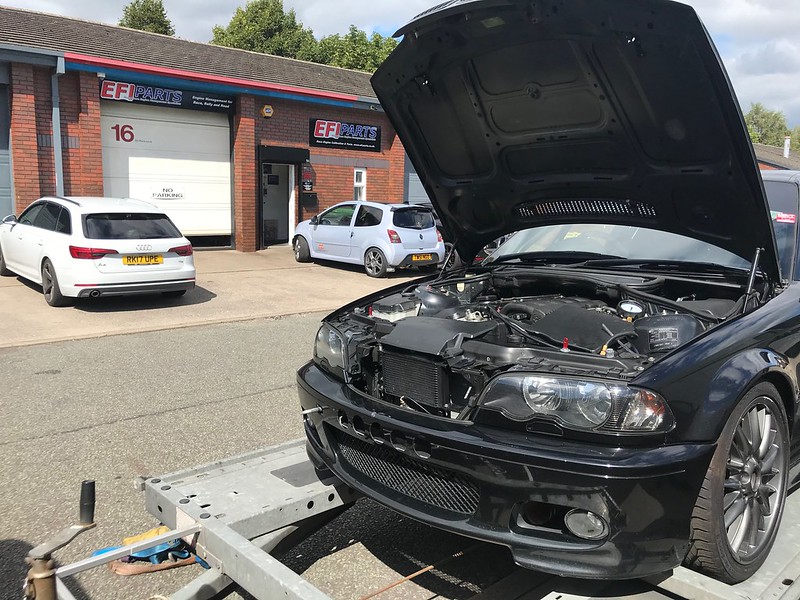
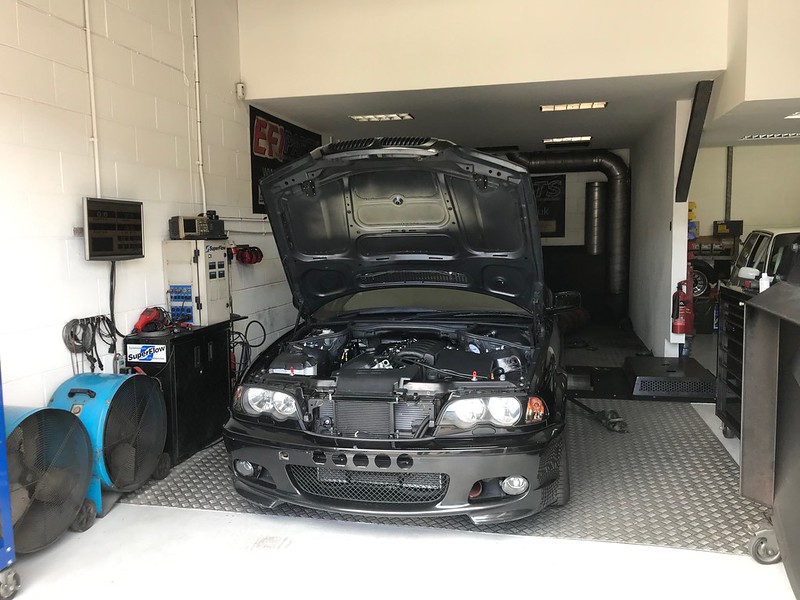
Loaded the car on the trailer and towed it over the EFI Tuning to get Chris to do the running in of the Engine, I would make any changes needed the to map and do some power runs towards the end to see what power it was making.
50137749303_c6073c2641_c.jpg


Strapped the car down on the dyno and Chris set off going through his running in process taking the car through a range of mixed loads and vacuum on the engine. Towards the end of this with more and more load it was becoming apparent that the car was running a little on the lean side at higher loads. We took a break from the running in and I added fuel to various points of the map were required.
50138528807_5a7d0aa8b6_c.jpg


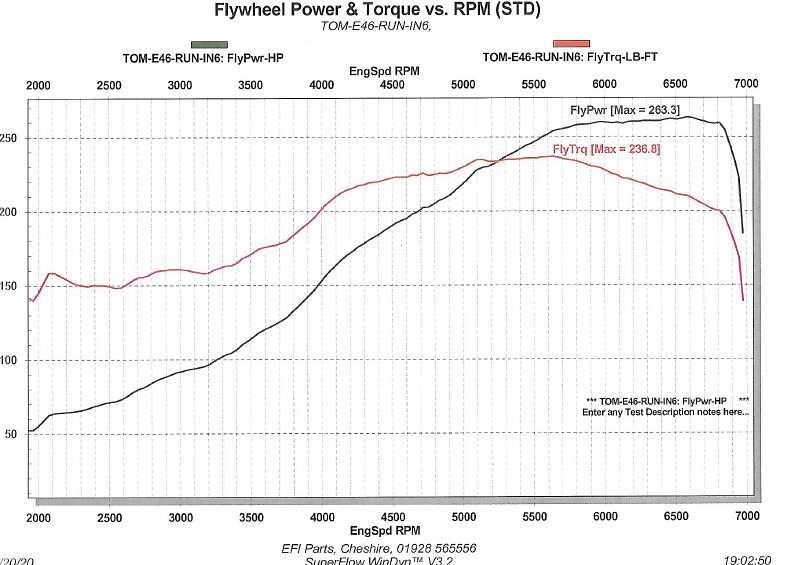
The car went on then to do a few full load runs to the original 6800rpm limit and everything was looking really good something like this.
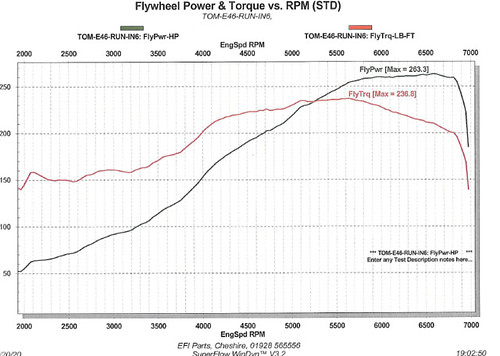
Really happy with how the car revs through the higher rev range and just holds the 260bhp flat to the 6800rpm limit.
The engine and exhaust note has really changes now and sounds a lot more free at higher revs.

50134878982_bdb0015f6a_c.jpg


After this we did a few more power runs with a little bit of timing remove around the 5500 rpm area and found a slight increase in torque. We thought there was a little bit of timing pulled in the area so removed a few degrees and lifted the limiter to 7000 rpm and it maintained the 260bhp to 7000rpm.

Absolutely made up with how this engine project had turned out. One thing to consider when looking the the dyno graph is the car is purely a track car and the low down torque below 3500 was never used on circuit. I looked a log of Oulton Park from March this year and I never dropped below 4000rpm with my current final drive which was at Shell in 3rd gear. Will be looking at adding a Super Damper to the engine though in the not too distant future due to how rev happy this new engine is going to be.

There is still plenty of work which could be done with the map to find more mid range as we spent the time with the fueling I didn't get the opportunity to swing the cam timing to see what additional power could be found, there's always something else for another day!
For now I've got some modifications planned for the data logger. Finish off some of the jobs and give it a good clean ready for Snetterton on the 18th July the Cadwell on the 27th July.
 
Another month brings another update, this time with some interesting developments after the Covid restrictions are lifting.

Brakes

We'll start with a brake update. I mentioned in the last post that I had returned the faulty Tilton valve after a refund after they finally admitted it was a problem and they didn't have an answer for it.
50248735998_4b85ec39f5_c.jpg


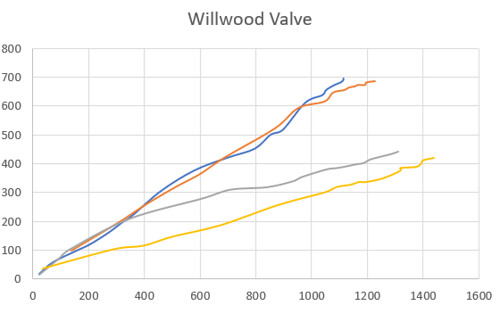
When the car had be ran in on the dyno I could then spend some time messing with it on the drive and leave it idling without worrying about damaging the new engine, I managed to extract a couple of brake presses from the logger in 3 positions on the Willwood valve. Should note the 3 level locations where random and not equally spaced.
The graph shows the effects on the line pressure in the front and rear circuits. Happy to actually see the valve working correctly and giving me a range of adjustment.
50249555572_4cd7360855.jpg


For reference the faulty Tilton product data.
49688230066_26449c4dc8_c.jpg


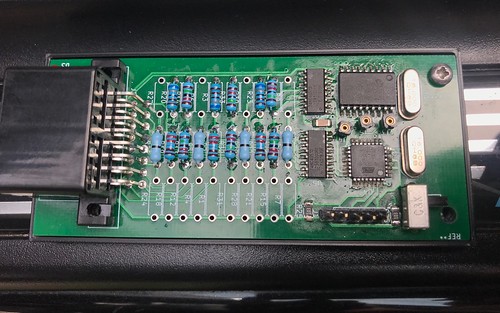
Carrying on with the logging theme, a friend of mine has developed this board which he will be selling shortly after some testing on the car. it's a 10 channel analogue to CANBUS board. I have now integrated this into the wiring of the car so that it takes in:
Front brake pressure
Rear brake pressure
Fuel rail pressure
Swirl pot pressure
Diff temp.

This information then is taken from the BMW Canbus network by the logger as well as the LCD screen. Great little board which has tidied up some of the wiring meaning that the analogue sensors no longer need to go to the logger and are terminated under the dash now.

50248734808_9403167b79.jpg


More detail on the logger later.

Revisiting the dyno plot

So the car produced the following at EFI after running in the new engine. On the face of it the figures look good...

50134878982_bdb0015f6a.jpg


However after getting home from the dyno, spending an hour or two thinking and looking at the dyno, I went out to the car, had a look at the error codes and the live data in inpa and my suspicion was true. Exhaust cam sensor fault and the vanos stuck in it's default position, this happens to be where the cams sit above 6000rpm perfect for making peak power but not for mid range torque. Long and short of it is peak power will remain the same but the engine is producing a lot more mid range torque than on the print out with the vanos working correctly. Will try and get back on the dyno at some point to get a proper look at what the engine is capable of making torque wise. All sorted with swapping the sensor over to the known good one from my old engine.

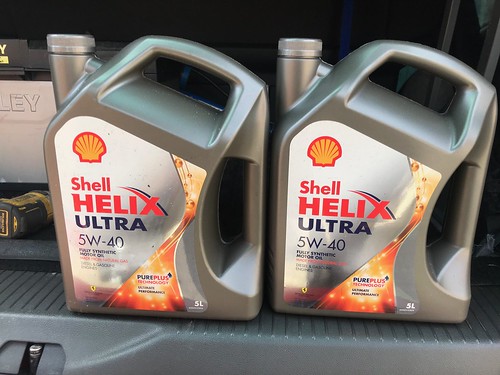
After the running in session I dropped the oil and replaced it with some better quality shell oil for the new engine, and the car was ready for it's first day out on circuit with it's new engine.
50249559742_0bcba36f9a.jpg


Snetterton
I had originally planned to get the car ready for a Cadwell Park double header track day in August but after having one of the days cancelled due to racing I used the credit to book onto Snetterton. Long 4 hour drive for me to get to Snetterton so we travelled down the day before and stayed in a hotel 15 minutes from the circuit.

E46 unloaded off the trailer ready to go out for sighting laps, I had it noise tested first thing and it's louder again, this time 102db static. It appears that the silencers are getting more and more blown out as it gets louder every day. Something I will probably have to address in the near future.

50249655992_3c4f32eedd.jpg


Spent the first session taking it a little easier than usual. Getting used to driving the car again, keeping a close eye on the engine temps, oil pressure and fuel pressure. I kept the ear plugs out for the first few sessions so I could listen to the car and get a feel for it after being rebuilt.
I had nothing to worry about, the car was running flawlessly. Only thing I had to do was set the tyres pressures at the end of the 1st and 2nd sessions.

Quick check of the logs from the data logger shows a couple of things, first of all the new Canbus board logging the sensors was working perfectly.
50248710958_32dd12cc23_b.jpg


Since messing with the fuel system 12 months ago fitting the return rail and swirl pot I have been plagued with issues with low fuel pressure, too much fuel pressure flow, running out of fuel on track with a 1/3 of a tank in the wrong side of the tank.
But finally I feel like I've got somewhere with this. Perfectly solid 53-55psi fuel pressure at idle and on track, especially at Snetterton with some fast corners, the new smaller pump and swirl pot working perfectly.

Swirl pot pressure drops to 0 during full load when the engine is consuming the max amount of fuel and in a couple of corners where the in tank pump isn't able to pick up fuel, which was the main reason for fitting the swirl pot.

Coolant and oil temps maxing at around 100-103 degrees. Water temp is a little warmer than i'd like so i'm going to experiment with a couple of ideas at Cadwell Park next week.

Logging brake pressures in the front and rear circuit gave a good indication of how the proportioning valve was working. On circuit it I moved it around a little, locking up the fronts, then locking up the rear and dialing in a nice balanced point were the car felt great under braking. Something I've been chasing for years with this car, finally felt like the brakes have clicked and I was able to use them properly. I've got the RC6 front pads in with the RC5 rears now.

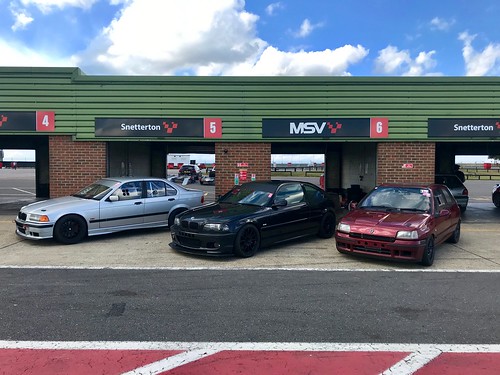
The line up of cars...
BMW E36 - ITB Stroker ~285bhp
BMW E46 - Schrick Cams, M50 inlet - 265bhp
Clio Mk1 - 182 Engine with 421 cams on ITB's - 215bhp

50249359216_beb2deeb65.jpg


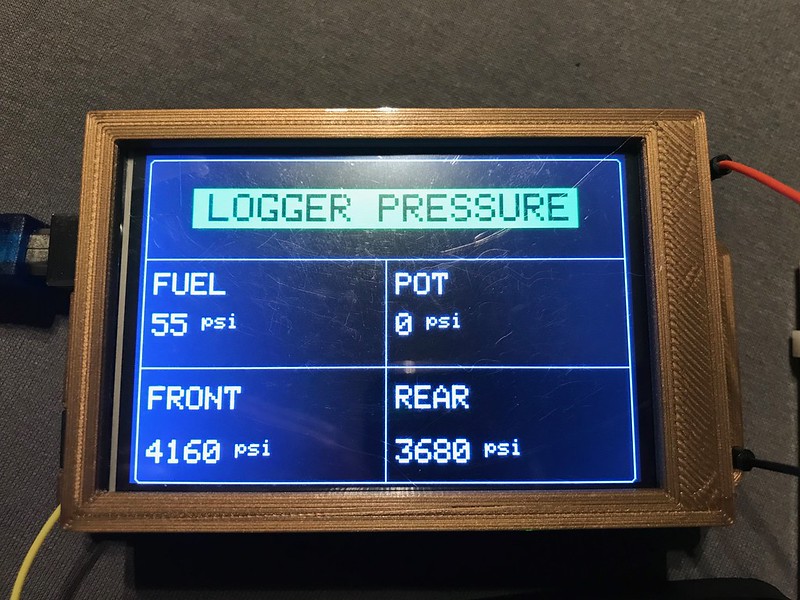
The track day went perfectly. Couldn't have asked for a better day on track to be honest. The car also ran flawlessly and the new engine has transformed the car. It's much more free revving the eager. Now it will happily shift at 6700rpm, previously peak power was at 5900 and it dropped off rapidly. The new engine with a shorter final drive I fitted for Oulton park is a perfect combination. Finally felt like everything came together perfectly and worked how it was designed to this week and it was really confidence inspiring to drive the car knowing the brakes were working correctly and all the niggles like the fuel pressure was working great, was nice to be able to monitor this on the LCD screen including all the engine temps, brake pressures and live brake bias %, fuel pressures etc.

All set and ready to go again at Cadwell Park next week with Track Obsession.

Couple of videos from the day...

Couple of afternoon laps.


Being followed by Foxy in the BMW E36


Similar Thread Suggestions