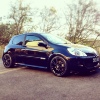
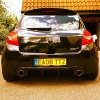
So this weekend is what I would officially say is the start of what I will call Project Lime B2.
With Rogue's guidance the car was jacked up and placed on axle stands.

Now I am not what you would call the most mechanically gifted person in the world, and considering I have a power tool ASBO placed on me by my parents this was extremely interesting.
So the task of taking the bumper off begun, and immediately we ran into the first problem. Whoever had put on the alloys before must have been a Demi-God because the front drivers side bolts would not budge (even with Rogue's incredibly slim figure jumping up and down on the bar) the locking wheel nut was not going anywhere. It begun to round the locking wheel nut which now means I have to get a new set all around!
So after many a colourful word was said we decided to crack on and take the arch lining off without removing the devil wheel.


The calipers are in need of a jolly good scrub that's for but that's for another day.
The main reason for the bumper off job was so I knew how to do it when I get my new lights. Also I wanted to spray the front grills which had badly faded and were bugging me alot.

So with everything off I gave her a bit of a clean up to the bits I wouldn't normally be able to reach.
As all this was going on the old man wouldn't stop talking about his "little" baby so made me take a picture. Quick bit of soft German car porn for anyone who likes it...

Anyhow back on track, with everything off the long task begun of sanding down the diamonds and cleaning up the grills as best I could ready for painting. It took about 2 hours to sand down each diamond until I was happy with the finish ready for the primer. The grills we're soaked in hot soapy water over night and then I put them in the dishwater. The salt from the dishwasher really made them come up clean ready for the primer.
3 days of carefully applying layers of black satin paint and lacquer and...


I will get some better pictures of the whole car at the weekend so it can be seen in better light. I am extremely happy with how they came out and they look IMO 100x better than they did.
Next on the list is get the locking wheel nuts sorted and being the first stage of "lime'ing" the calipers
Thanks for reading.
With Rogue's guidance the car was jacked up and placed on axle stands.

Now I am not what you would call the most mechanically gifted person in the world, and considering I have a power tool ASBO placed on me by my parents this was extremely interesting.
So the task of taking the bumper off begun, and immediately we ran into the first problem. Whoever had put on the alloys before must have been a Demi-God because the front drivers side bolts would not budge (even with Rogue's incredibly slim figure jumping up and down on the bar) the locking wheel nut was not going anywhere. It begun to round the locking wheel nut which now means I have to get a new set all around!
So after many a colourful word was said we decided to crack on and take the arch lining off without removing the devil wheel.


The calipers are in need of a jolly good scrub that's for but that's for another day.
The main reason for the bumper off job was so I knew how to do it when I get my new lights. Also I wanted to spray the front grills which had badly faded and were bugging me alot.

So with everything off I gave her a bit of a clean up to the bits I wouldn't normally be able to reach.
As all this was going on the old man wouldn't stop talking about his "little" baby so made me take a picture. Quick bit of soft German car porn for anyone who likes it...

Anyhow back on track, with everything off the long task begun of sanding down the diamonds and cleaning up the grills as best I could ready for painting. It took about 2 hours to sand down each diamond until I was happy with the finish ready for the primer. The grills we're soaked in hot soapy water over night and then I put them in the dishwater. The salt from the dishwasher really made them come up clean ready for the primer.
3 days of carefully applying layers of black satin paint and lacquer and...

I will get some better pictures of the whole car at the weekend so it can be seen in better light. I am extremely happy with how they came out and they look IMO 100x better than they did.
Next on the list is get the locking wheel nuts sorted and being the first stage of "lime'ing" the calipers
Thanks for reading.
Last edited:


