You are using an out of date browser. It may not display this or other websites correctly.
You should upgrade or use an alternative browser.
You should upgrade or use an alternative browser.
Silverstone Edition 200 - AST 5100
- Thread starter Jack Maxwell
- Start date
Jack Maxwell
Paid Member
Built not boughtYou could just buy one ready done
You could sell me your carbon door cards however. Been on the hunt for them for months
Jack Maxwell
Paid Member
Oreca no longer sellOreca Motorsport sells the carbon cards.
Never mind,i cant see them anymore,thats where i got mine from a few months back.
Jack Maxwell
Paid Member
Out of stock and they are not going to re stock either. Found them for sale on a french site who I think supplied AP as well as Pure motorsport but they arent getting back either
VeiRoNv2
Paid Member
Found this guy off of facebook clio group,might be worth a try.


Jack Maxwell
Paid Member
Jack Maxwell
Paid Member
So booked a track day at the Ring for October which means time to make changes to the car once again.
Going more track focused over the previous clubsport style, still not sure if I'm doing the right thing as it was pretty clean as it was but ah well.
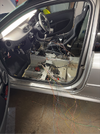
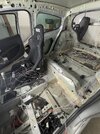
Started with the big strip out.
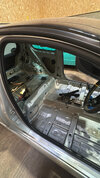
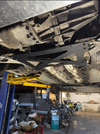
Took the wiring loom down to its minimum required. Went all the way to the connectors and de-pinned all that wasnt needed. Most of the tar sound deadening removed too.
Then took the car for a new timing belt, water pump and dephaser.
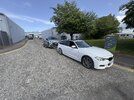
I got the airbag light coded out. I had no airbags connected at the time but when I disconnected the loom from the airbag ECU the light came back on so need to try get that coded out again, tough as its tricky to find somewhere with the ability near me.
Moved onto electrics and made my own battery relocation kit. Bought a deadweight industries battery to power the car.
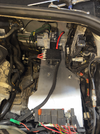
Designed my own battery cage and printed on my 3D printer. Yes the design idea was shamelessly stolen from @RSRowe
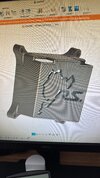
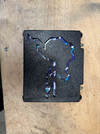
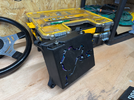
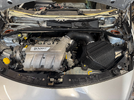
V6 airbox was then fitted. Surprisingly managed to get all the parts new from Rsport. Mounted to an ali sheet I made to fit.
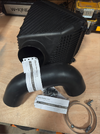
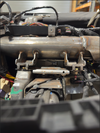
Steering rack lowered using some nuts and washers.
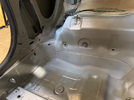
Onto the roll cage. Got a full bolt in MSUK cage from SW motorsport. Welding in the feet was a bit squeeky bum at times with underseal catching fire close to the fuel tank. Also removed the seam sealer from this area. Will think about doing the boot area in the future, what a ball ache it is.
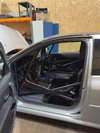
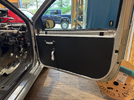
Door cards bought from trackdoor cards after giving up trying to find the R3 carbon door cards. Went with the fabric strap door handle style.
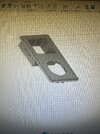
With the window switches and mirror adjuster I wanted a neater look than just using the standard mounting plates. Got onto fusion and designed a new plate that houses both the switches and mirror adjuster. Re used the original metal clips and It clips perfectly onto a 2mm sheet.
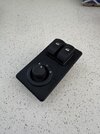
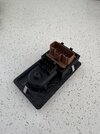
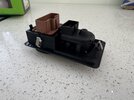
Deciding wether to mount it to the door cards or run new wiring to the centre consol and have it mounted to the black space down near the handbrake. Might take the easy option.
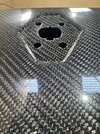
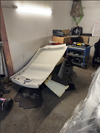
And finally treated the car to a carbon boot. Although everyone knows carbon is super light its still shockingly lightweight.
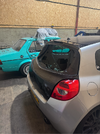
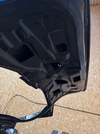
Took measurement after measurement after measurement. Bit the bullet and cut holes into it for the aero catches.
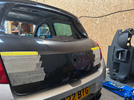
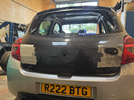
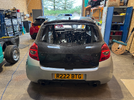
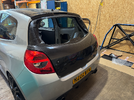
Awaiting the lexan screen and need to make some brackets for the pins but that is all for now. Still loads to be done
Going more track focused over the previous clubsport style, still not sure if I'm doing the right thing as it was pretty clean as it was but ah well.
Started with the big strip out.


Took the wiring loom down to its minimum required. Went all the way to the connectors and de-pinned all that wasnt needed. Most of the tar sound deadening removed too.


Then took the car for a new timing belt, water pump and dephaser.

I got the airbag light coded out. I had no airbags connected at the time but when I disconnected the loom from the airbag ECU the light came back on so need to try get that coded out again, tough as its tricky to find somewhere with the ability near me.
Moved onto electrics and made my own battery relocation kit. Bought a deadweight industries battery to power the car.

Designed my own battery cage and printed on my 3D printer. Yes the design idea was shamelessly stolen from @RSRowe


V6 airbox was then fitted. Surprisingly managed to get all the parts new from Rsport. Mounted to an ali sheet I made to fit.


Steering rack lowered using some nuts and washers.

Onto the roll cage. Got a full bolt in MSUK cage from SW motorsport. Welding in the feet was a bit squeeky bum at times with underseal catching fire close to the fuel tank. Also removed the seam sealer from this area. Will think about doing the boot area in the future, what a ball ache it is.


Door cards bought from trackdoor cards after giving up trying to find the R3 carbon door cards. Went with the fabric strap door handle style.

With the window switches and mirror adjuster I wanted a neater look than just using the standard mounting plates. Got onto fusion and designed a new plate that houses both the switches and mirror adjuster. Re used the original metal clips and It clips perfectly onto a 2mm sheet.


Deciding wether to mount it to the door cards or run new wiring to the centre consol and have it mounted to the black space down near the handbrake. Might take the easy option.
And finally treated the car to a carbon boot. Although everyone knows carbon is super light its still shockingly lightweight.


Took measurement after measurement after measurement. Bit the bullet and cut holes into it for the aero catches.


Awaiting the lexan screen and need to make some brackets for the pins but that is all for now. Still loads to be done
Last edited:
Jack Maxwell
Paid Member
Does anyone know how to solve the view attachment issue? File sizes arent any larger than the ones that displaying?
burrellbloke
Paid Member
I’m not sure what the solution is. I often upload images which are about 1mb each rather than the original photo. It is an old habit I have from living with a terrible internet connection - thankfully I have 1gb speeds now.
EthanMenace
Paid Member
Proper update, looks great!
How did you find the wiring strip down? I've planned to leave ours well alone for now.
How did you find the wiring strip down? I've planned to leave ours well alone for now.
R20BTG
Paid Member
Images have to be <2mb to embed. You’ll need to batch resize and reupload for them to show
Jack Maxwell
Paid Member
Jack Maxwell
Paid Member
I believe the standard is 18-20kg and the carbon one is 3-4kg. Can't remember exactlyGreat work,do you know how much the carbon boot saves compared to the original?
Jack Maxwell
Paid Member
Its not bad if you know how to de pin and are gentle enough. There is a huge amount of excess wiring once you get rid of the unnecessary. I've left the loom at the dash section for now and may tackle that in the future.Proper update, looks great!
How did you find the wiring strip down? I've planned to leave ours well alone for now.
Jack Maxwell
Paid Member
No need for a guide. Once you’ve stripped the car just removed the wires going to the stuff you no longer need. The boot is from Gtgramtech in PolandWhat did you use as a guide to remove the wiring and where did you find the carbon boot if you don't mind me asking? Thanks
Similar Thread Suggestions
| Thread starter | Similar threads | Forum | Replies | Date |
|---|---|---|---|---|
| J | CLIO SILVERSTONE GP EDITION FOR SALE | Clios For Sale | 0 | |
| J | For Sale: Clio Silverstone GP Edition For Sale | Clios For Sale | 4 | |
|
|
Silverstone edition? | Clio General Chat | 8 | |
|
|
*Update p20* Tims #43 200 Silverstone GP Edition | Projects/Progress Threads | 204 | |
|
|
200: Silverstone Limited edition 200 and 133 | Clio General Chat | 32 |


