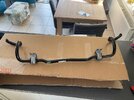
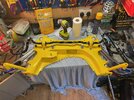
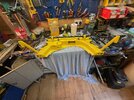
Massive progress was made this weekend with getting the car back together and installing the Cup Racer front end parts.
We had to replace a few parts after the crash at Snetterton so we installed a new Nissan's radiator. The car had been filled up in the week with type D yellow coolant and the system had been bled. A new PMS AC delete pulley and bearing had been installed as the old pulley had taken a bit of a whack and had some very minor damage on the outside face.
@EthanMenace had spent a few hours after work most days this week taking the subframe off of the Clio, and generally prepping the car. The subframe was built up in the shed on Thursday and Friday. We had a subframe refurbished over the winter and had a lot of new parts but reused the steering rack, and the outer tie rods. New parts included SuperPro anti-rotation links to match the SuperPro drop links that we already had. We also had new inner tie rods.
On Saturday Ethan drained the gearbox oil and then pulled out the old driveshafts. He then popped in the new extended driveshafts from PMS.
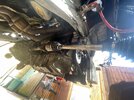
The built up subframe was then offered up to the car and bolted on.
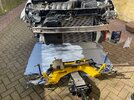
The newly power coated subframe, cleaned wishbones, SuperPro drop links and anti-rotation links, and braided HEL brake lines look good. The car could do with a bit of a scrub under the arches.
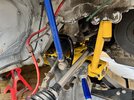
This is the view from the drivers side.
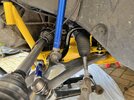
When the subframe and ancillary parts were generally in place Ethan installed some small spacers between the chassis and the wings. We had stolen the spacer idea from
@R20BTG so that we could attempt to stop the Cup Racer setup from wearing away front edge of the front bumper in the wheel arches. We will have to wait and see if this plan does work.
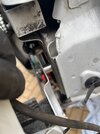
A spacer was installed on both the drivers and passenger side.
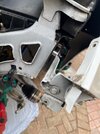
When the hubs went back on to the car we encountered a few issues. There is no guide that we have been able to find that explains how to install a Cup Racer front end. Most of it was guess work. I have got various Cup Racer .pdf documents and in one of those it had the torque values for the parts such as the EE brackets - but not a step by step guide on how to do a road car to Cup Racer transformation. After working out that part of the bump steer kit would not fit in the hub
@LiamP very helpfully answered a few questions and explained that we would have to drill out the hole in the hub for the bump steer kit to sit flush.
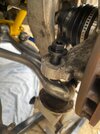
The next issue we discovered was that the drivers side hub bearing had a lot of play in it and was moving about 2 to 3mm out of the hub. This could have been caused with the lateral slide at Snetterton. The movement in the hub bearing was not something that we had ever noticed before and I am pretty sure that we would have felt it taking off the wheels or putting wheels on the car.
After a bit of head scratching we worked out that the bearings bolted in to the hub carrier, but the hub was pressed in to the bearing. After considering buying some new parts and pausing the car works for a week or so we decided to raid the Clio parts bin. We still had two complete hubs that we removed from the shell of the current Clio. We had swapped over the complete hubs from the previous shell as the balls joints were done in 2020.
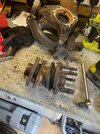
Today
@EthanMenace swapped over a hub and bearing, removed the stud and nut kit from the old hub, then reinstalled the stud and nut kit with some new Loctite after retapping the threads.
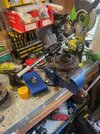
When the hub and bearing was sorted out it was bolted back on to the hub carrier.
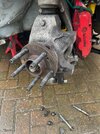
Ethan spent a long time measuring and adjusting the anti-rotation links trying to make sure that we did not have excessive amounts of caster when the car was going to go back on to the floor. He based most of his work on a few photographs he had taken at AW Motorworks when we saw Alex a few weeks ago and he had showed us one of his customers cars up on a ramp which had the EE brakes kit installed.
Before the car came off of the axle stands a few bits of maintenance were completed. We are now on to our third ZeroPointOne tow eye extender having both bent/snapped/lost previous ones in accidents.
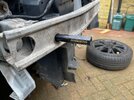
Next was a genuine Renault radiator mount/foot. At less than £4 this was possibly one of the cheapest genuine Renault parts that I have purchased. Sadly the one that should have been on the car is probably someone near Brundle at Snetterton.
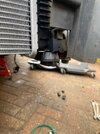
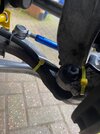
The ABS brackets would not fit with the new setup so the ABS sensor cables were carefully cable tied to the tie rods - this seems to be the approved practice in the Clio Cup manual.
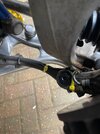
Yellow cable ties make it obvious that something has been cable tied, plus it adds to the other yellow accents on the car.
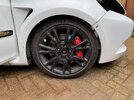
When the car came off the axle stands we put the newish bumper on to see how the kit would affect the car. I was expecting large amounts of caster that would put the front edge of the tyres very close to the bumper side wheel arch edge. Surprisingly the wheels sat pretty much where they needed to be.
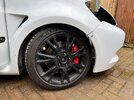
When the wheels were put on full lock to both sides they seemed to be clearing the front bumper and not rubbing on anything inside the wheel arches. There are no arch liners on the car yet - and we will have to see if there is enough room to get them back in, or partly back in.
The car looks like the front is now sitting lower than it was before. I have not taken any photos of the camber, but it looks like the car now has substantially more camber than the minus 3 ish degrees it had before.
The car has not moved off of the drive yet. We have got a set of black insert headlights to go in which Ethan picked up in the week. The newish bumper needs a few bits done before it can go on to the car like putting in some brake ducts in to the for light holes.
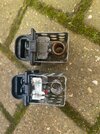
The radiator fan had stopped working the day before our trip to Snetterton in February. I found this out as I sat in traffic and the temperature gauge kept creeping up to the point where the stop light came on and the dashboard flashed up a message that the car was overheating. We swapped out the old crusty fan resistor and now the radiator fan now comes on as it should.
I really want to drive the car and see how the Cup Racer front end makes the car feel, but there are a few things to do before the can can be driven. The drivers seat is not bolted in as we need to drill some holes in the floor and install the crutch straps to make our 4 point harnesses in to 6 point harnesses. The brakes need to be "tested". We have put on some Brembo HC discs on the front and some DS Uno pads that were in our parts bin. The discs look crusty and the pads do not have too much meat left on them. I will order some more DS 1.11 pads and Godspeed J Hook discs this week - that pad and disc combination has served us well so far.
The parts that have been installed have been paint marked so we can check that everything remains tight before our next track day at Cadwell Park.
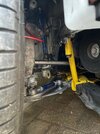
The EE brackets sit very close to the rims of the wheels. We will need to see if the Oz Ultralegerras fit with the new kit but I suspect that the offset of the OZs will be too much and will rub the bumper. So plan B will be to put some MRFs on to a spare set of Speedlines that we have in the parts bin.
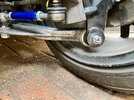
The car will need an alignment before it goes to Cadwell Park.


